User

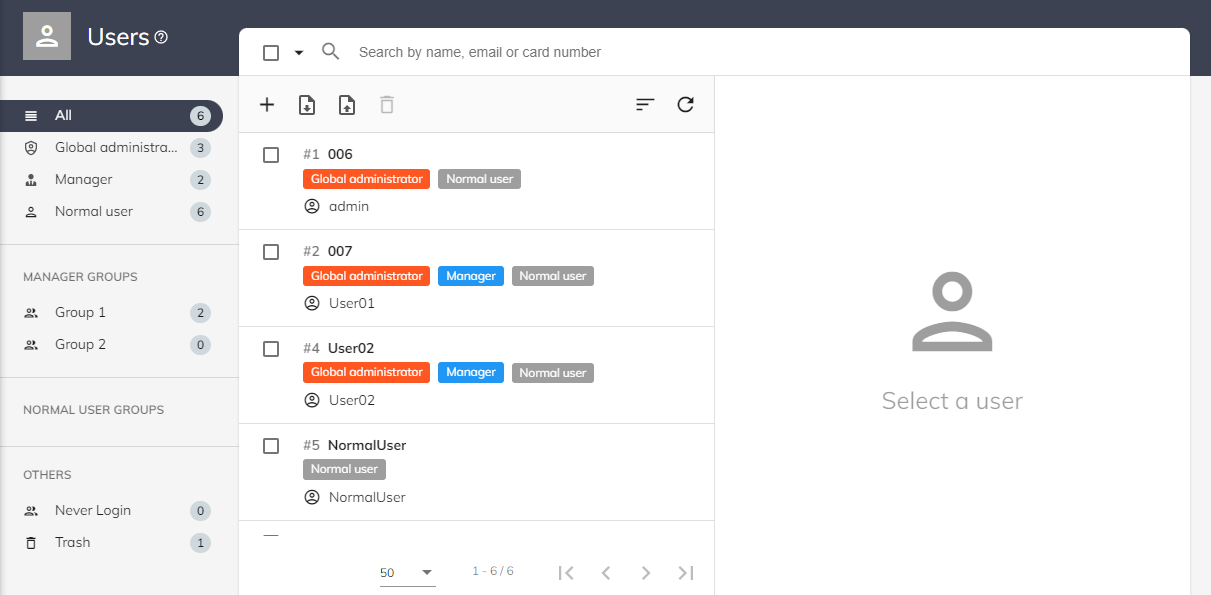
User is the basic unit for any person to login and use Bookings ONE. Setting different Permission to different users can help organize which user can access/use different features in the system, such as assign to be a Manager to manage different resources, or act as a Normal User to reserve different resources.
Each user have his/her own user id (e.g. #1) which is generated by system. This cannot be editable and mainly for system reference and internal use.
Management console -> Users -> UsersTo create new accounts, please note that the "Username" must be unique and shall not be same with other username.

User setting
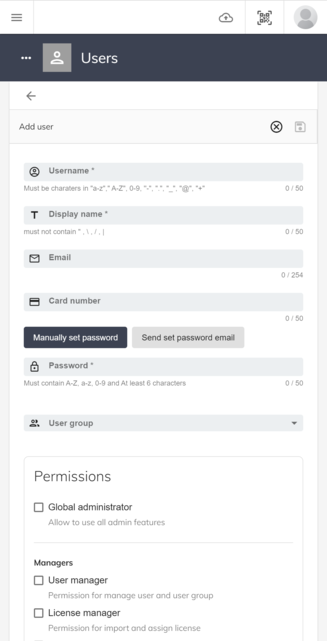
- Username: Username is used as the login id. This username must be unique.
- Display name: The display name of the user will be shown to identify the user in the system, such as the booking creator, attendee etc.
- Email: User can use email to login. Notification will be sent to this email address if this is set.
- Card number: A field for card reader integration if applicable. You can input staff number here.
- Password: User Manager need to select one option to create password for user:
- Manually set password: User Manager should manually set password for user.
- Send set password email: If User Manager select this option, system will send an invite email to user. User should create his / her own password via the link in email.
- User group: User Manager can decide the user belong to which groups based on permission / user right. You can assign multiple user groups to each user. Please refer to User Group for details.
- Permission: Permission of the user. Please refer to User Permissions.

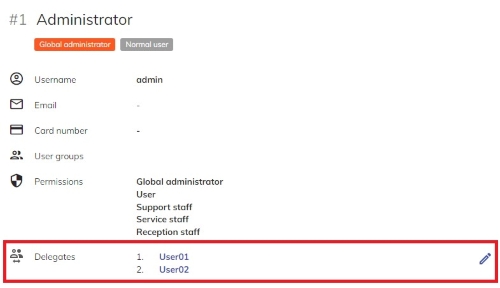
User Delegates
User can be delegated with right to create booking and verify identity for other users. You can assign users to the list to delegate further user right to them.

Create Local User by excel
Local user can be created in batch using excel files to import / export the data. User import from ADFS/LDAP cannot be edit using this method.
User Manager will find details of the import user rules when click Import user . You can also export the local user by clicking
Export user . Please be noted that user that are import via LDAP or other means that are not created locally cannot be affected by this export / import function.
There are two ways to create a user account:
- After you have inputted the username and display name, you need to click
Manually set passwordand set the password. Finally, clicksavebutton to create a user account. - After you set the email address, you need to click
Send set password emailand clicksavebutton. System will send a email to the user to set the password.
Select a user, click Menu button ⋮, then click Edit.
Select a user, click Menu button ⋮, then click Delete and input "YES" to the text field.