Outlook add-in setup
This section will introduce the step on how to deploy outlook add-in to the users, please refer to related instructions according to your environment:
Prerequisites
- Exchange Server 2013 or above / Office 365
- Outlook 2016 or above
Deploy in Office 365
- Access to your
Microsoft 365 admin center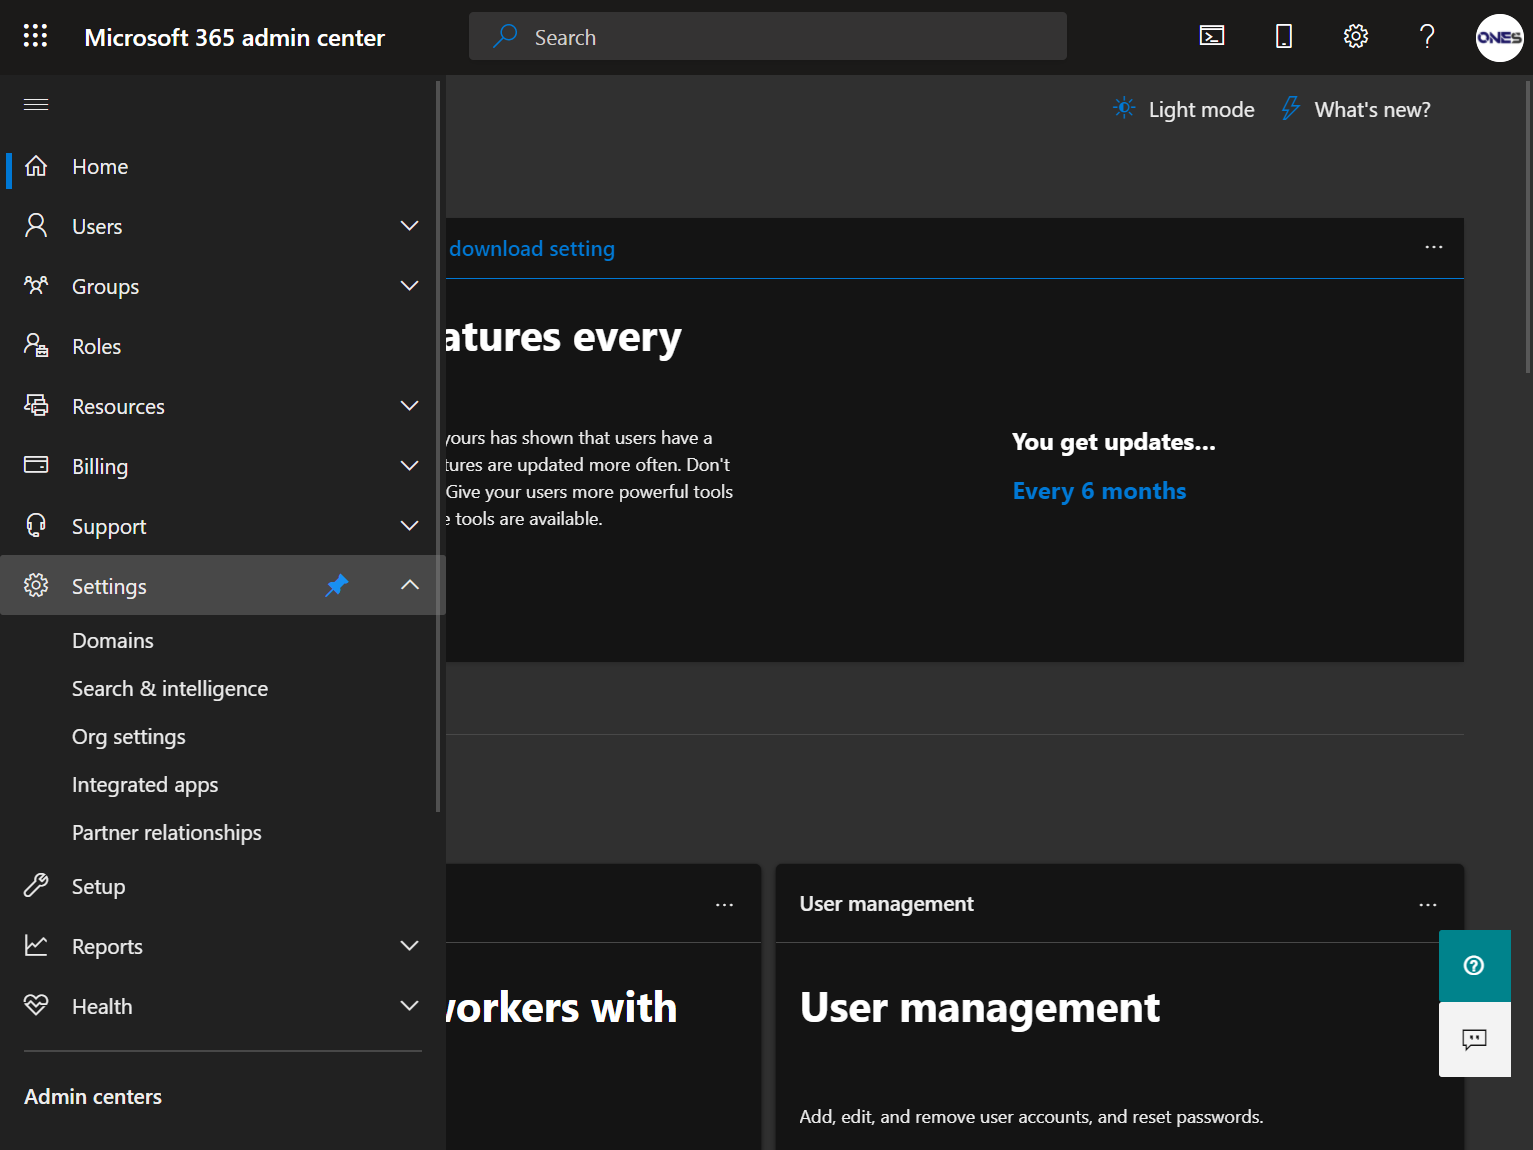
- Click
Menubutton,Show all, and thenSettings > Integrated apps - Click
Add-ins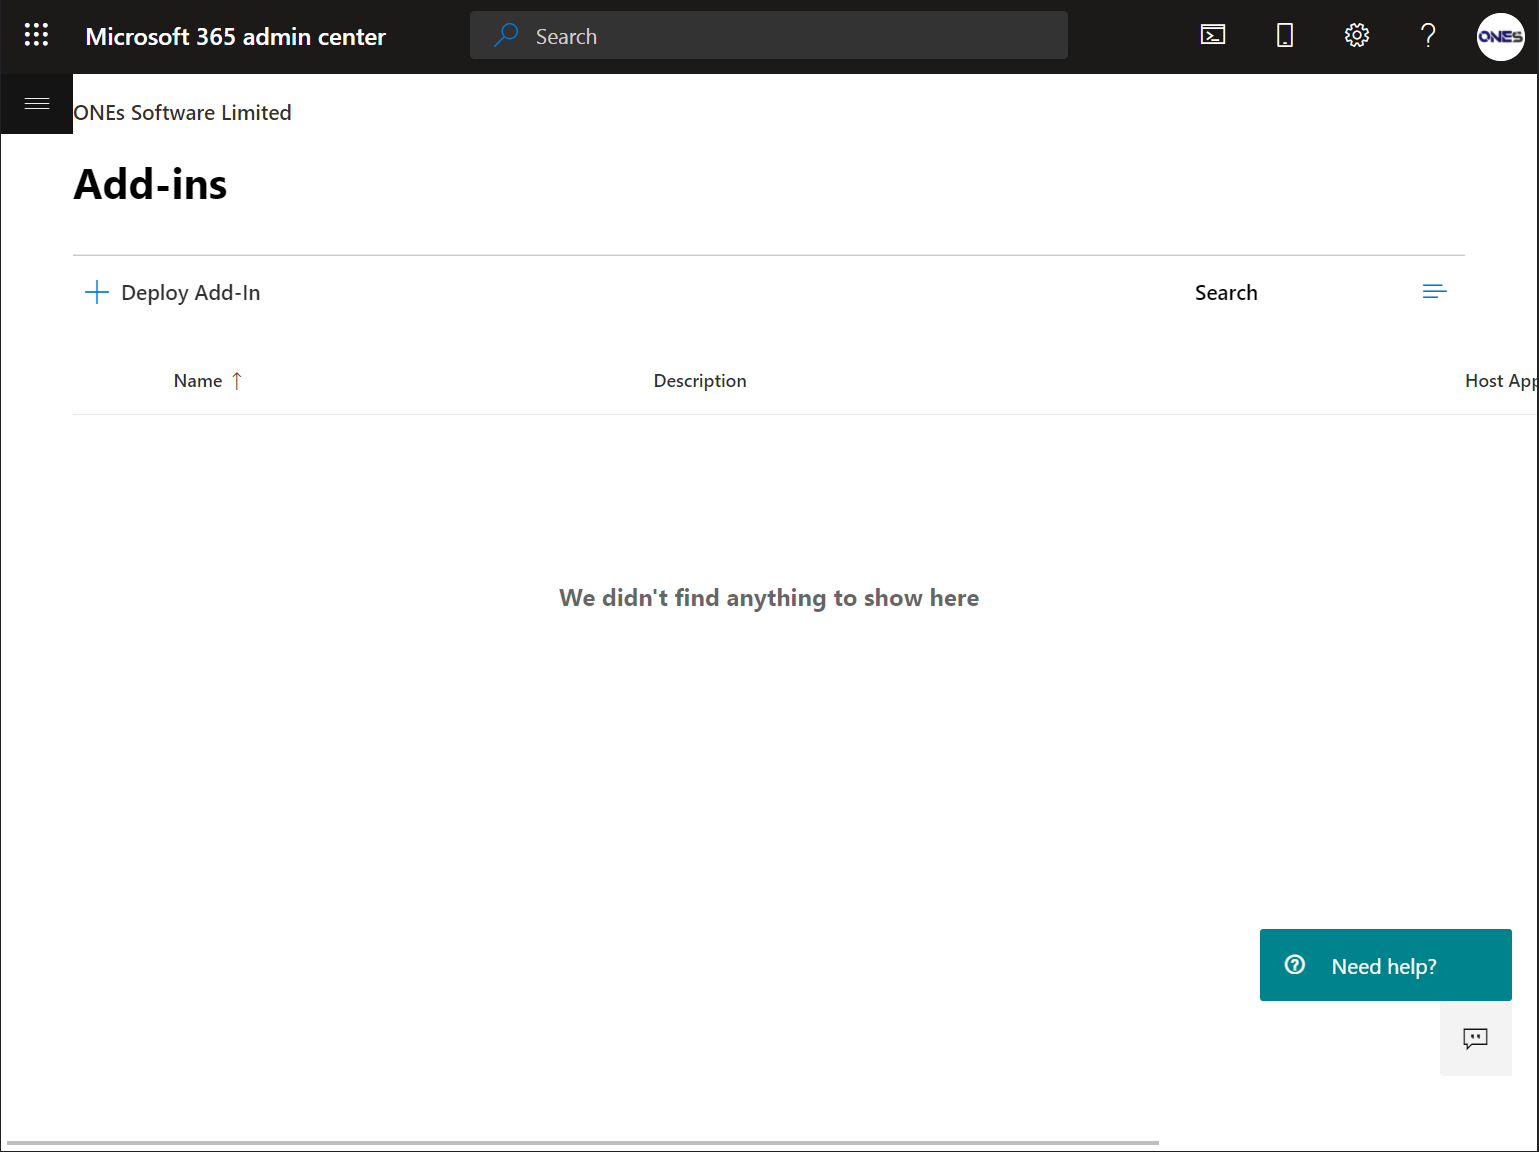
- Click
+ Deploy Add-in - Click
Upload custom apps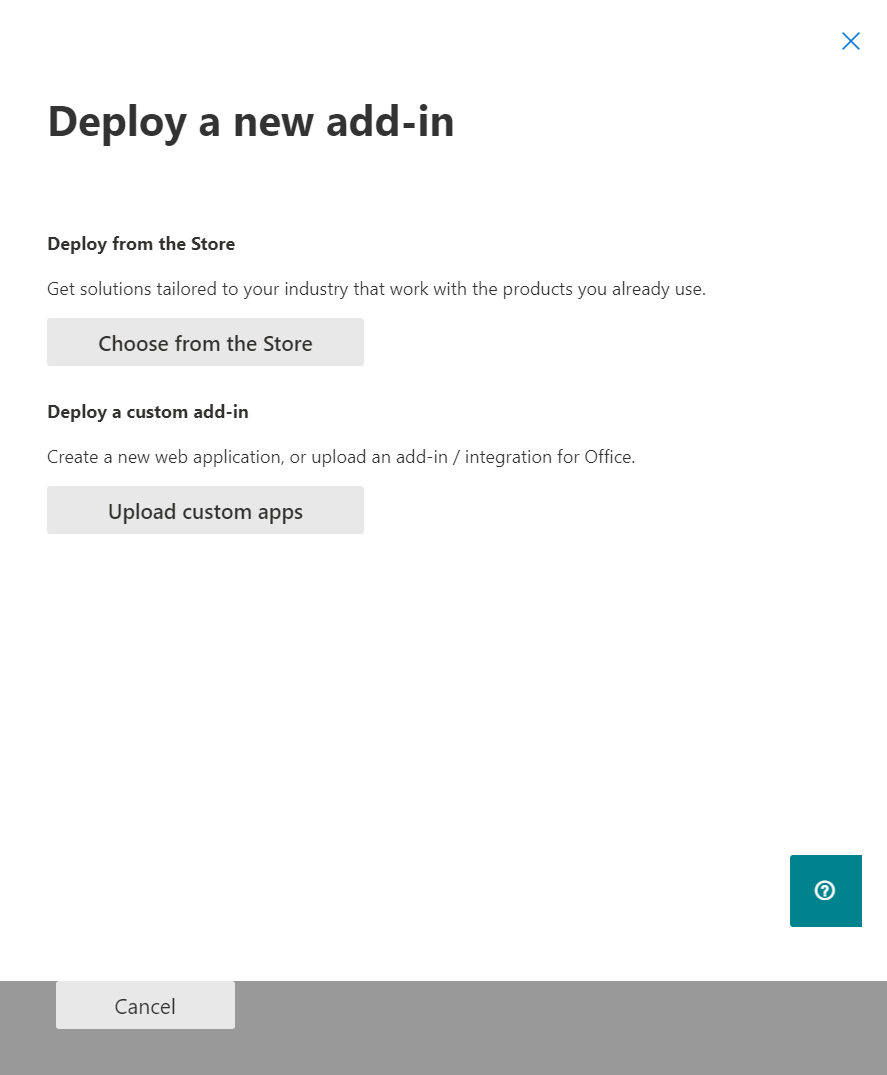
- Select
I have a URL for the manifest file, then enter{bookings_one_server_address}/outlook/manifest.xml, clickUpload - Select the deployment setting based on your usage, click
Deploy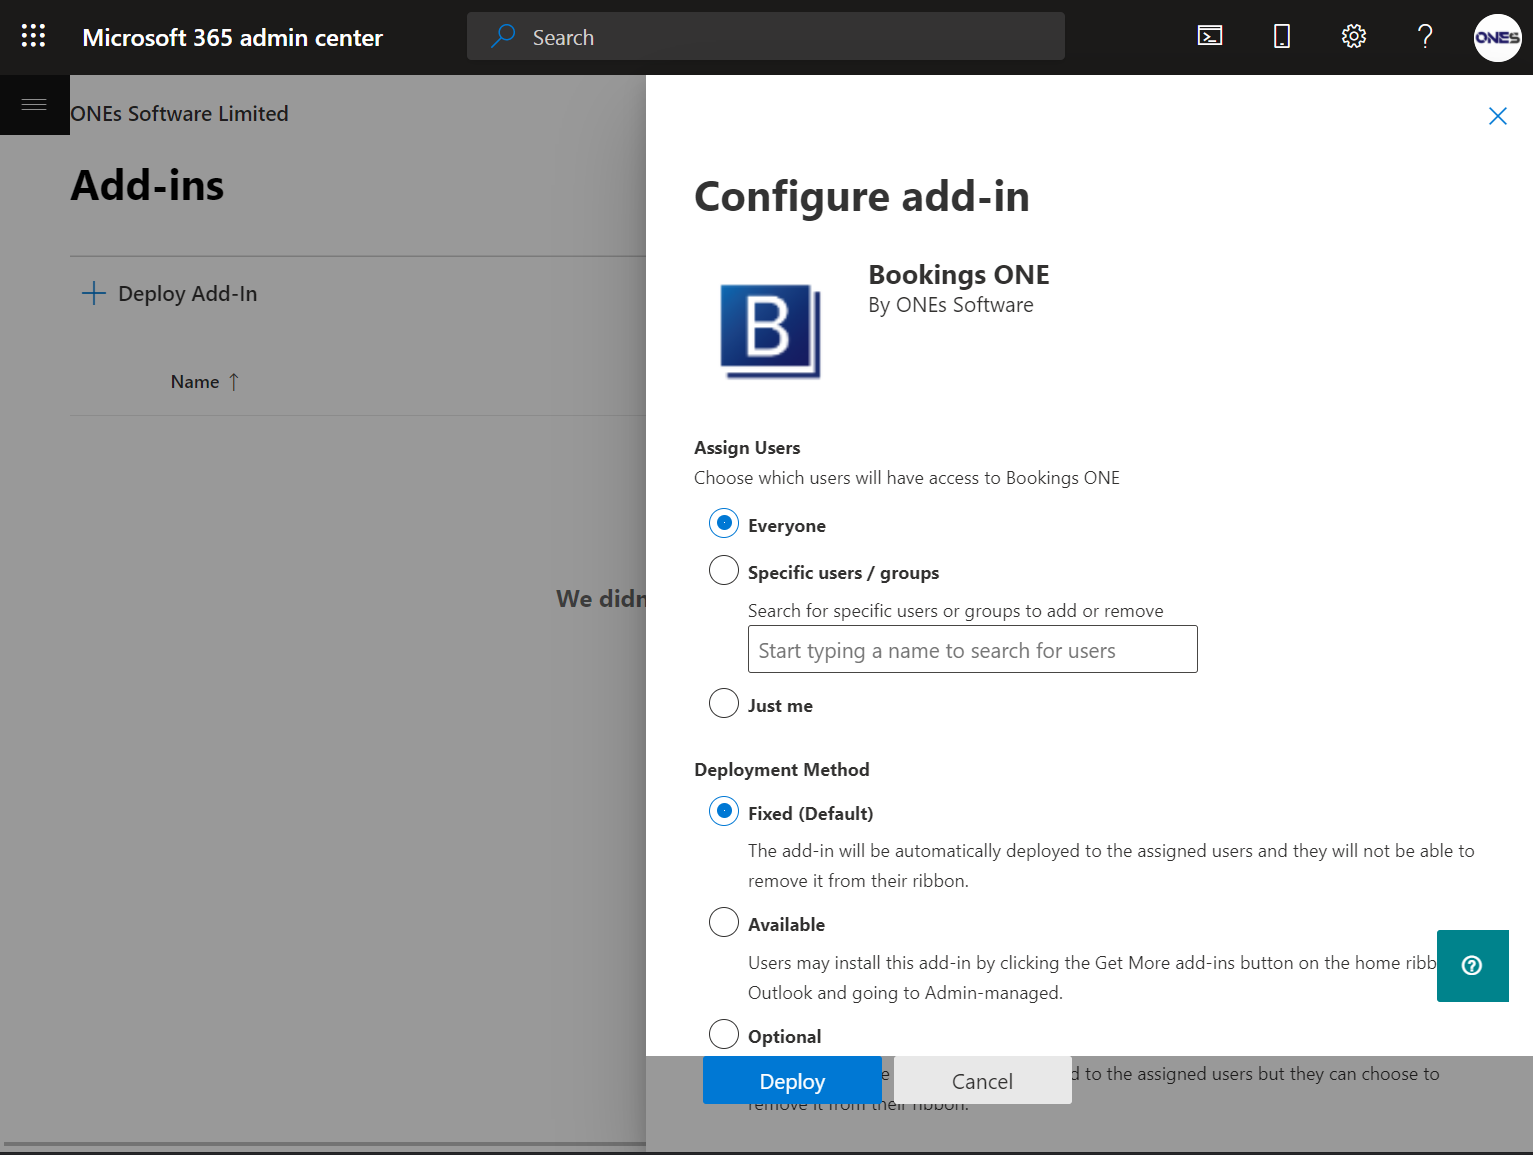
- The deployment may take 12 hours to deploy to all user, and then you can see the add-in in user's outlook.
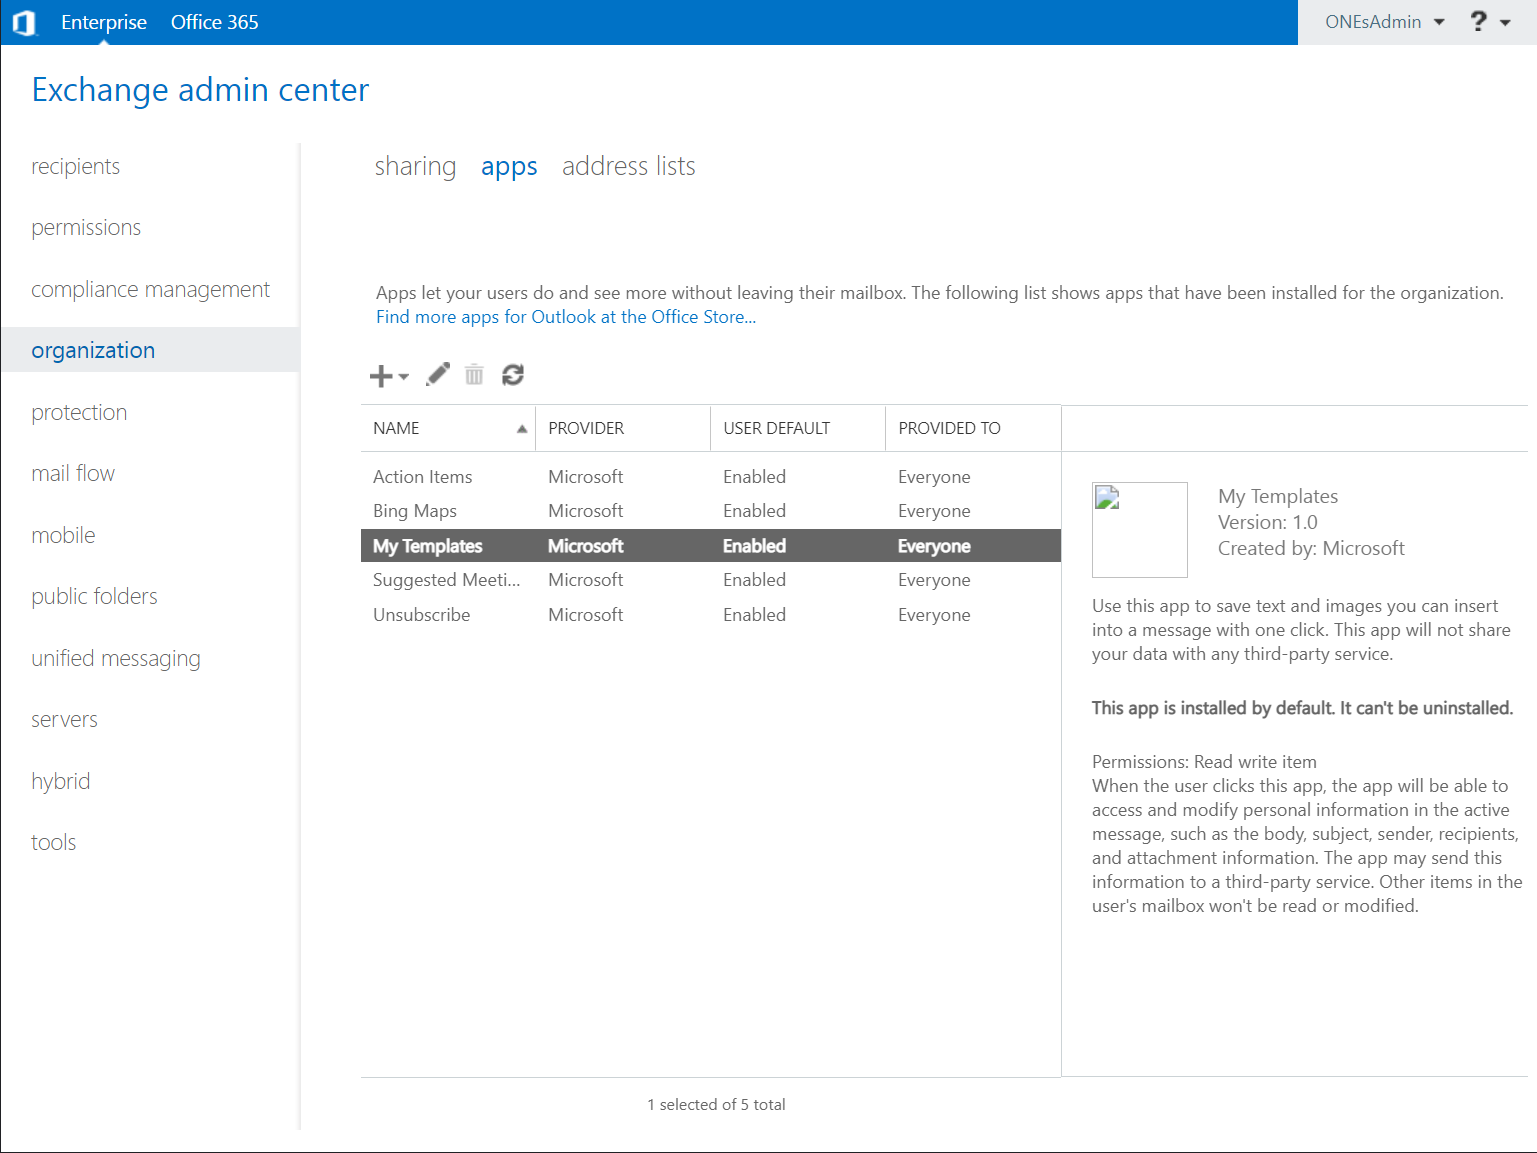
Deploy in Exchange server
⚠️ Make sure your exchange server are accessable to the Bookings ONE server.
- Open
https://{your_exchange_server_address}/ecpto access Exchange admin center- Click
organization, and then clickapps- Click the
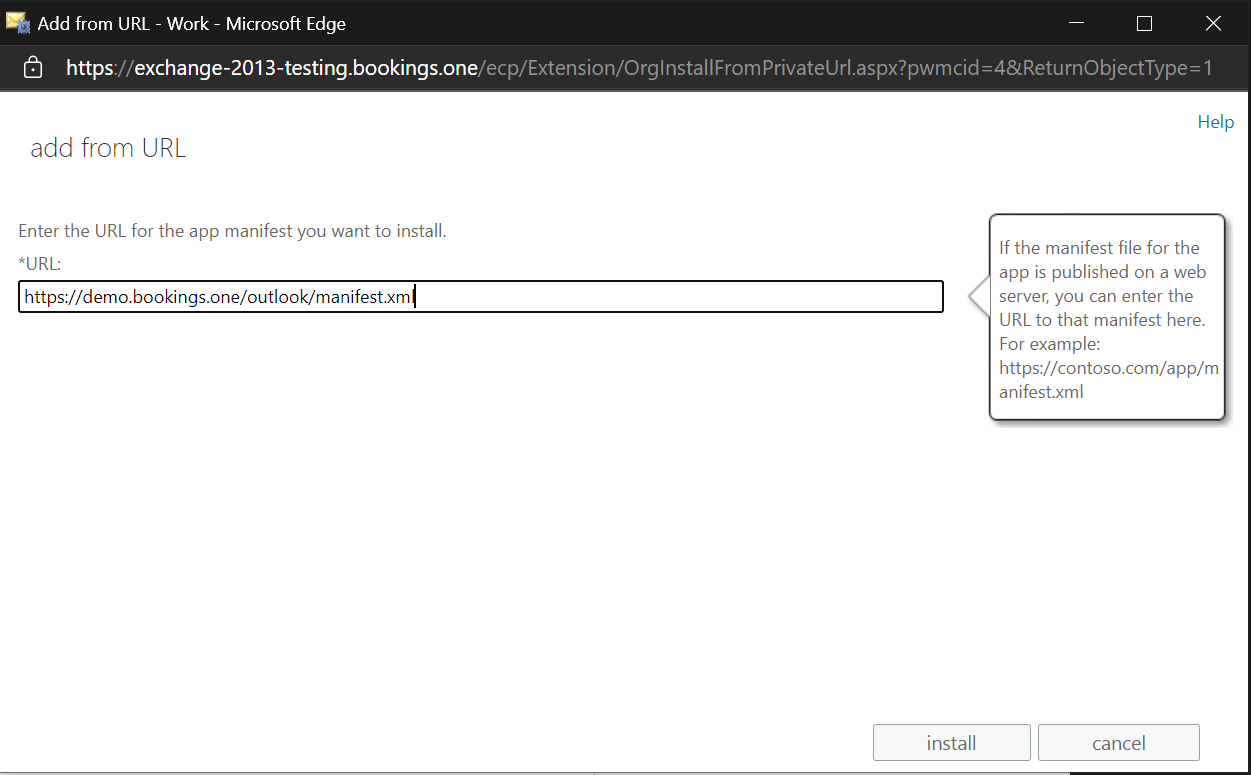
add +button and thenadd from URL- Enter
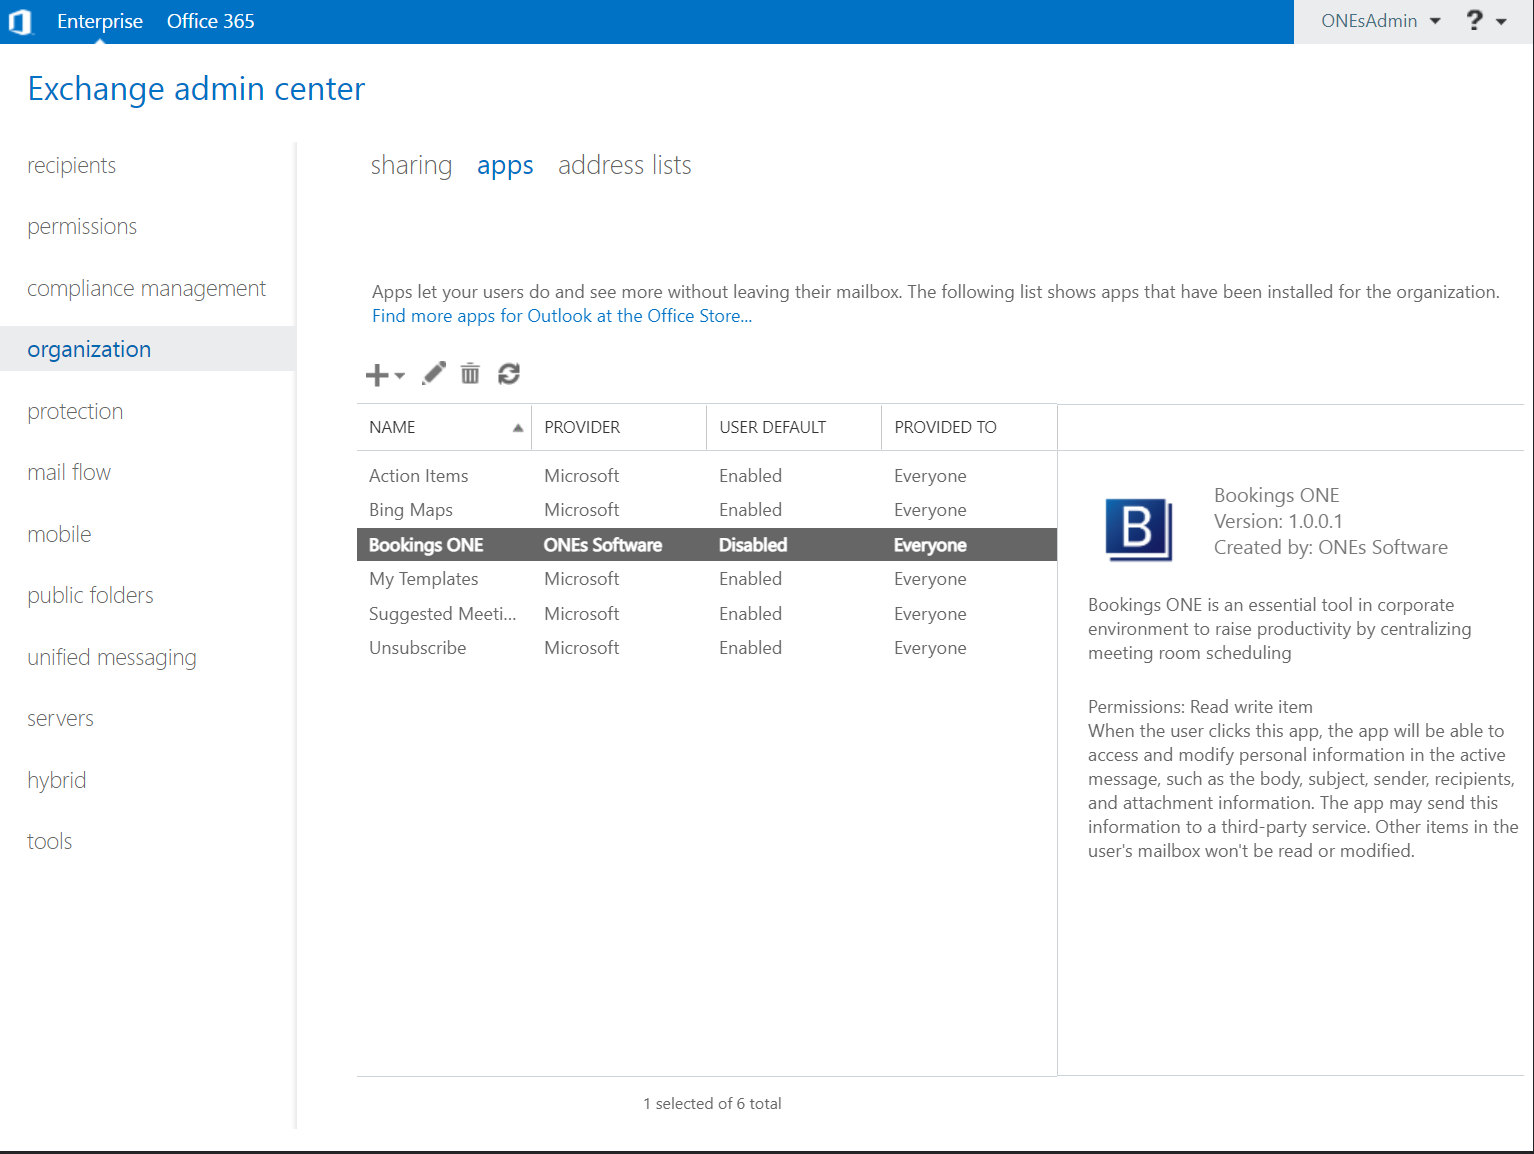
https://{bookings_one_server_address}/outlook/manifest.xmlfor manifest file, clickOK- Installation finish, you will see Bookings ONE in the app list
Direct install in outlook (Single user only)
- Open Outlook , click
Get Add-insin theHometab - Click
My add-ins, and scroll to the sectionCustom add-ins, click+ Add a custom add-in, then clickAdd from URL...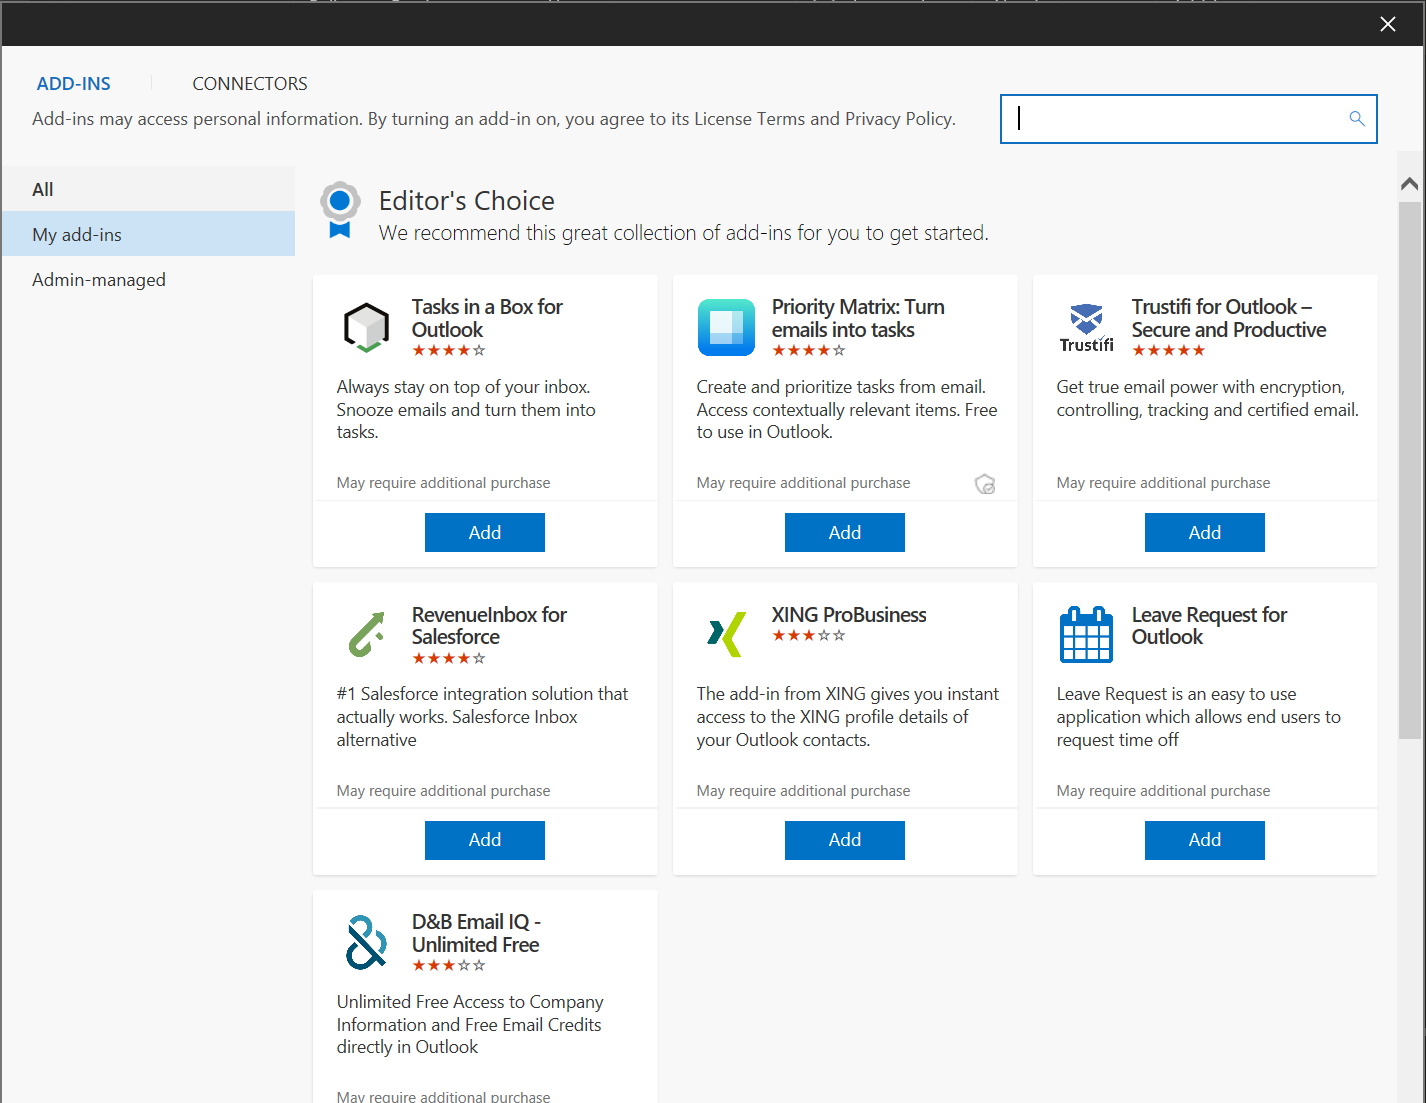
- Enter
https://{bookings_one_server_address}/outlook/manifest.xmlfor manifest file, clickOK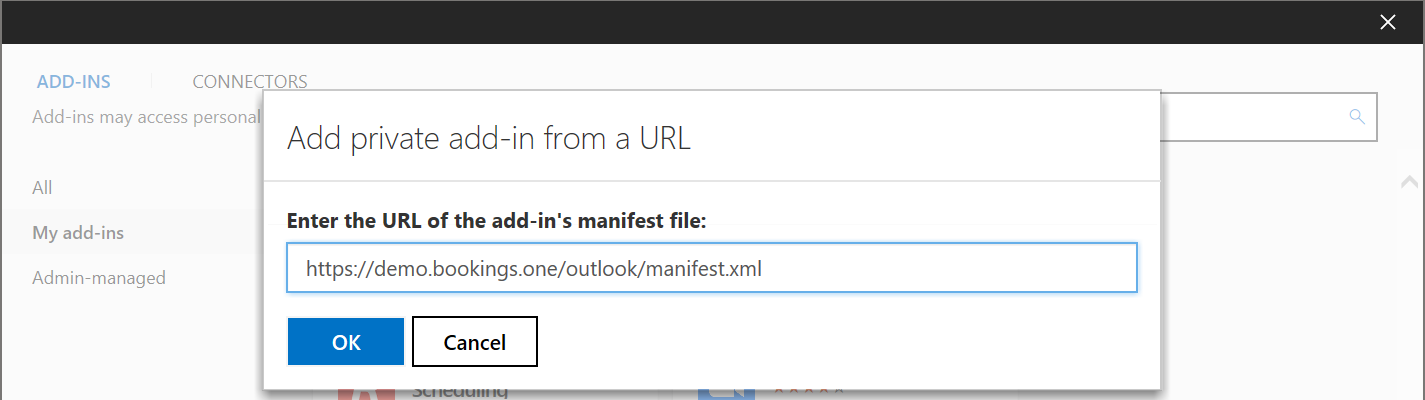
- A Bookings ONE add-ins block will be added to the customer add-ins list