Active Directory with LDAP User synchronization
This section will introduce the step on how to integrate with Active Directory with LDAP user synchronization. Based on the following integration steps, user can:
- Synchronize users from Active Directory via LDAP
- User can perform login to Bookings ONE via LDAP
Network Connectivity
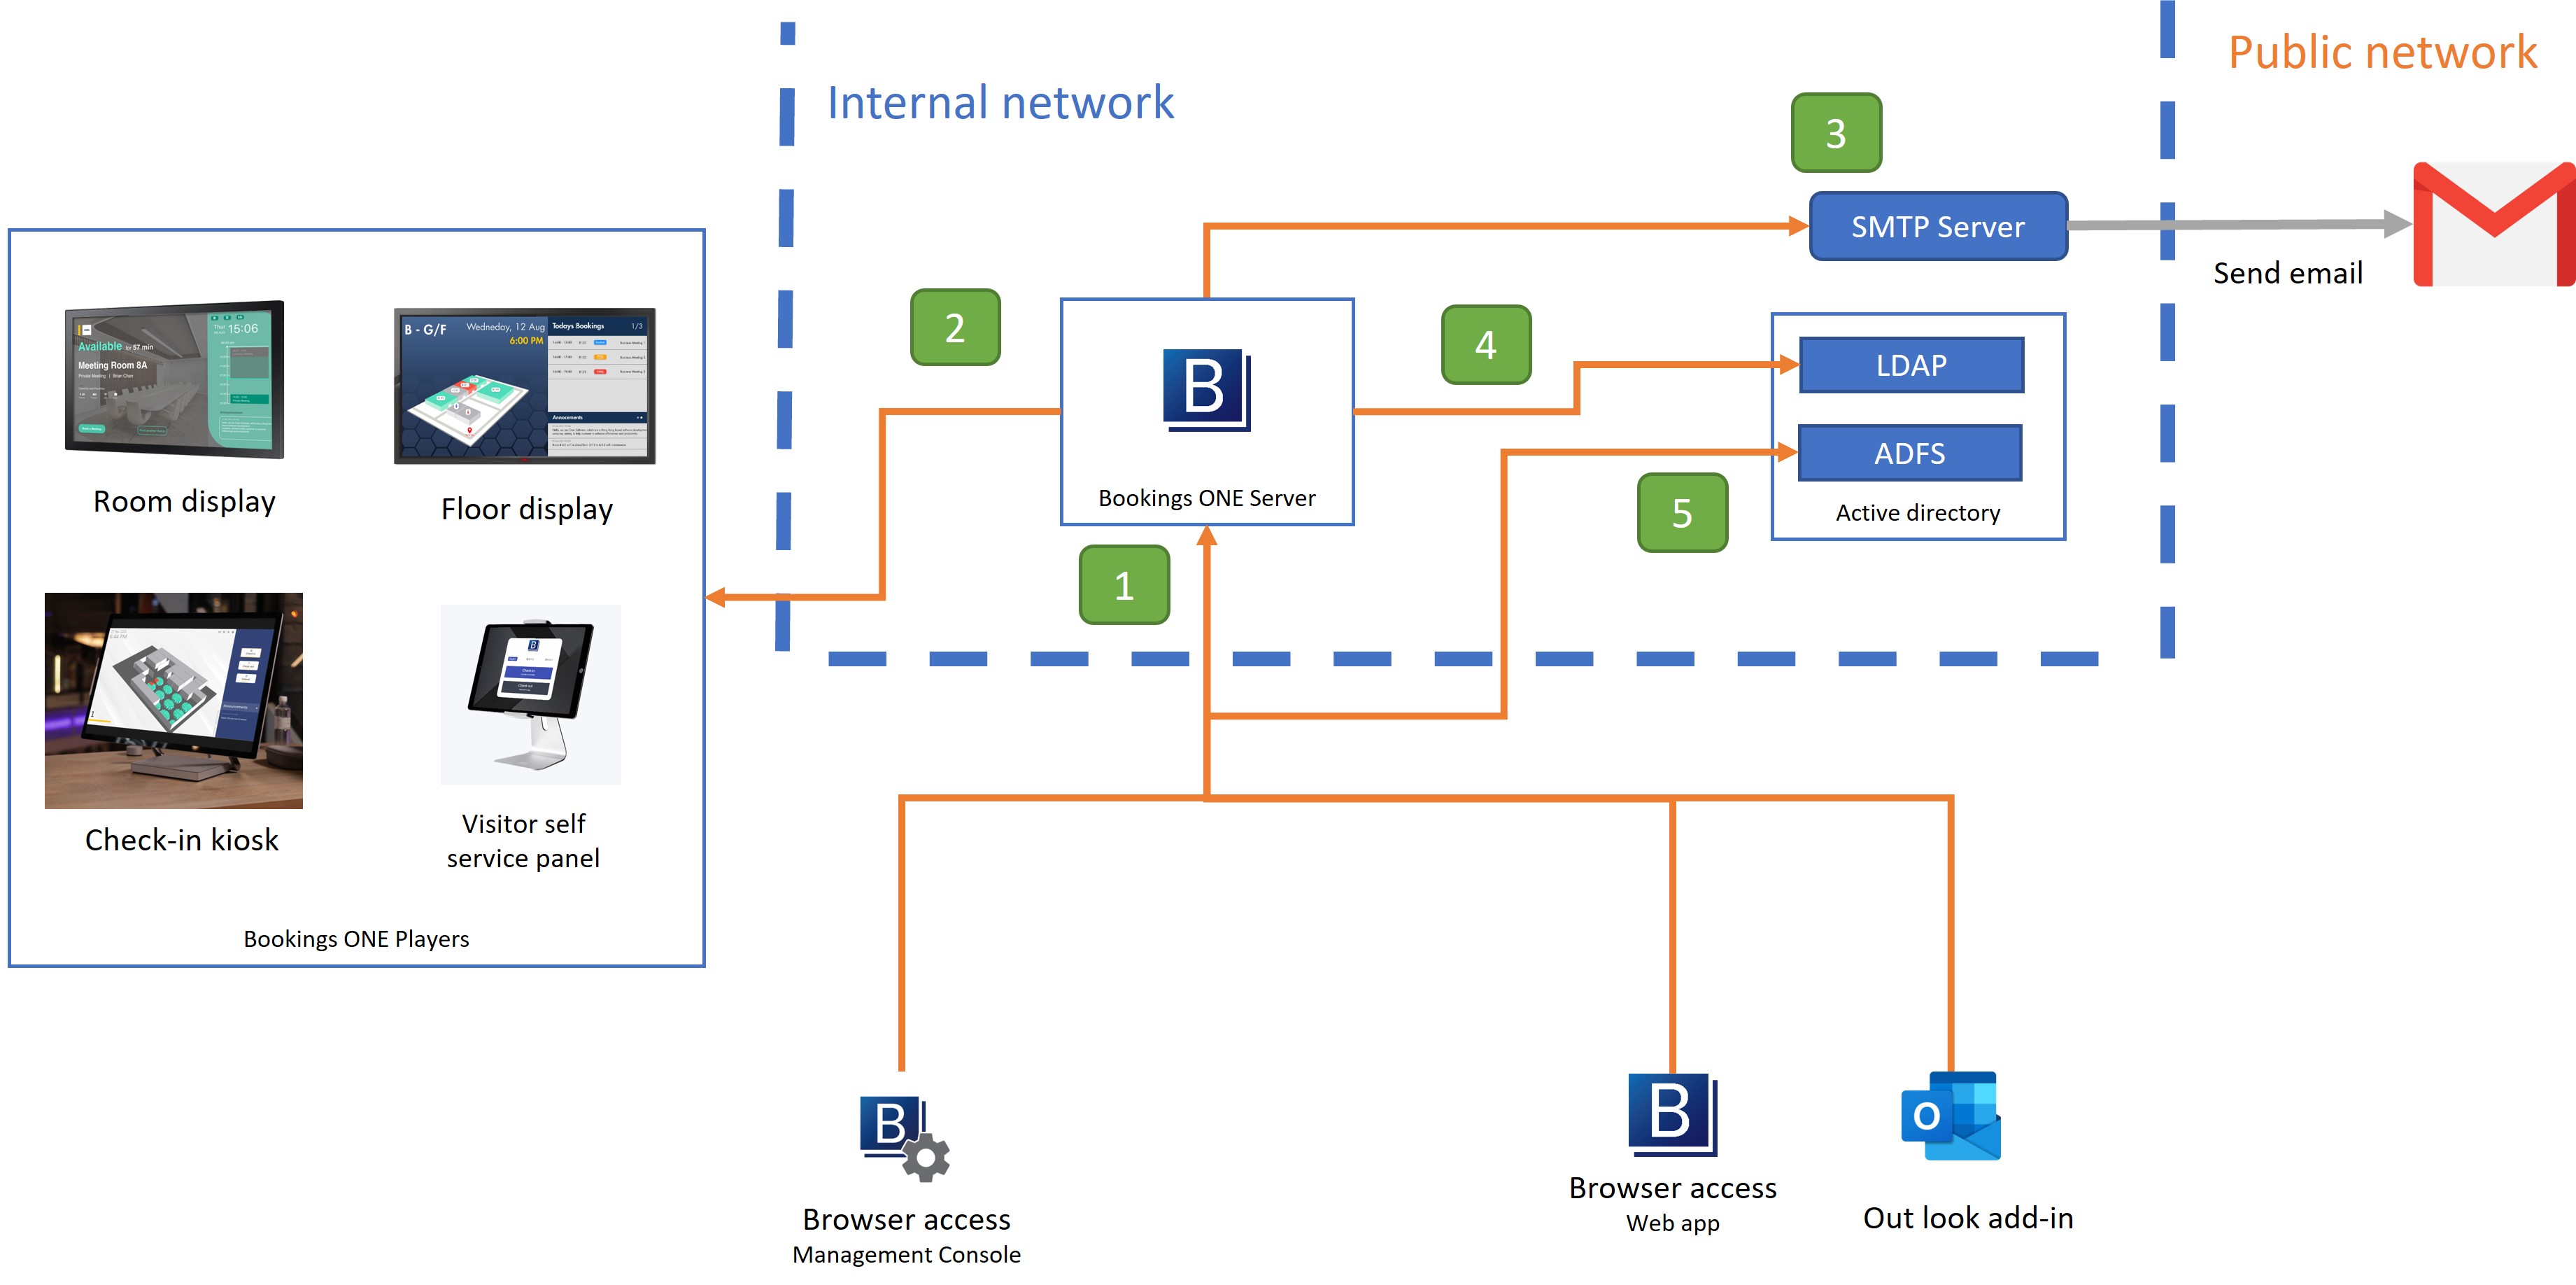
Connect from User Web App, Outlook Add-in, Management Console to Bookings ONE Server
- For open the WebApps of Bookings ONE.
- Port:
TCP 443
Connect from Bookings ONE Server to Bookings ONE Player
- For room display, floor display, etc.. connect to Servers to receive the signal., Bookings ONE Server can real-time update data through the
httpsandwssprotocol. - Port:
TCP 443
- For room display, floor display, etc.. connect to Servers to receive the signal., Bookings ONE Server can real-time update data through the
Connect from Bookings ONE Server to SMTP Server
- For sending email through the SMTP Server, sending email to the receiver.
- Port:
TCP 25, 465, or 587(depend on the SMTP Server setting)
Connect from Bookings ONE Server to LDAP:
- For synchronize users data from active directory.
- Port:
TCP 389 or 636(depend on the LDAP Server setting)
- Connect from User Web App, Outlook Add-in, Management Console to the ADFS
- For user single sign on with the Active Directory Federation Services (ADFS)
- Port:
TCP 443
Integration Steps
- Microsoft Active Directory
- LDAP enabled
- Service account for access LDAP
Open
Bookings ONE Management ConsoleNavigate to
Settings > External IntegrationClick
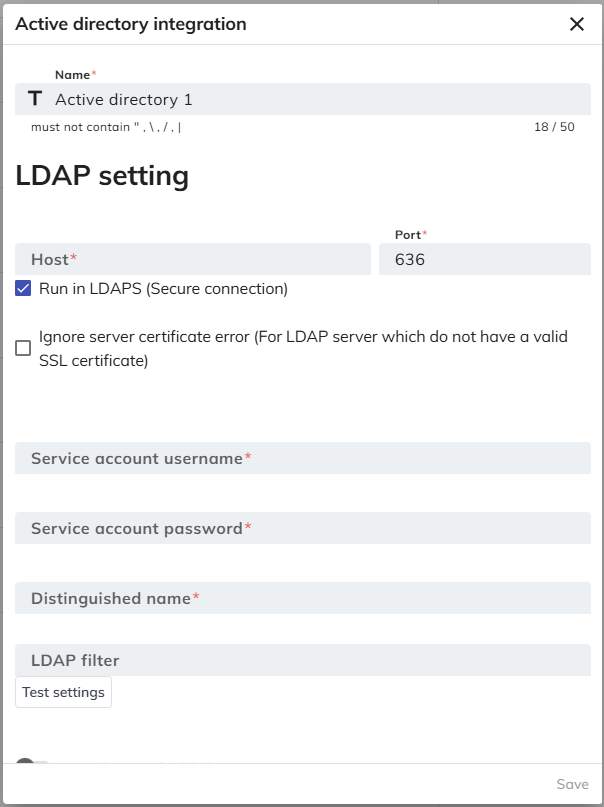
New external integration +button, selectActive Directory>LDAP + ADFSFill in the host server address and port
⚠️ By default it will run in LDAPS, if you do NOT want to use SSL, uncheck the box for
Run in LDAPS (Secure connection)⚠️ If your LDAP server have any certificate issue, you may check the box for
Ignore server certificate error to skip the error(shown when checkedRun in LDAPS (Secure connection))Fill in service account username (normally with format: admin.super@company.hk or CompanyName\admin.super) and password
Fill in distinguished name (Require) and LDAP filter (Optional)
💡 Distinguished name should be in format like "OU=Users,DC=ones,DC=software", please point to the Organization Unit that contain the users you want to synchronization.
💡 LDAP filter is an advanced filter function for filtering the specified users such as by security group or by specified name, format will be like "memberOf=CN=Development Teams,DC=ones,DC=software"
System will not synchronize the disabled user by default. If you want to synchronize the disabled user, enable
Synchronize disabled users.If you want to sync the specified active directory field into the user card number, select the option you need from the list. Default is
No synchronize.Single-sign-on setting
- Configure the ADFS / Azure active directory. Please follow the ADFS setup guide and AzureAD setup guide
- Fill in the Metadata address and WtRealM
- For Exchange server
- In metadata address, fill in the address
https://{your active directory address}/FederationMetadata/2007-06/FederationMetadata.xml - In Wt RealM, fill in the value for WS-Federation Passive protocol app's URL configured in active directory
- In metadata address, fill in the address
- For Office 365
- In metadata address, fill in WS-Federation middleware's MetadataAddress
- In Wt RealM, fill in the Application ID URI
- For Exchange server
(Optional) Fill in Login button name, it will show
Login via Active directoryif leave the field emptyClick
Savebutton.Now user can single sign on in login page
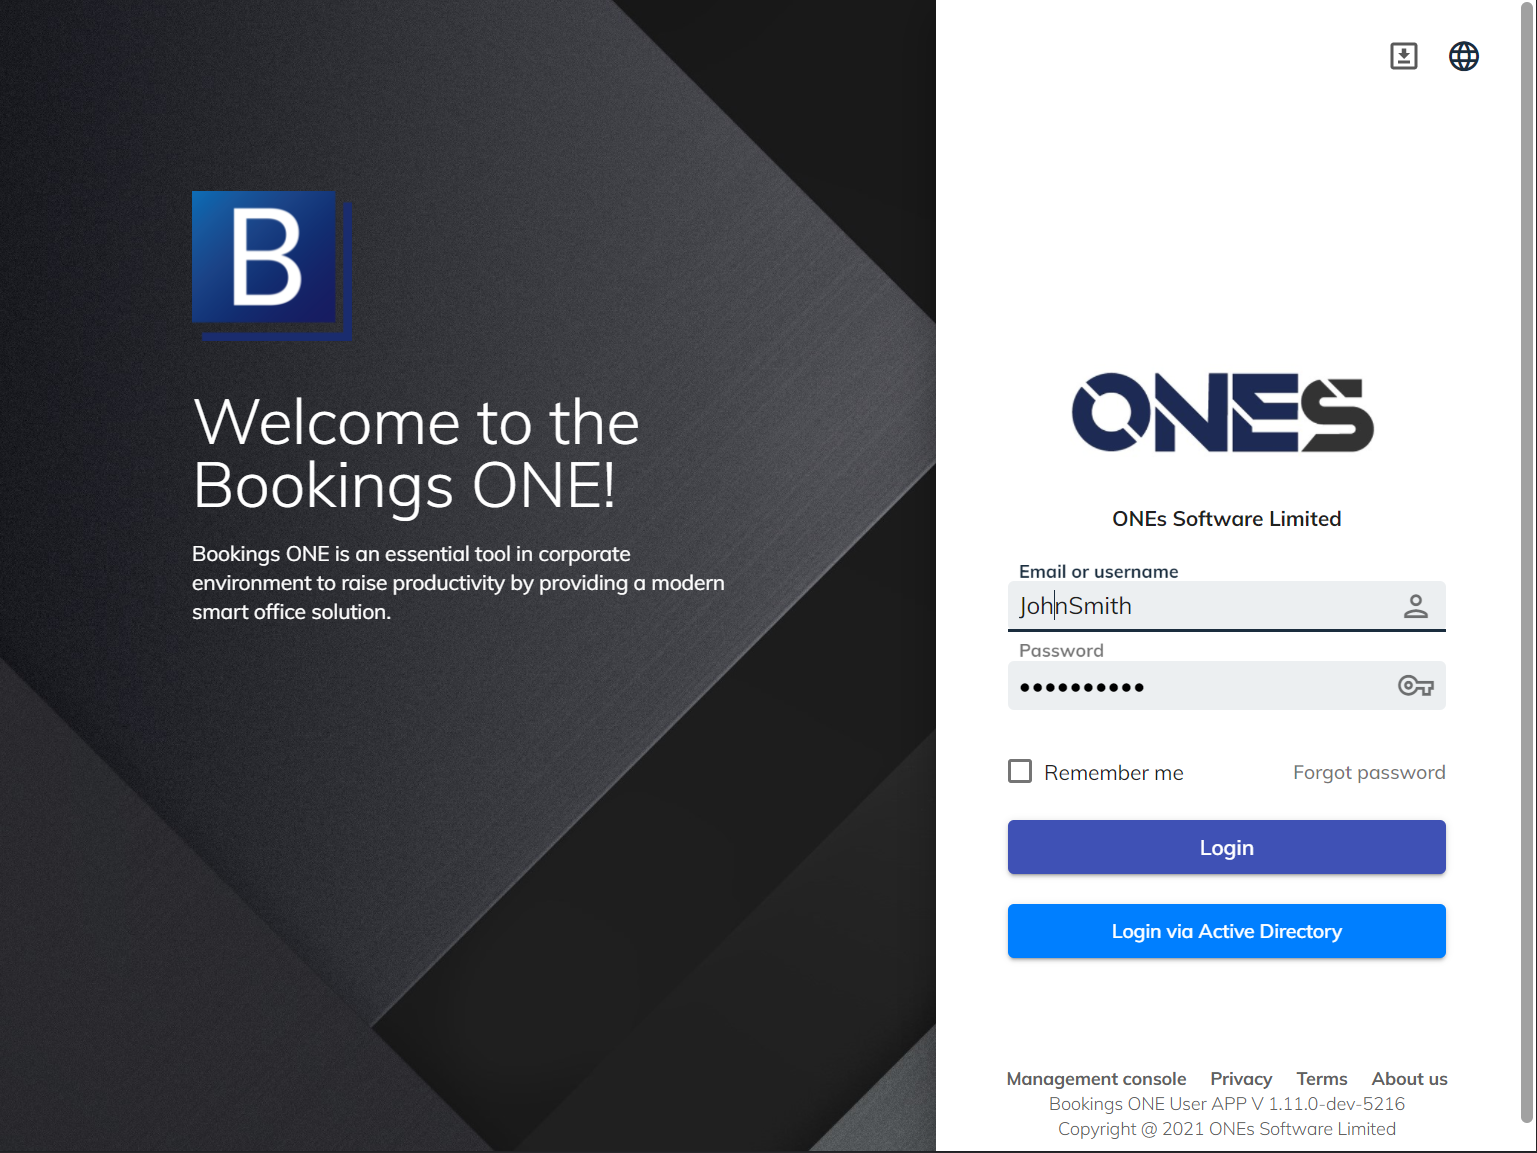
❓ What is the different between the single sign on by the ADFS and LDAP?
For ADFS, if the user are already signed in the Active directory account in the browser, they will not require to enter the username and password to sign in again.
For LDAP, it always need user to enter the username and password to login the system.
Default login field and buttons are for user to login via system local accounts. If you are using the system without any local user accounts or you do not want user to login via local account, you can hide these fields by following steps in Management Console:
- Navigate to
Settings > General - Select
Hidden local login in User App - Click the
Updatebutton