Delegated resource only
This section will introduce the procedure of integration (Delegated resource only) with Google. This integration is suggested for companies who have a higher security concern.
User have to login to ONES at least once for booking resources.
Server settings
Getting start
- Enter the
nameof integration for identification of this integration in ONES.
Create Project
- For retrieving the customer ID, client ID and client secret, you need to create a project for integration. Navigate to your Google Cloud Platform.
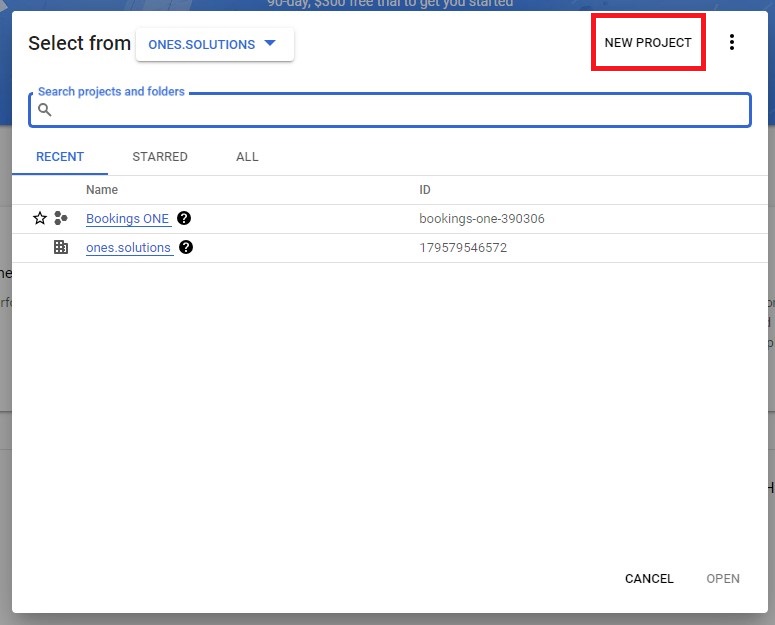
- Click
Select a projectand clickNEW PROJECT: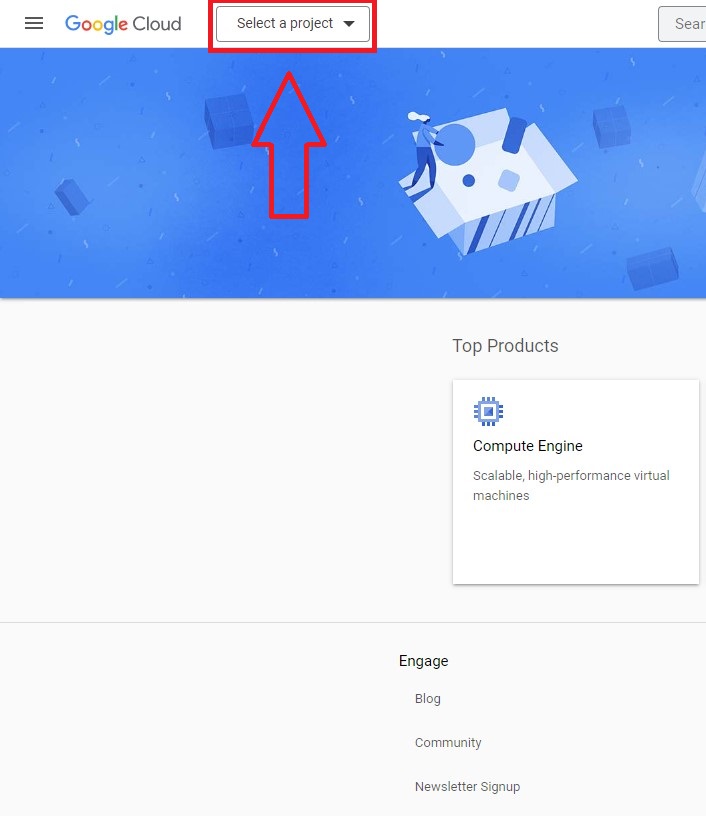
- Enter a name, organization and location for the project. (These information are just for naming, which will not be used in the integration with ONES.)
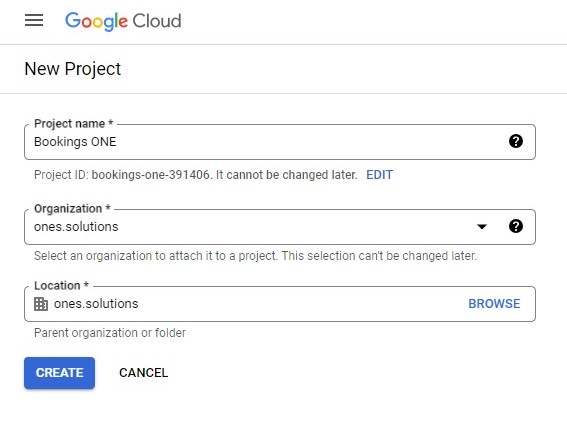
- Click
CREATEto create the project.
Enable API
- Navigate to the
APIs & Servicesand select the project.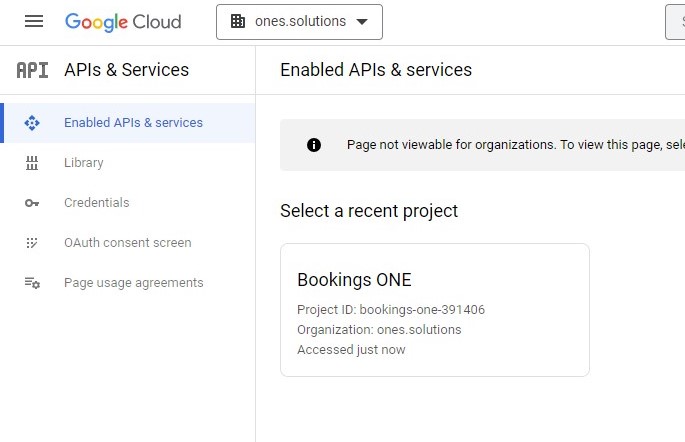
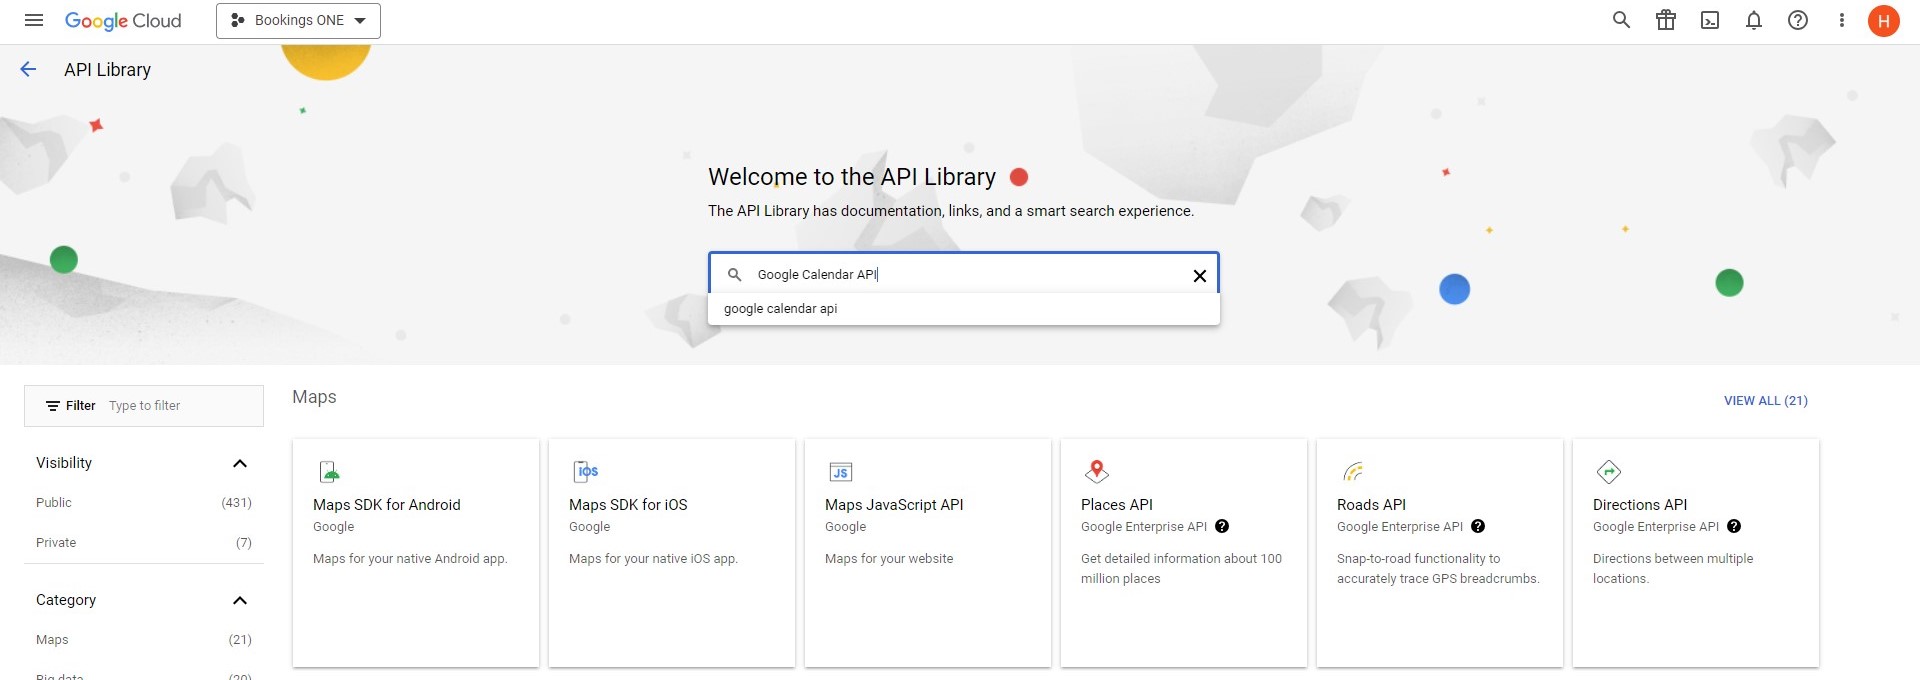
- Click
ENABLE APIS AND SERVICESand searchGoogle Calendar API.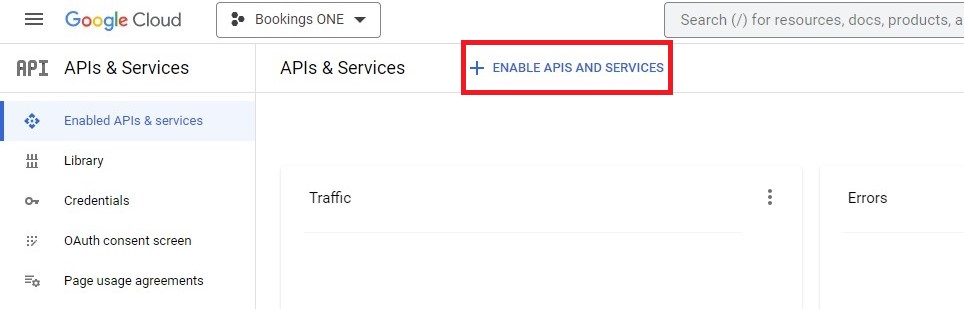
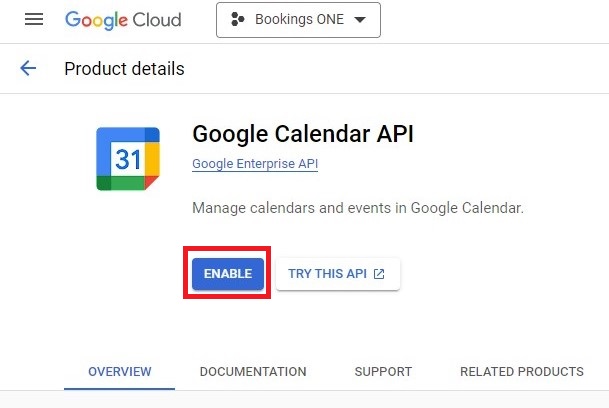
- Select
Google Calendar APIand clickENABLE.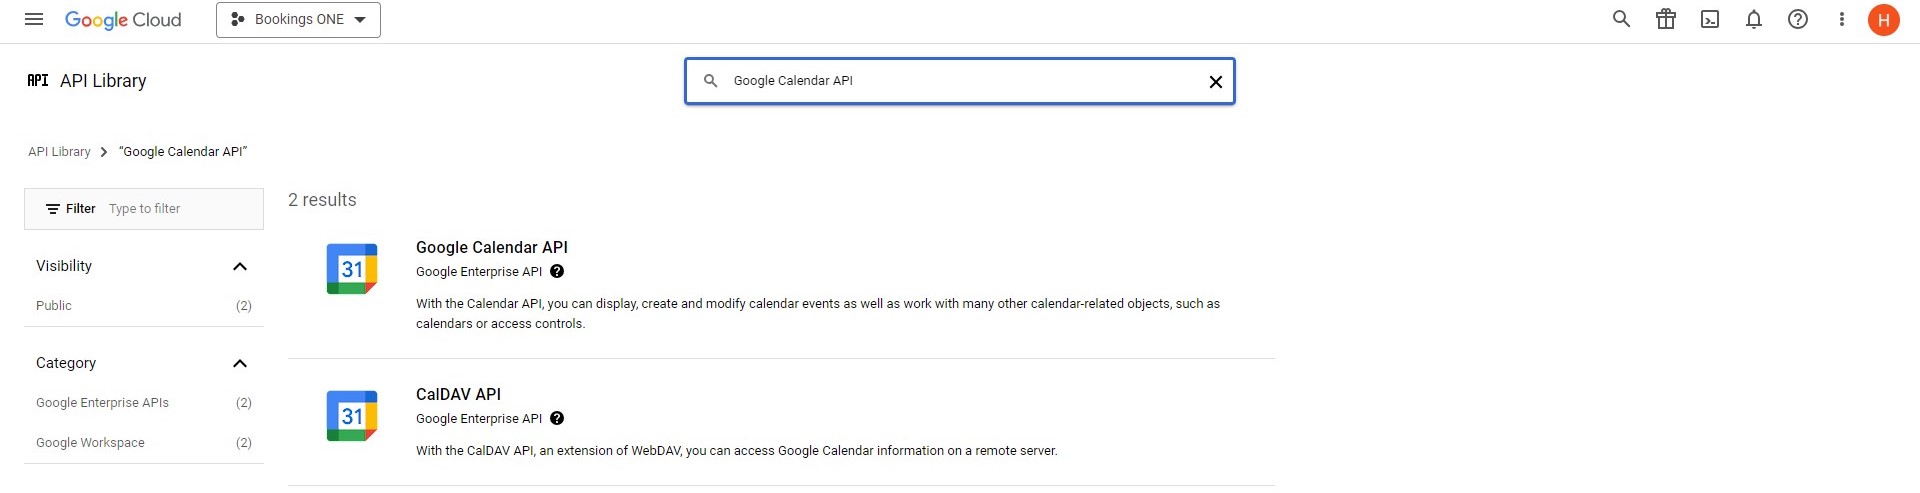
Create OAuth consent screen
- Navigate to
OAuth consent screen. - Select
Externaland clickCREATE.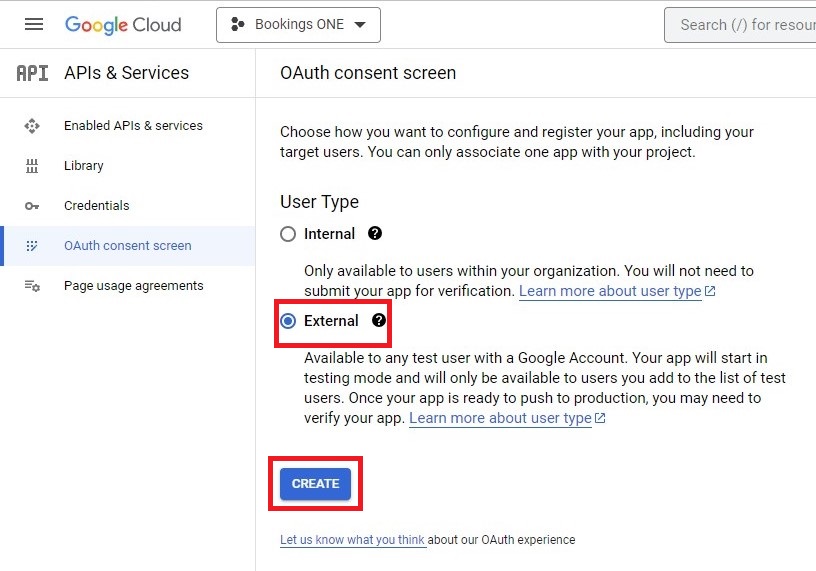
- Input
App name,User support emailandEmail addressesofDeveloper contact information. (These information are just for naming, which will not be used in the integration with ONES.) - Click
SAVE AVD CONTINUE.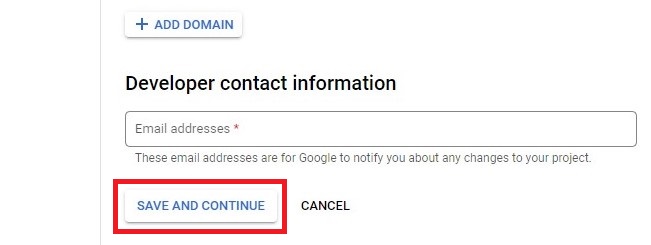
- Click
ADD OR REMOVE SCOPES.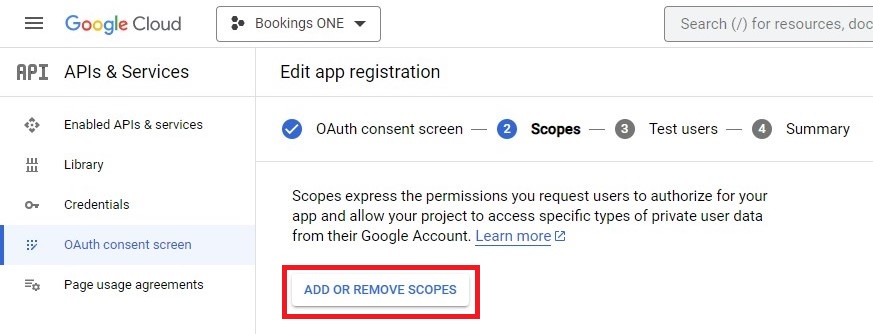
- Select
userinfo.email,userinfo.profileandopenid.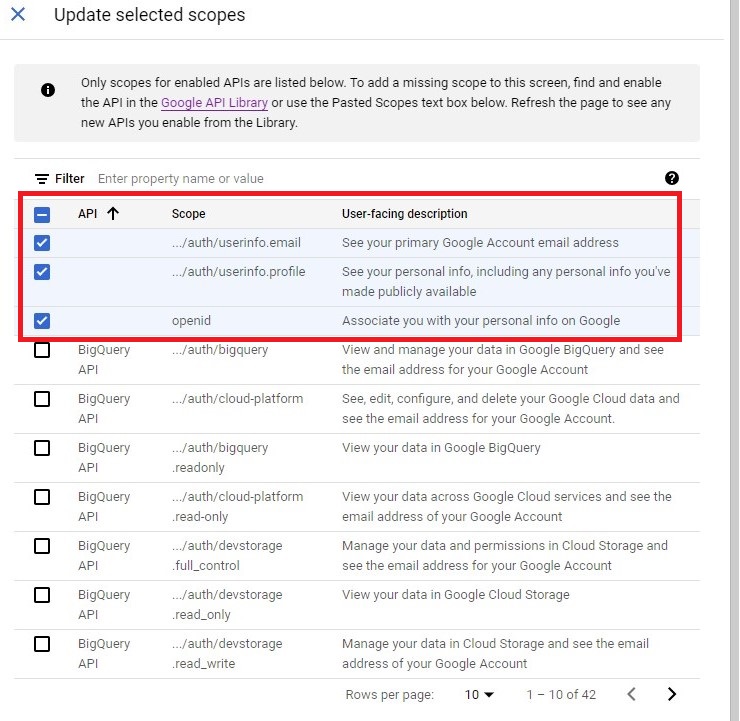
- Search
Google Calendar APIand selectcalendar.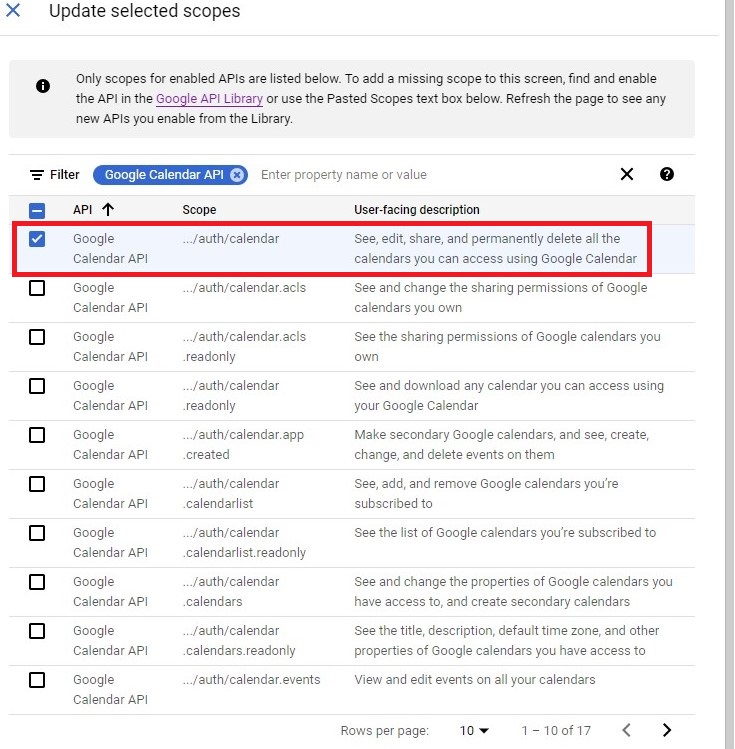
- Click
UPDATE - Click
SAVE AVD CONTINUE. - Click
SAVE AVD CONTINUE. - Click
BACK TO DASHBOARDto finish the procedure.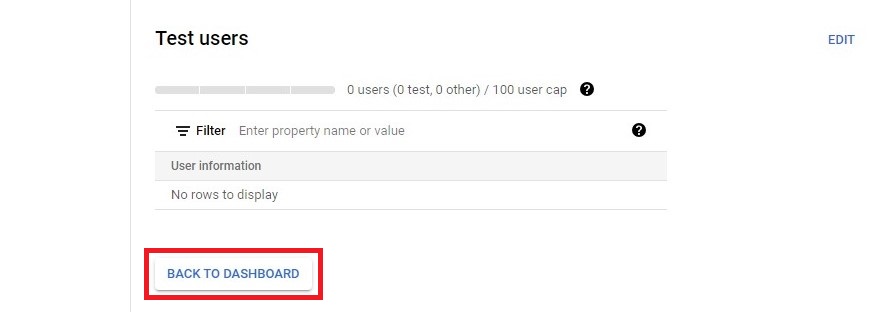
Create OAuth 2.0 Client IDs
- Navigate to
CredentialsofAPIs & Services. - Click
CREATE CREDENTIALSand selectOAuth client ID.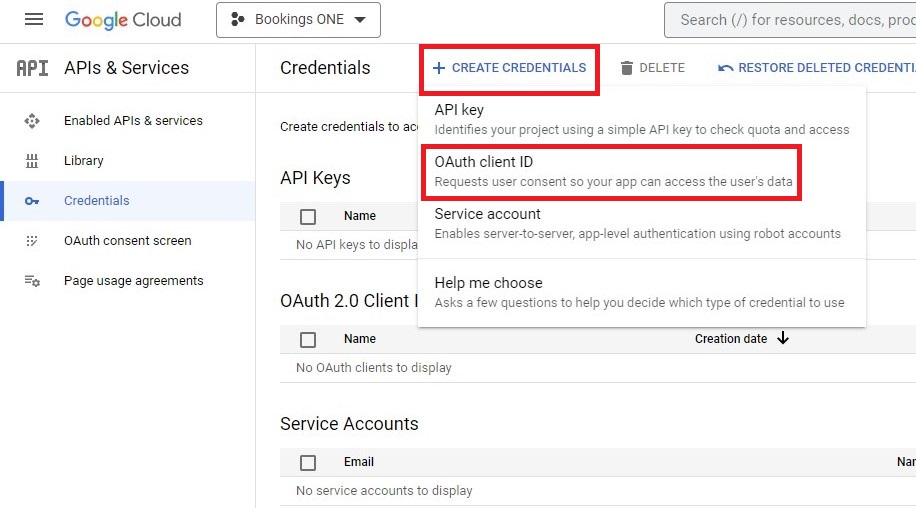
- Click
Application typeand selectWeb application, and typeName. - Click
CREATEto finish the procedure.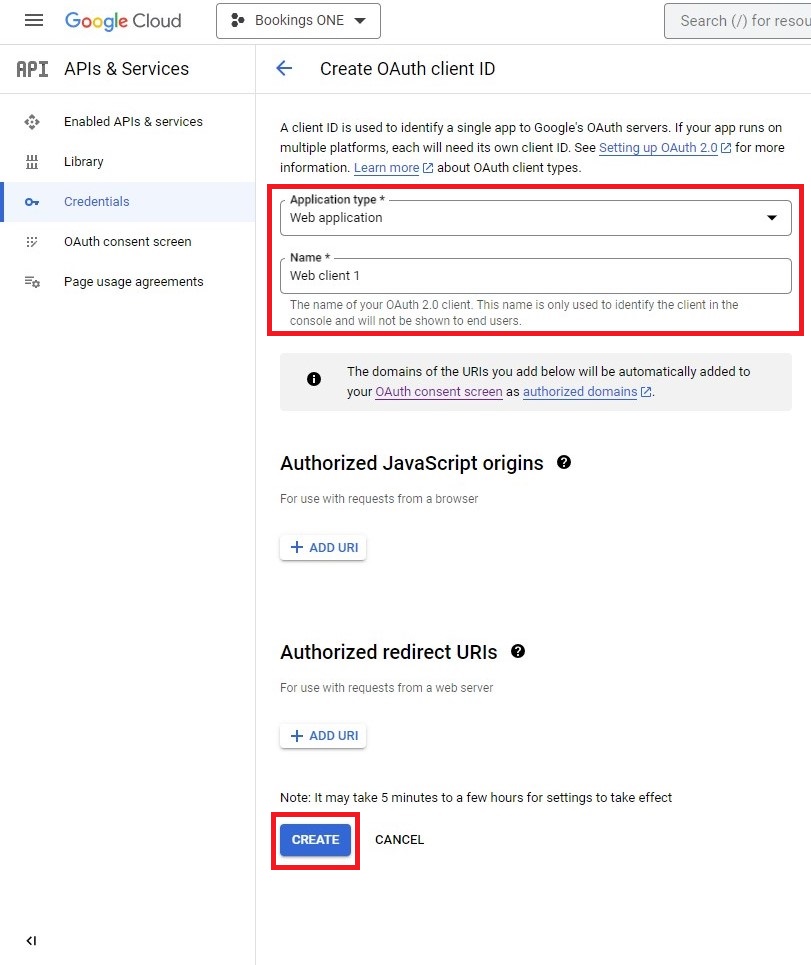
- Copy the
Client IDandClient secret.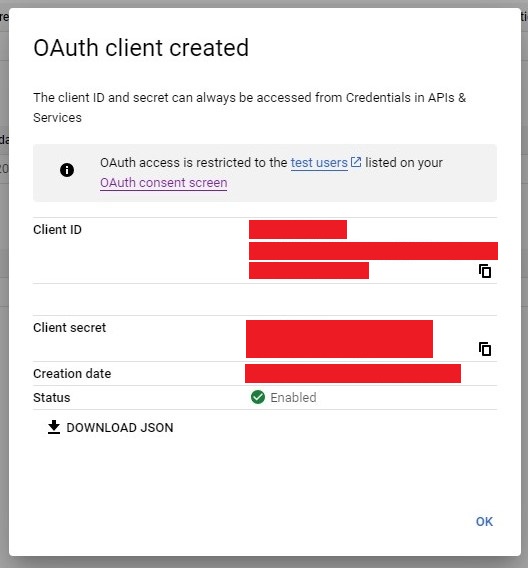
- Go back to Bookings ONE and paste the values to the corresponding fields.
Set Customer ID
- Navigate to Google Admin console.
- Click
Accountand navigate toAccount settings. - Copy the
Customer ID.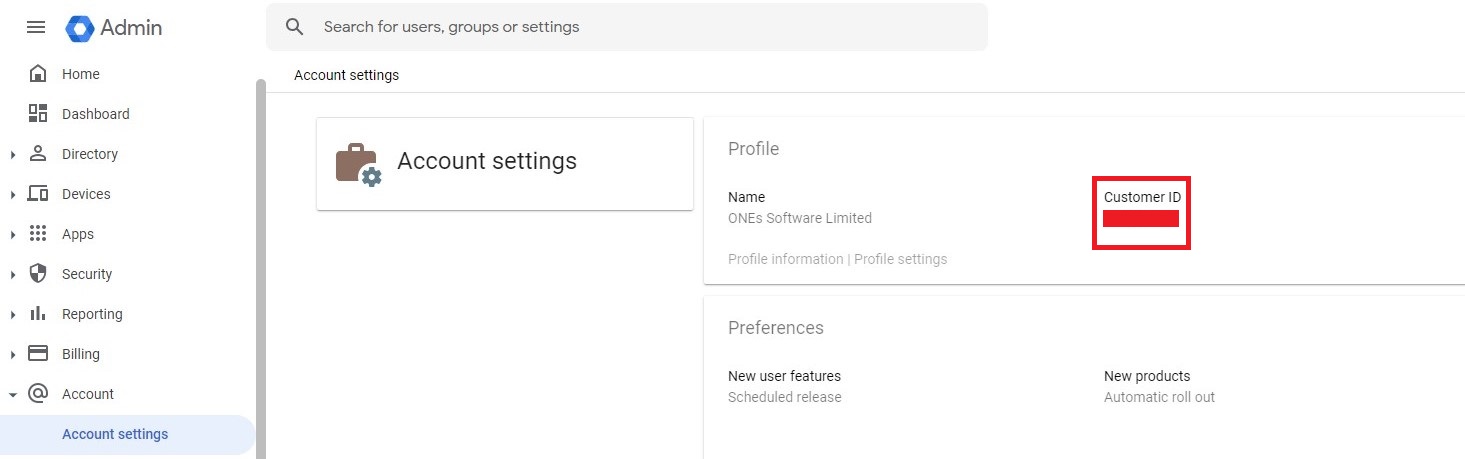
- Go back to Bookings ONE and paste the
Customer IDto theCustomer IDcolumn.
Save and next
- Click
Save and nextto continue once the information is confirmed to be correct.
Room settings
Redirect URI
- Redirect URI is for adding single-sign-on callback-link to Google(Please also add this to the Google Cloud Platform):
- Copy the Redirect URI on the right side of Bookings ONE.
- Navigate to Google Cloud Platform.
- Navigate to
CredentialsofAPIs & Services. - Edit the OAuth 2.0 Client ID.
- Click
ADD URIofAuthorized redirect URIsand paste the Redirect URI to the column.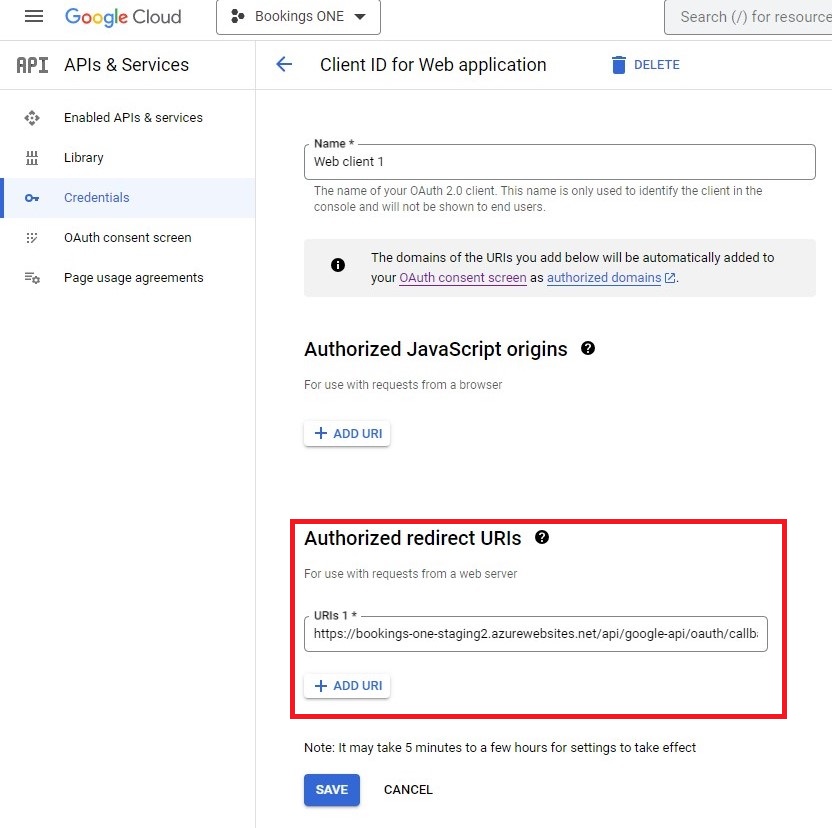
- Click
SAVE.
Add resources calendar to admin account and change the resources settings
- Navigate to Google Calendar and login as admin.
- Click
Settings menuand go toSettings.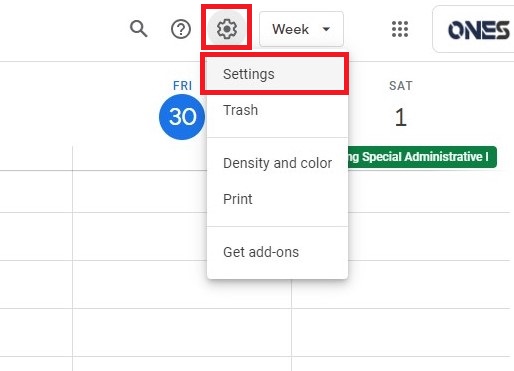
- Click
Add calendarand go toBrowse resources.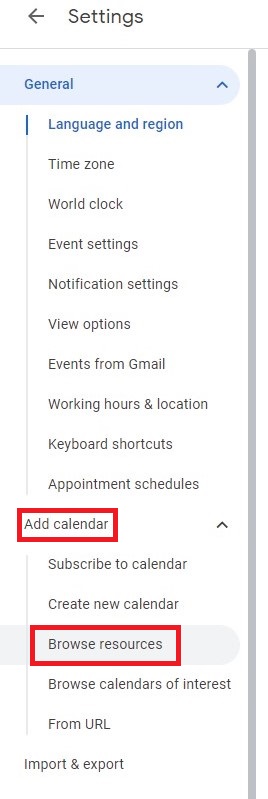
- Select the resources that you want to subscribe.
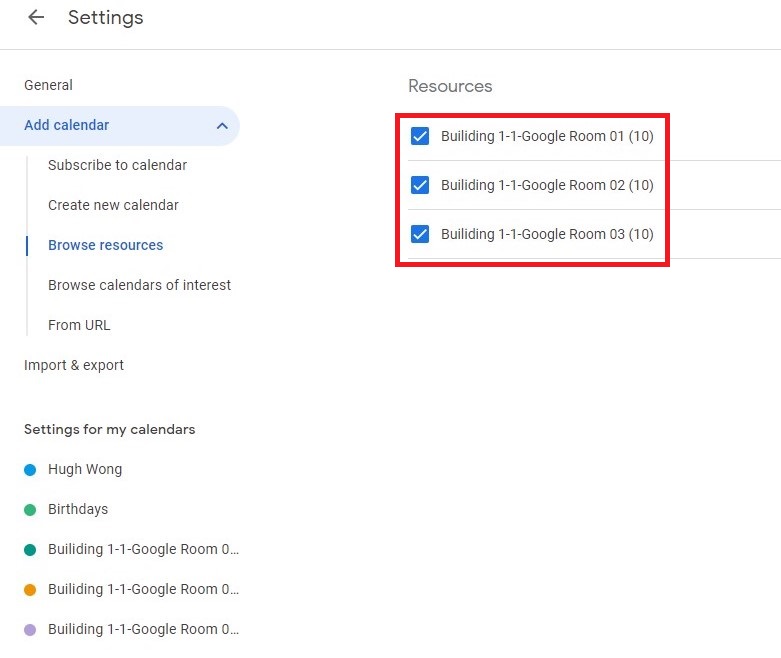
- Navigate to the resources.
- Change the
Time zone.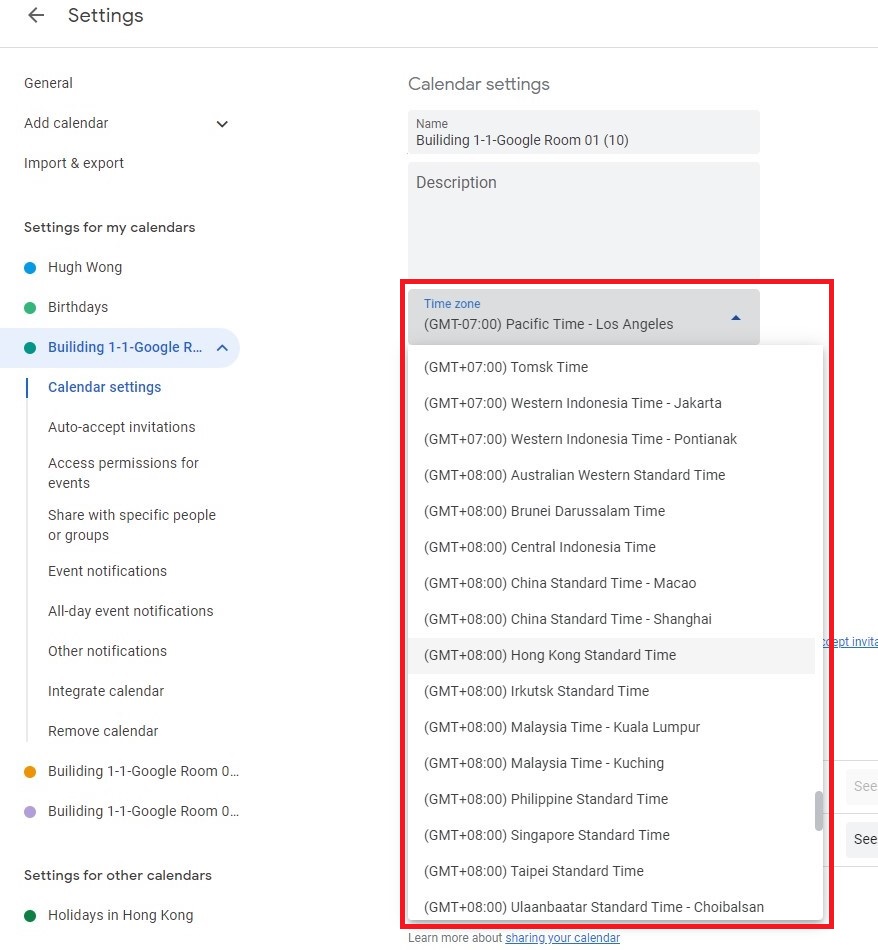
- Go to
Auto-accept invitationsand selectAutomatically add all invitations to this calendar.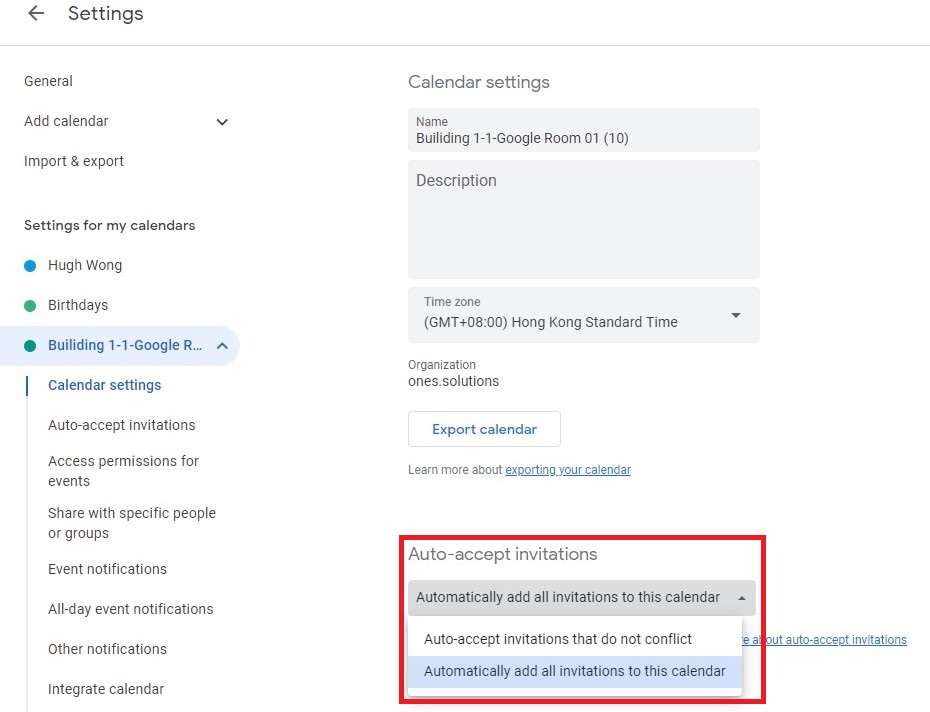
Add delegated account
- Click
Add delegated account. - Select the account that you have subscribed the resources calendar.
- Click
Allow.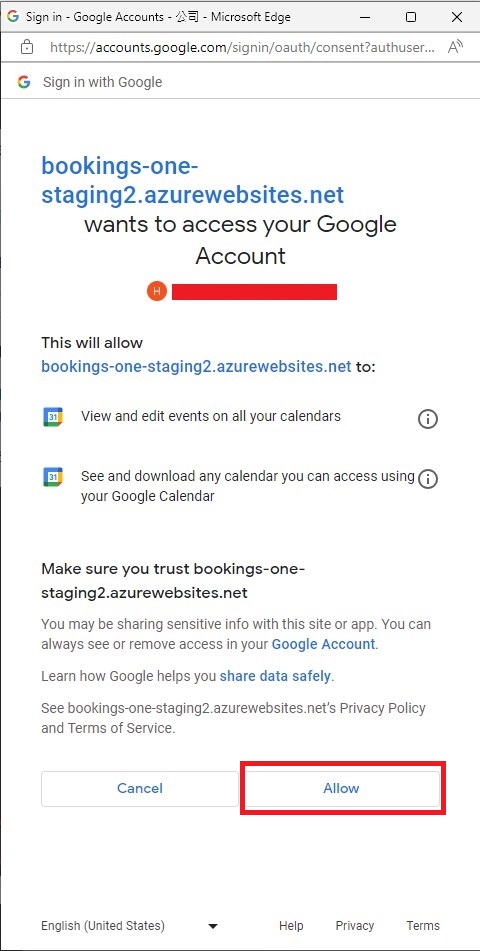
- Input the resource email and click
Add room.
Save and next
- Click
Save and nextto continue once the information is confirmed to be correct.
User settings
Create OAuth 2.0 Client IDs
- Navigate to
CredentialsofAPIs & Services. - Click
CREATE CREDENTIALSand selectOAuth client ID. - Click
Application typeand selectWeb application, and typeName. - Click
CREATEto finish the procedure. - Copy the
Client IDandClient secret. - Go back to Bookings ONE and paste the values to the corresponding fields.
Redirect URI
- Redirect URI is for adding single-sign-on callback-link to Google(Please also add this to the Google Cloud Platform):
- Copy the Redirect URI on the right side of Bookings ONE.
- Navigate to Google Cloud Platform.
- Navigate to
CredentialsofAPIs & Services. - Edit the OAuth 2.0 Client ID.
- Click
ADD URIofAuthorized redirect URIsand paste the Redirect URI to the column. - Click
SAVE.
Others
- You can set the
Login button namein the login page. - Click
Save and close.