Qbic ePaper
This page is about the setting procedure of Qbic ePaper.
Management Console -> Players -> E-paper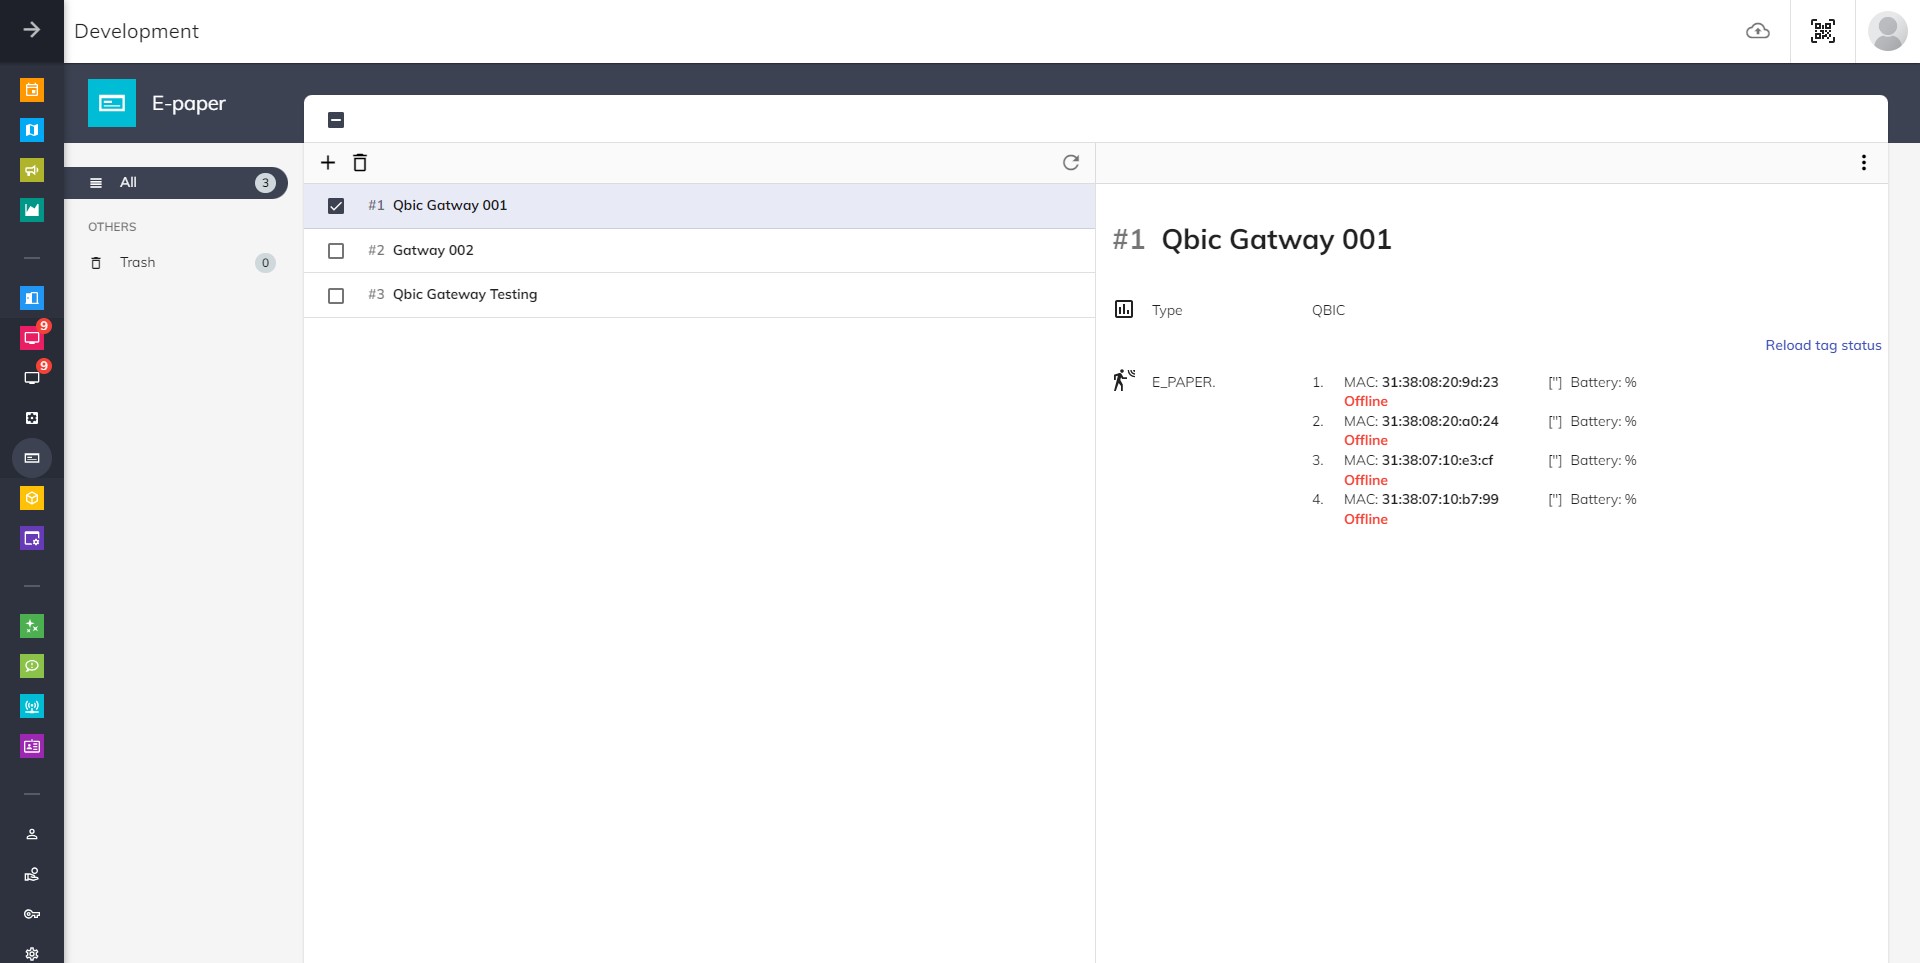
Add E-paper controller
To connect tags, you need to first create an E-paper controller for the BXP-100.
General settings
- Click
Addbutton and select Qbic. - Input a name to identify the controller.
- Select a language. This determines which language the tag will display.
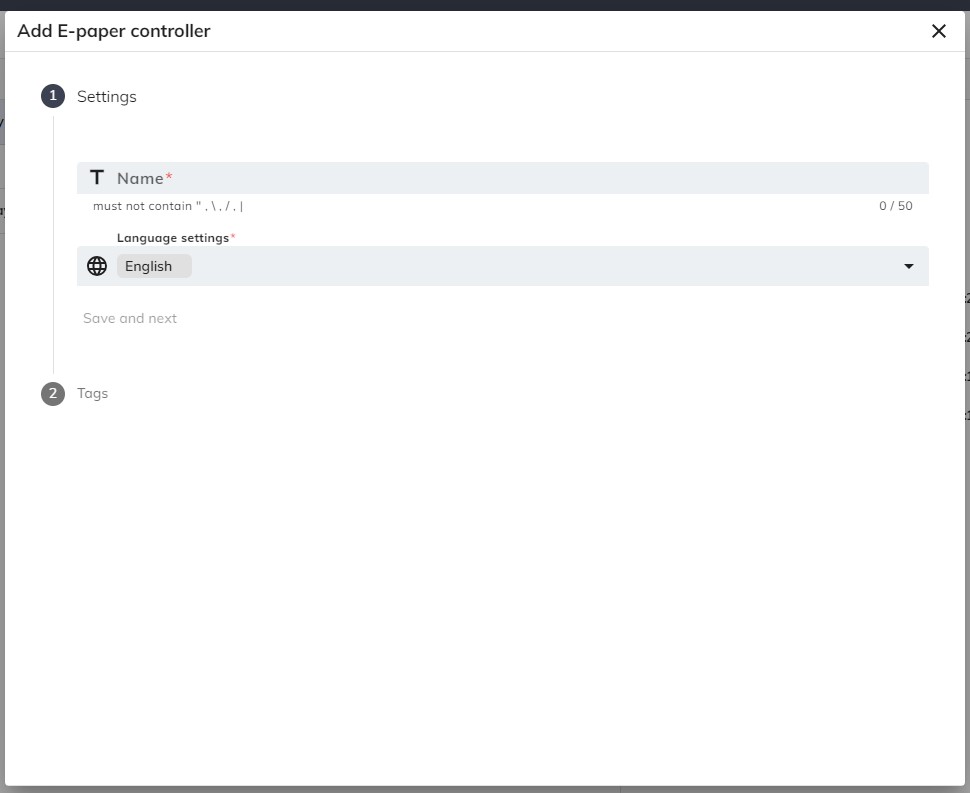
Save and next
- Click
Save and nextto continue once the information is confirmed to be correct.
Tags
- Click
Addbutton to add tag. - Input the MAC address of the tag. To view the MAC address, press the first two side buttons on the tag.
- Set a resource to the tag.
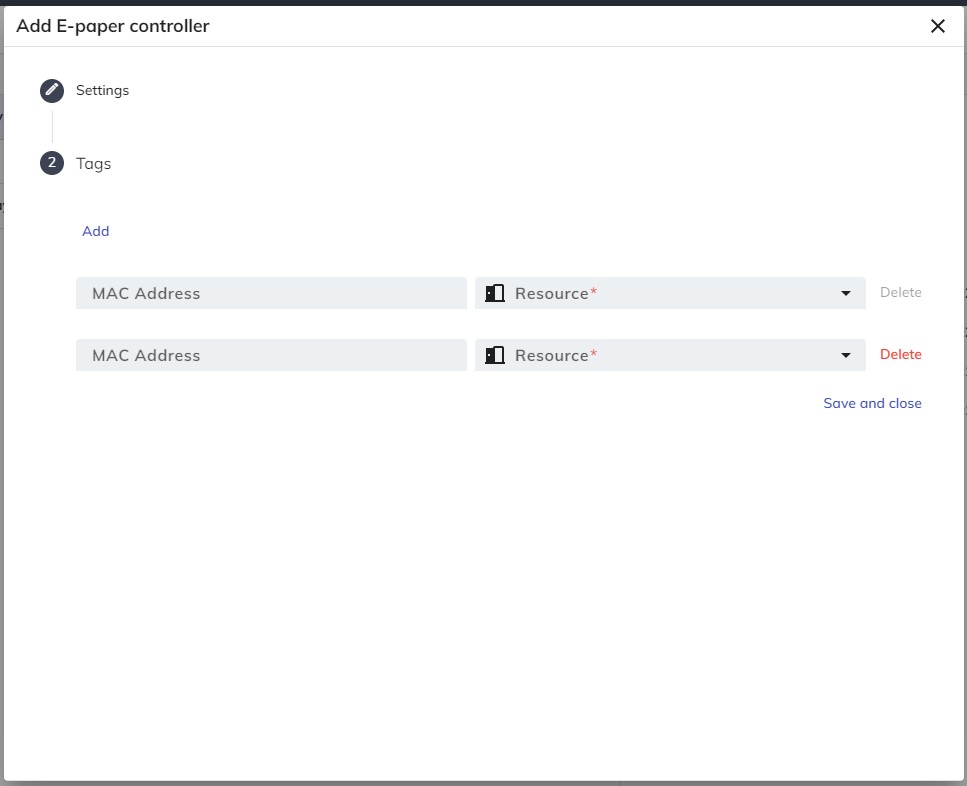
Save and next
- Click
Save and nextto continue once the information is confirmed to be correct.
Apply E-paper controller to BXP-100
Some of the following steps need to be done on the BXP-100.
For first time boot-up
- Go to BXP-100.
- After boot-up the device, set-up the Wifi Networking and timezone in configuration screen on start-up first.
Set-up content
- After turning on the device, in the content field in configuration screen on start-up, enter the server address +
/qbic, e.g.
https://company.bookings.one/qbichttp://192.168.0.100/qbic
- Click
Save and Playbutton, then the device will then enter the Qbic contorller screen and will load Qbic contorller when it start-up.
Get back to setting page
If you want to get to the setting page, please tap the corner until the panel back to the setting page.
Create Access Token
- Go to Management console -> Settings -> API authentication
- Click
Addbutton. - Input a name.
- Click
Savebutton.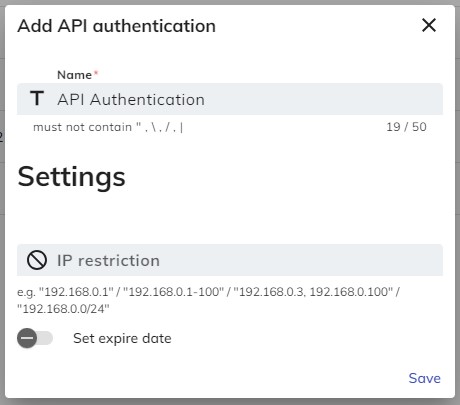
- Click
OKand copy the access token.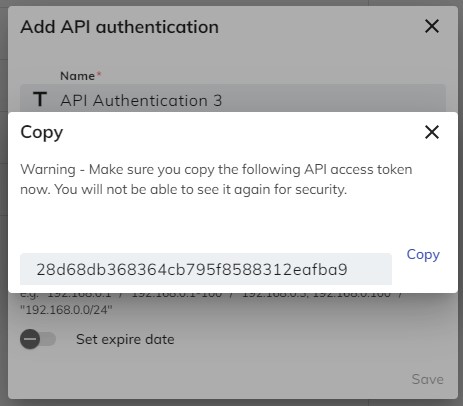
Setup Access Token
- Go to Setting of Qbic controller.
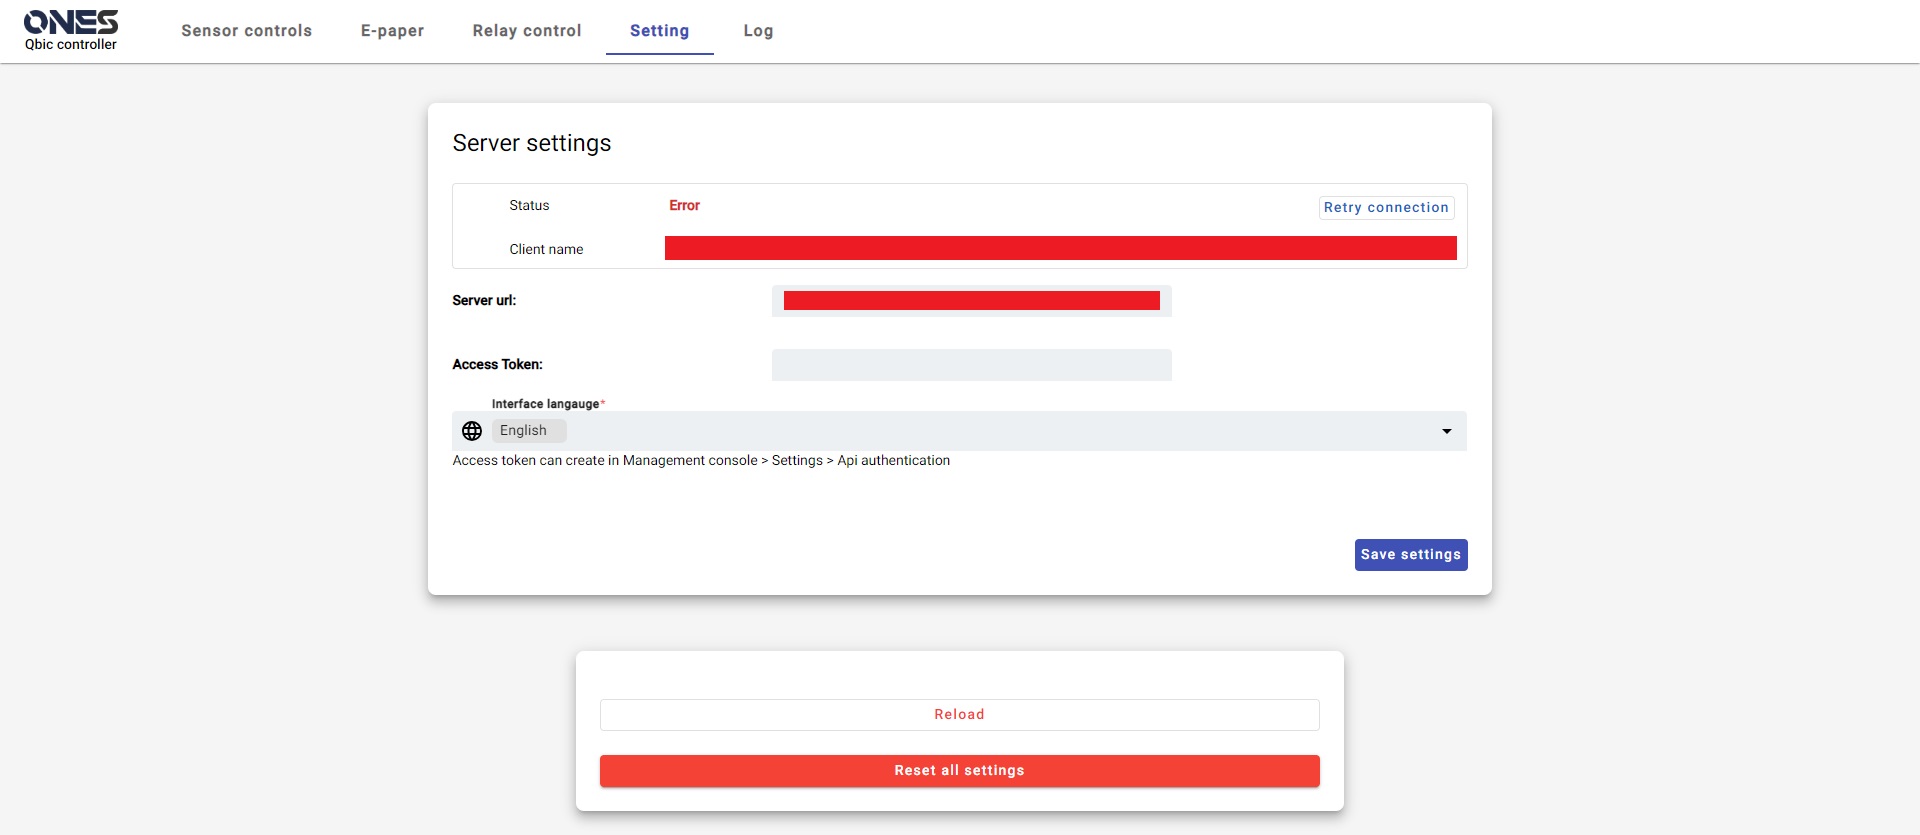
- Input the access token to the Access Token field.
- Click
Save settings
Select E-paper controller
- Go to E-paper.
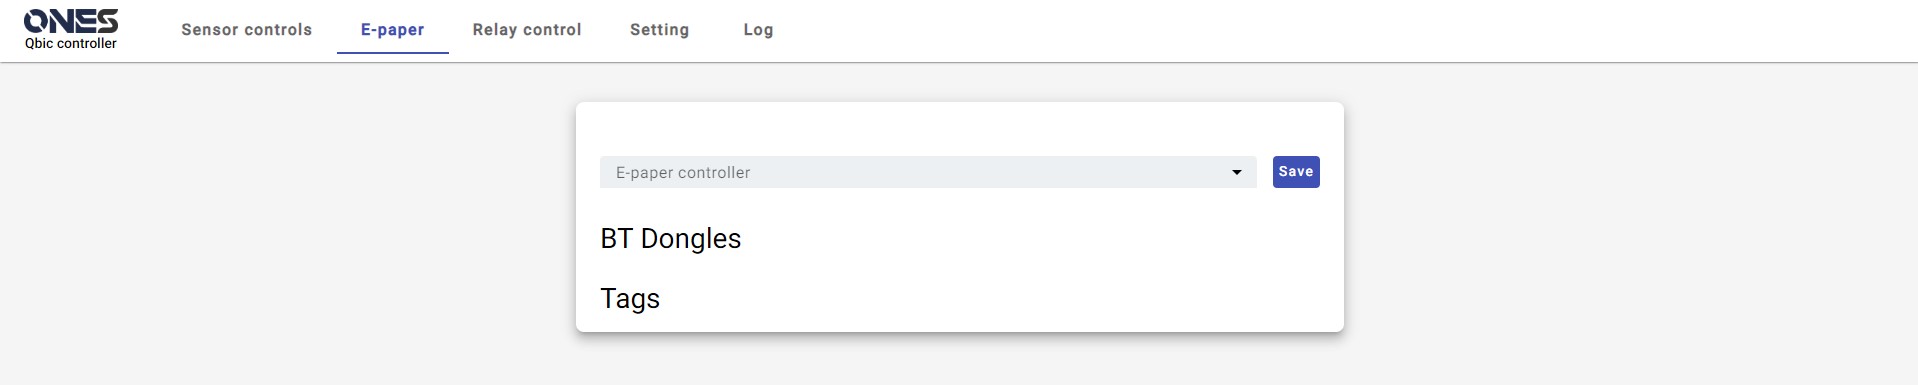
- Select E-paper controller.
- Click
Savebutton - After you success to finish the setup, you will see the below image:
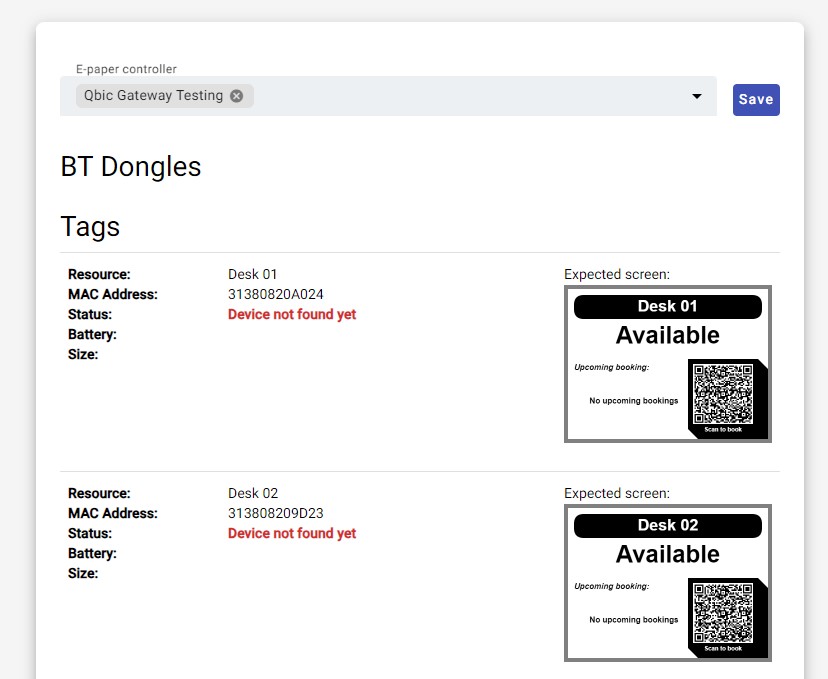
- When the gateway found the device, the will change to "Connected".