Minew ePaper
This page is about the setting procedure of Minew ePaper.
Management Console -> Players -> E-paper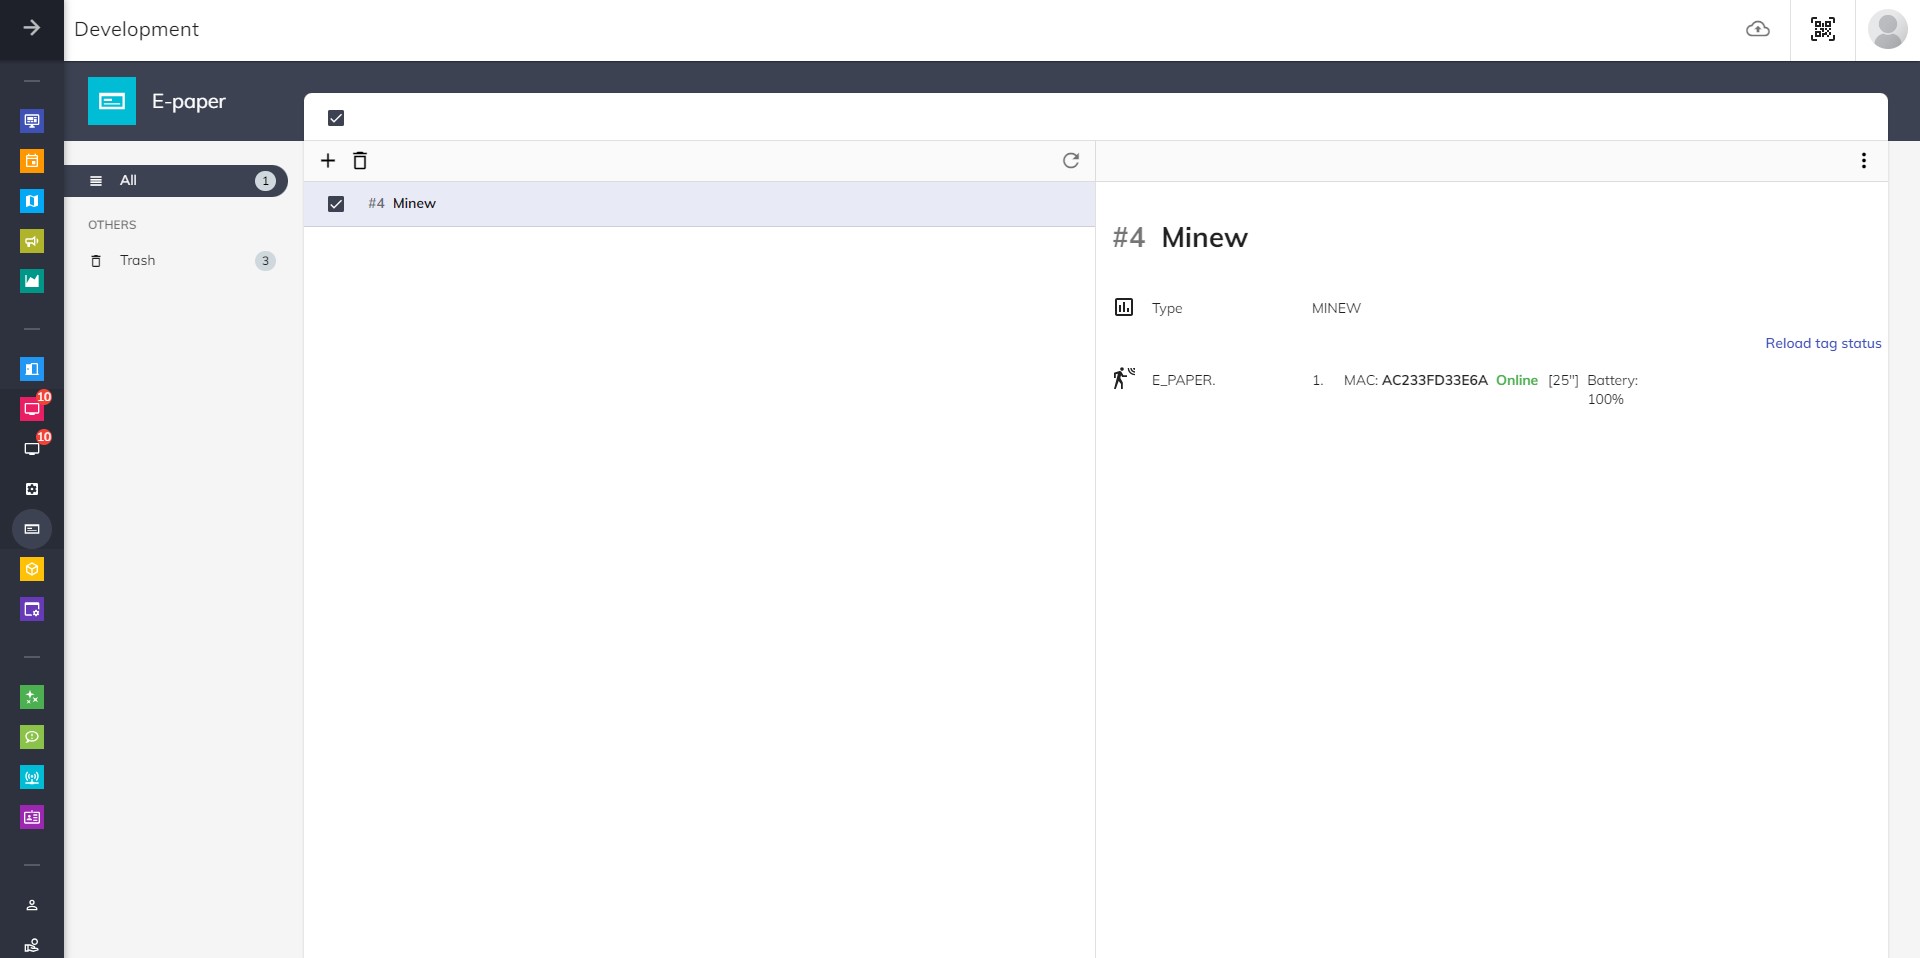
Minew cloud settings
Add Store
- Navigate to Minew cloud.
- Click
Addbutton. - Enter a store no., store name and store address. (These information are just for naming.)
- Click
Confirmto create the store.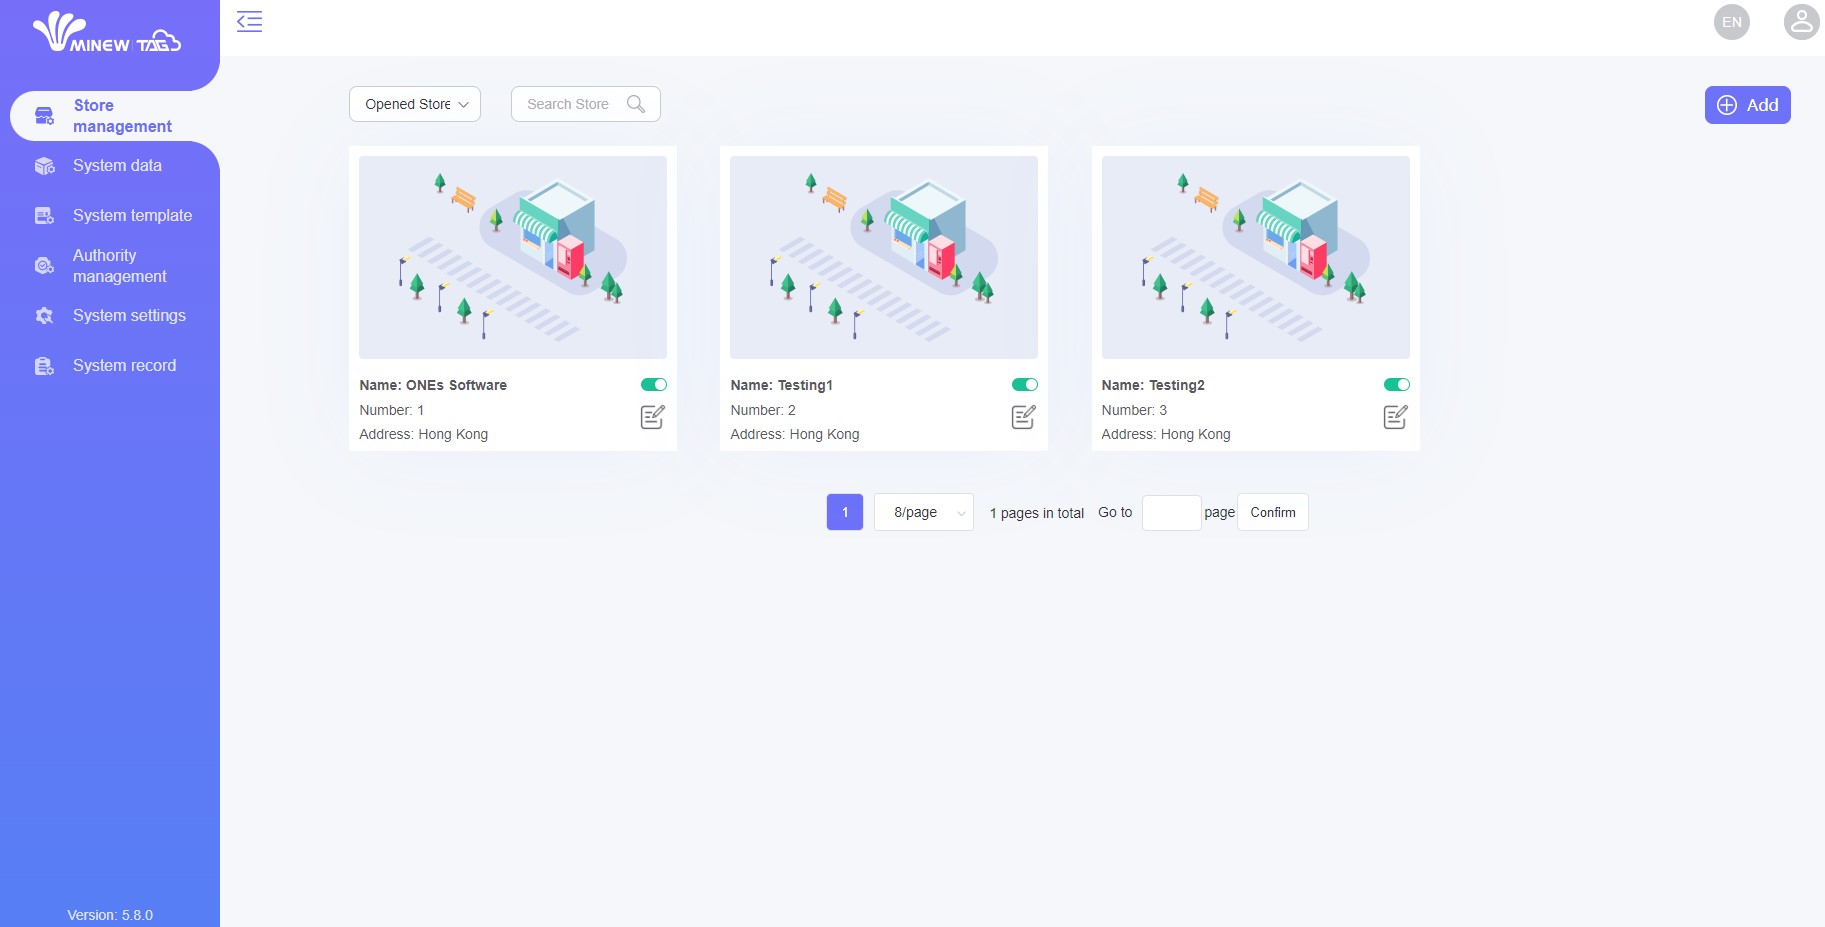
Add Gateway
- Select the store.
- Go to "Gateway management".
- Click
Addbutton. - Input name and mac address.
- Click
Confirmto add a gateway.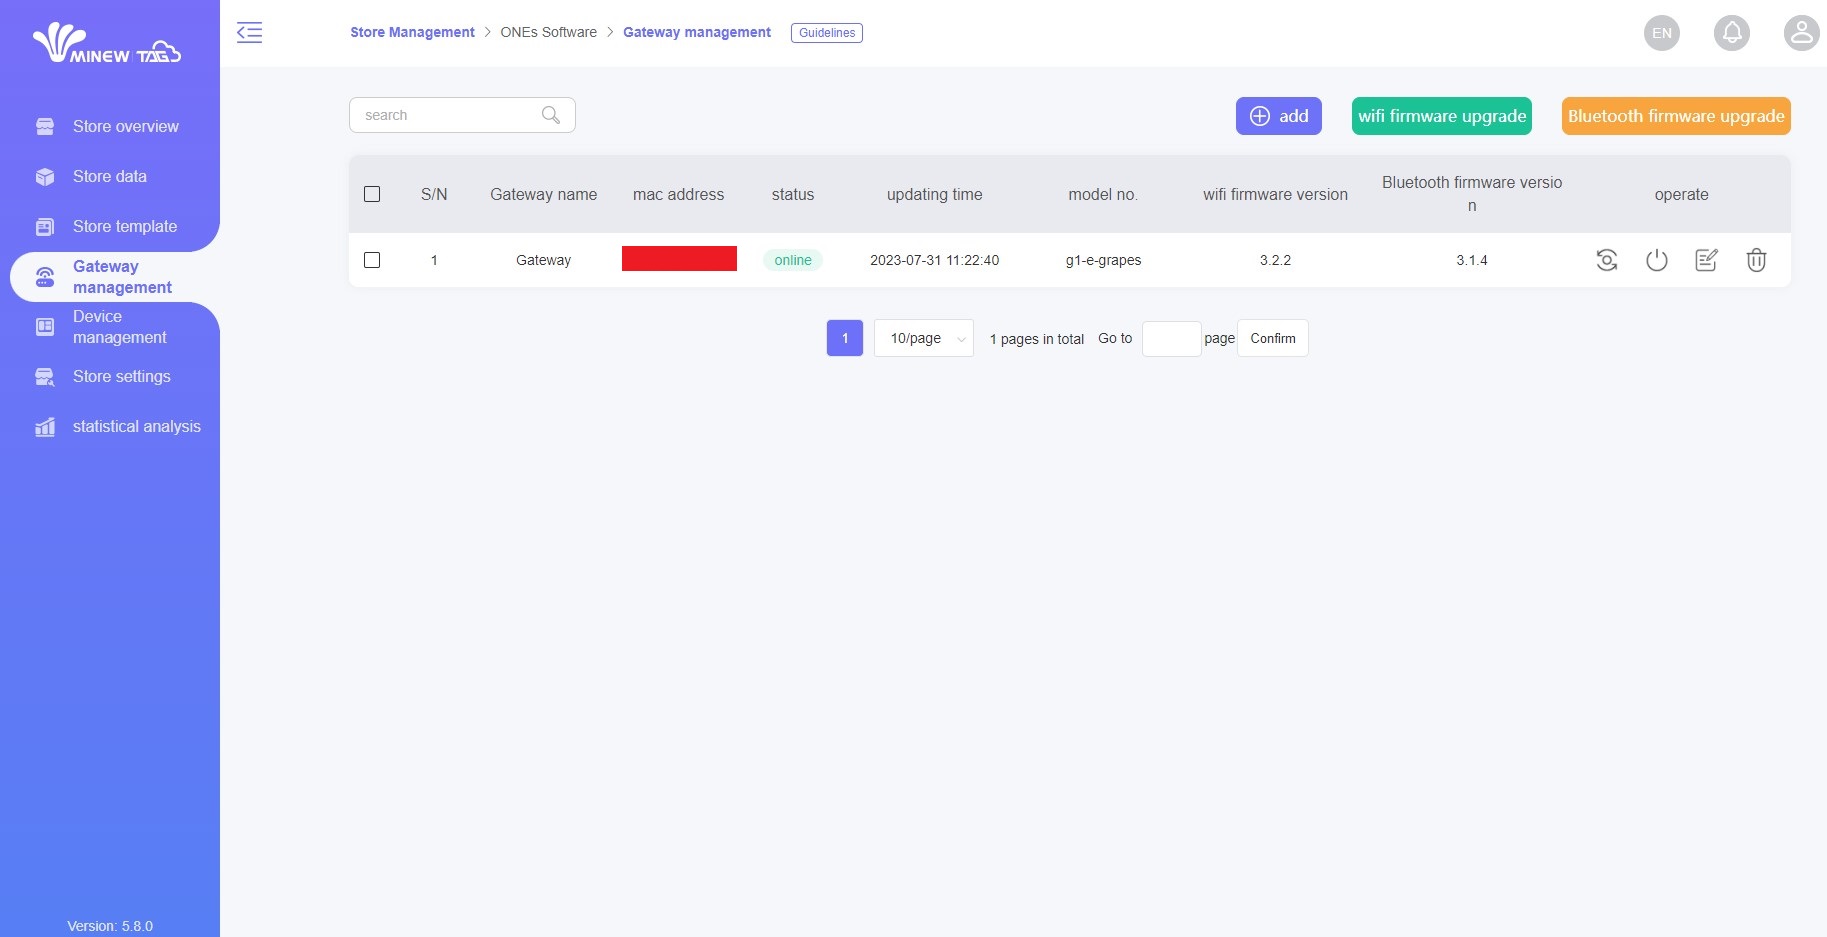
Please refer to the documentation provided by Minew to set up the gateway when it first boots up.
Add E-paper controller
To connect tags, you need to first create an E-paper controller.
General settings
- Click
Addbutton and select Minew. - Input a name to identify the controller.
- Select a language. This determines which language the tag will display.
- Input the server URL. The default server URL is
https://cloud.minewtag.com. - Input the username and password of your Minew account.
- Input your active key of the Minew cloud.
- Select the Store ID. The selection will be displayed after you finish above field.
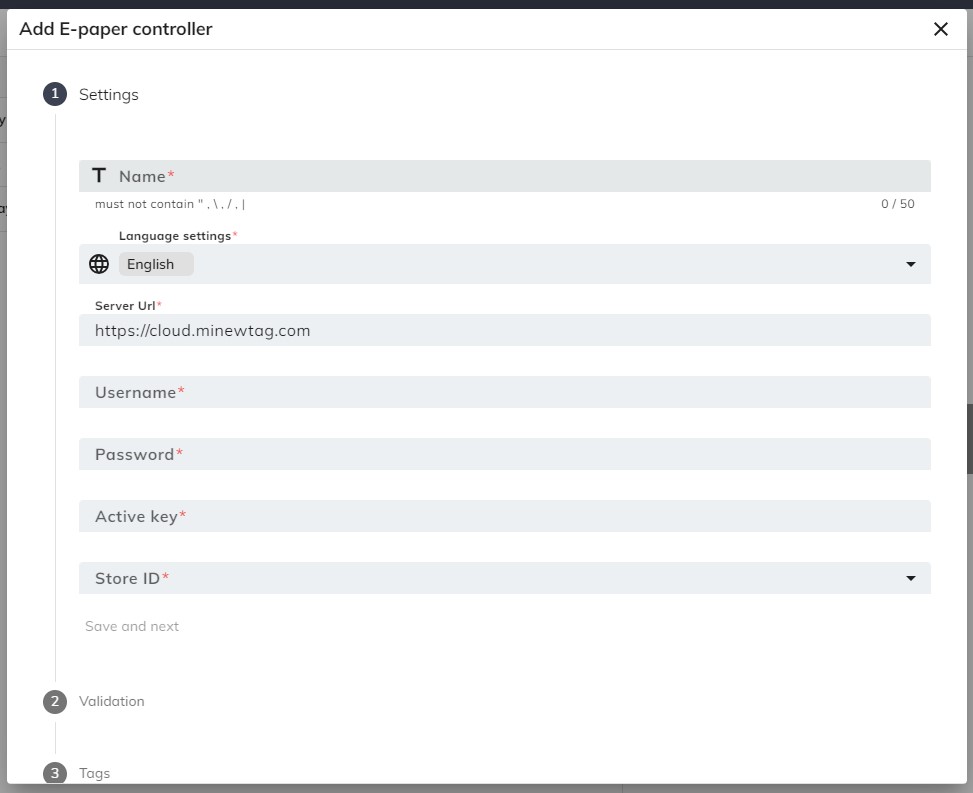
Save and next
- Click
Save and nextto continue once the information is confirmed to be correct.
Create data field
- Navigate to Minew cloud.
- Go to "System settings".
- Click ordinary field and click
Addbutton to add field. - Input the data fields that shows on the Bookings ONE. The data type of ONES_QR_CODE is QR code-qrcode, while the others are pure text. Input the field ID to name column.
- ONES_QR_CODE
- ONES_RES_NAME
- ONES_RES_STAT
- ONES_BOOK_TITLE
- ONES_BOOK_TIME
- ONES_BOOK_ONAME
- ONES_NEXT_ONAME
- ONES_NEXT_TIME
- ONES_NEXT_TITLE
- Click
Confirmbutton to finish the setting.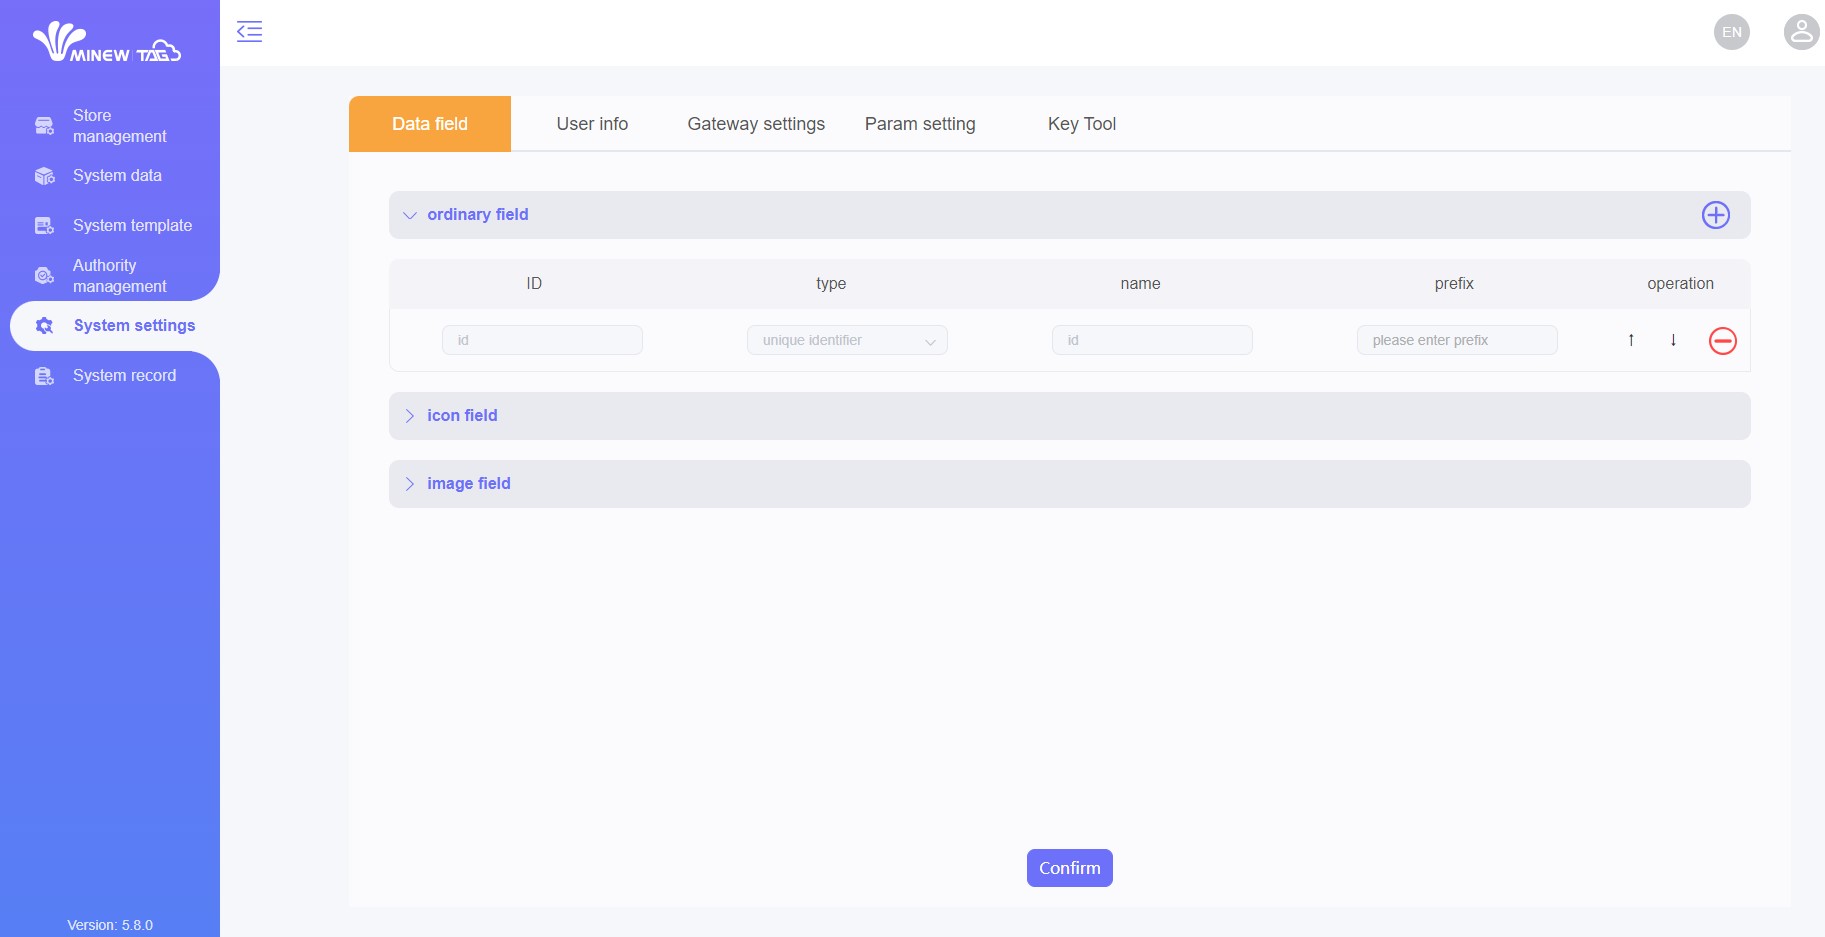
Please finish creating the data field first before you start importing the template.
Import template
- Download the template on Bookings ONE.
- Navigate to Minew cloud.
- Go to "System template".
- Click
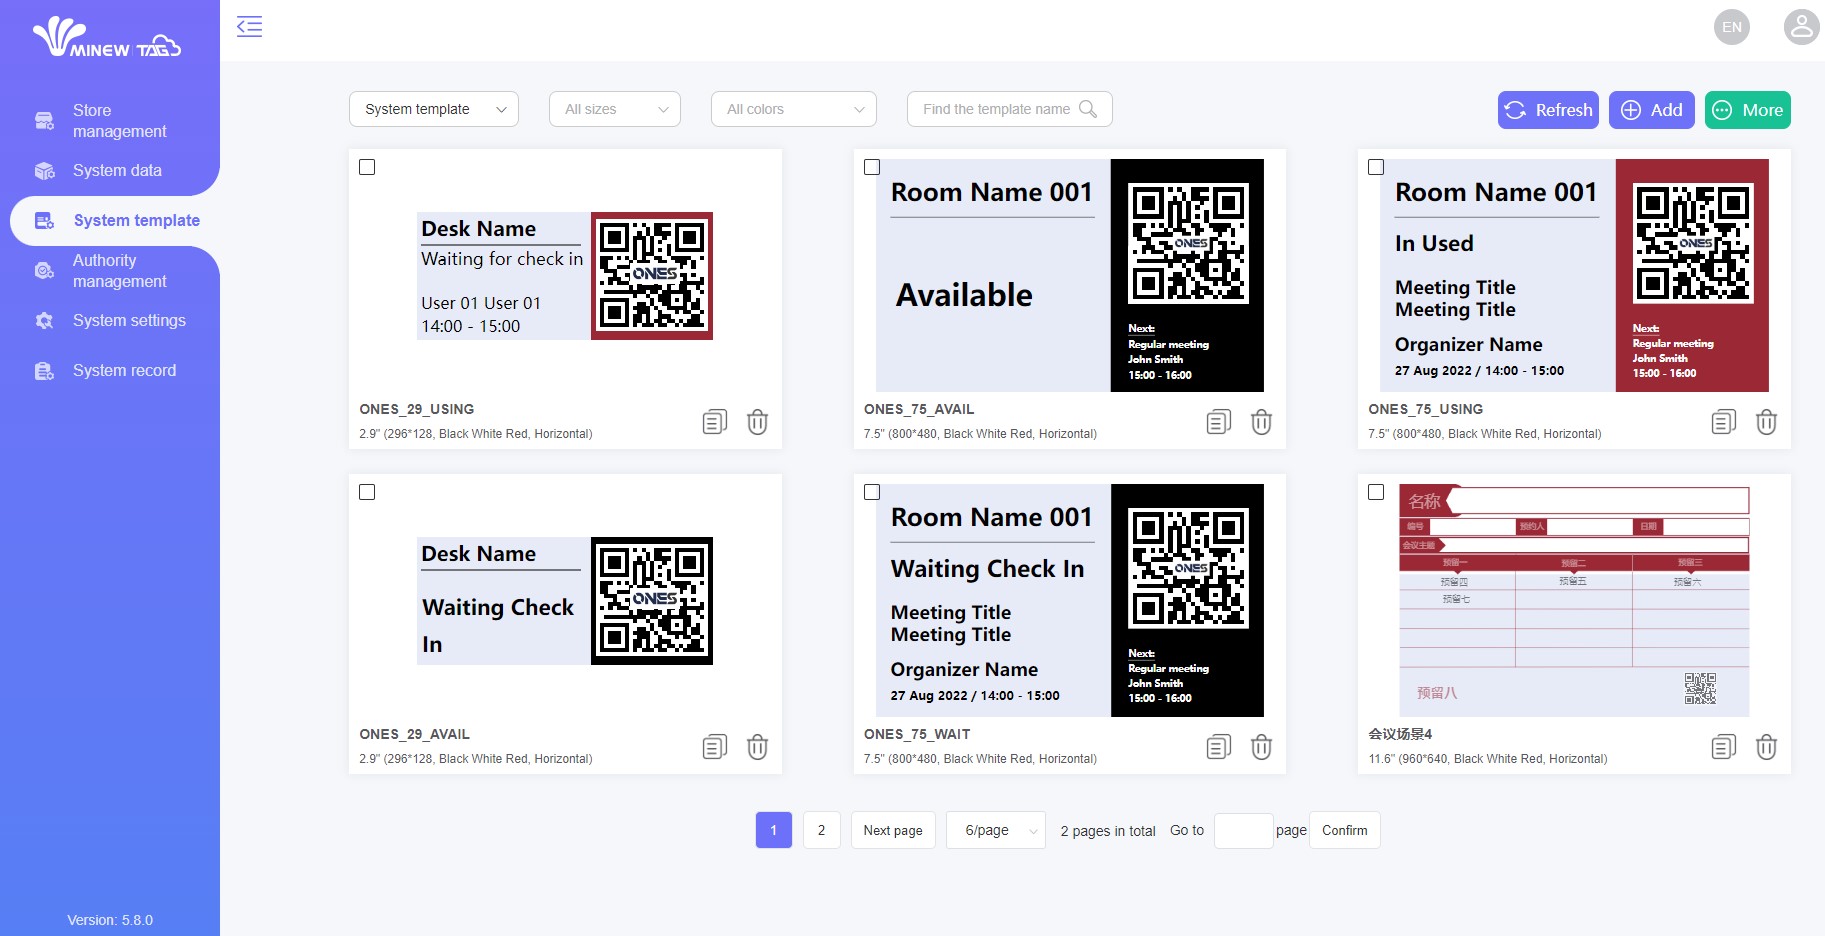
More, then selectBatch import. - Choose Minew_ONES_Templates.xls to import.
- After you success to import the template, it will shows like the below image:
- Back to Bookings ONE and click
Checkto confirm the template is imported.
Next
- After you success to set above settings, it will shows like the below image:
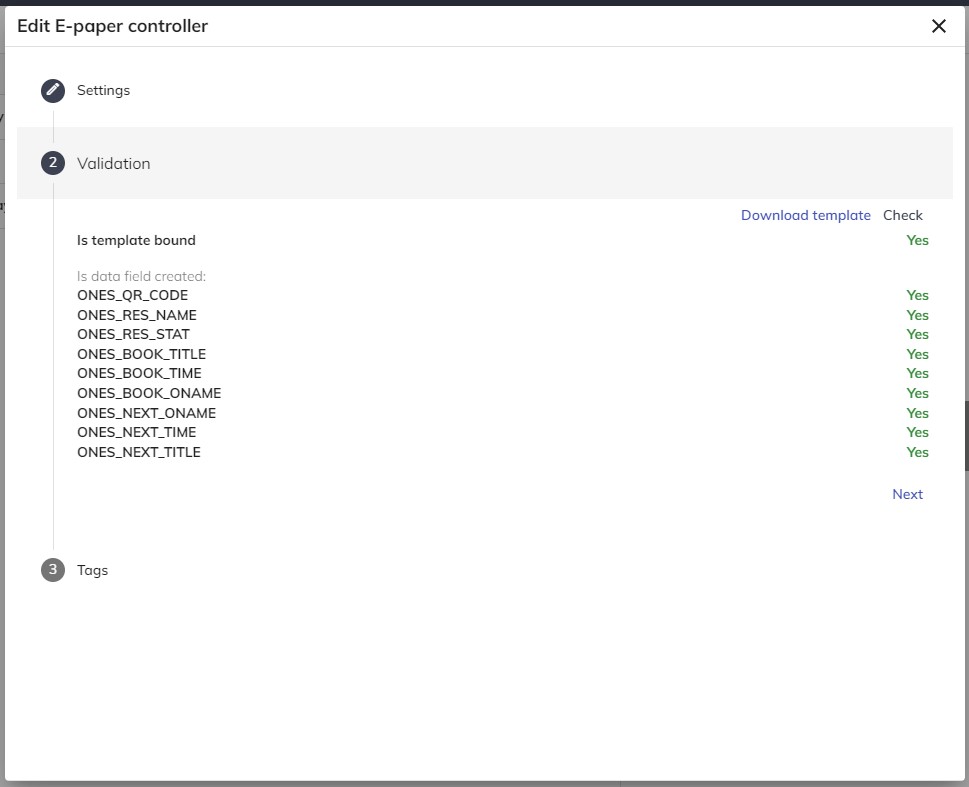
- Click
Nextto continue once you finished above settings.
Add Tags
- Click
Addbutton to add tags. - Input
MAC Address. - Select resources.
Save and close
- Click
Save and closeto continue once the information is confirmed to be correct.
Wake up the Tags
- Navigate to Minew cloud.
- Select a store.
- Go to "Device management".
- Select all tags.
- Click
Moreand clickwake up.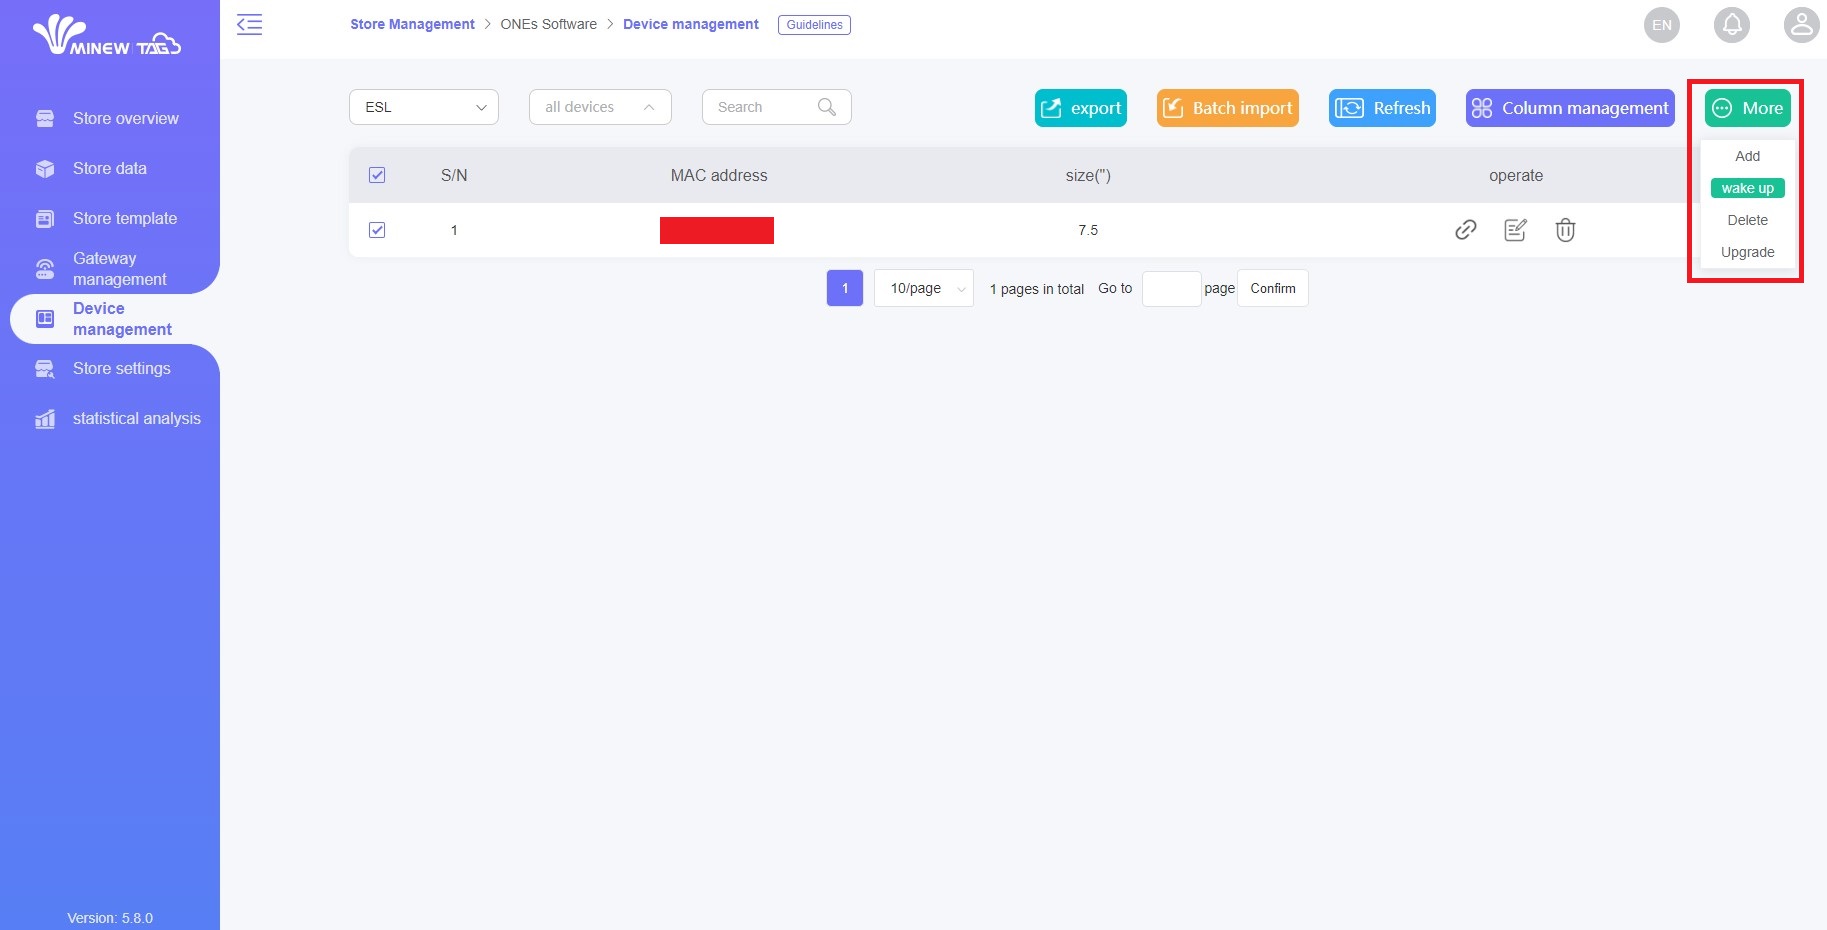
- Click
Confirmbutton.