Active Directory (單點登錄)
本節將介紹如何與 Active Directory 整合以實現單點登錄的步驟。 基於以下整合步驟,用戶可以:
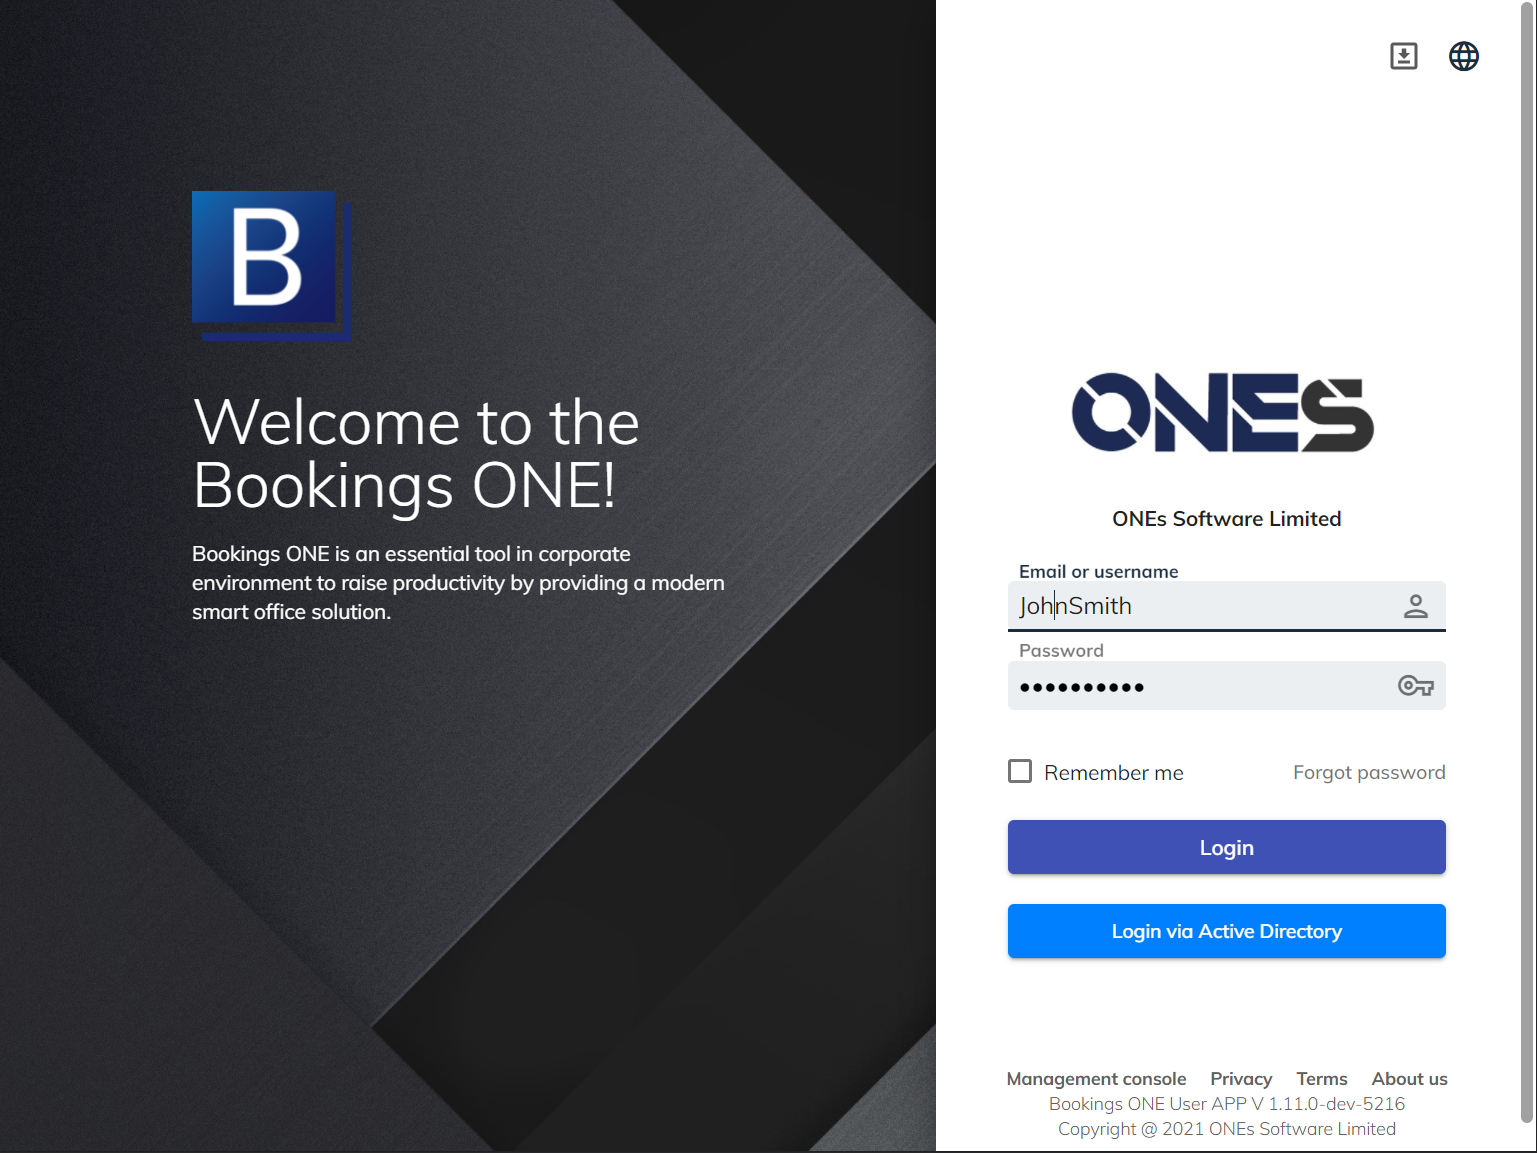
- 用戶可以對Bookings ONE 系統執行單點登錄
- 只有在用戶第一次登錄時才會自動創建用戶帳戶,同時會授予
用戶權限
⚠️ 以下設定不會將所有用戶同步到系統中,每個用戶帳戶只有在用戶第一次登錄系統時才會自動創建。 如果您想先將所有用戶預加載到系統中,請參考 Active Directory with LDAP User Synchronization
網絡連接
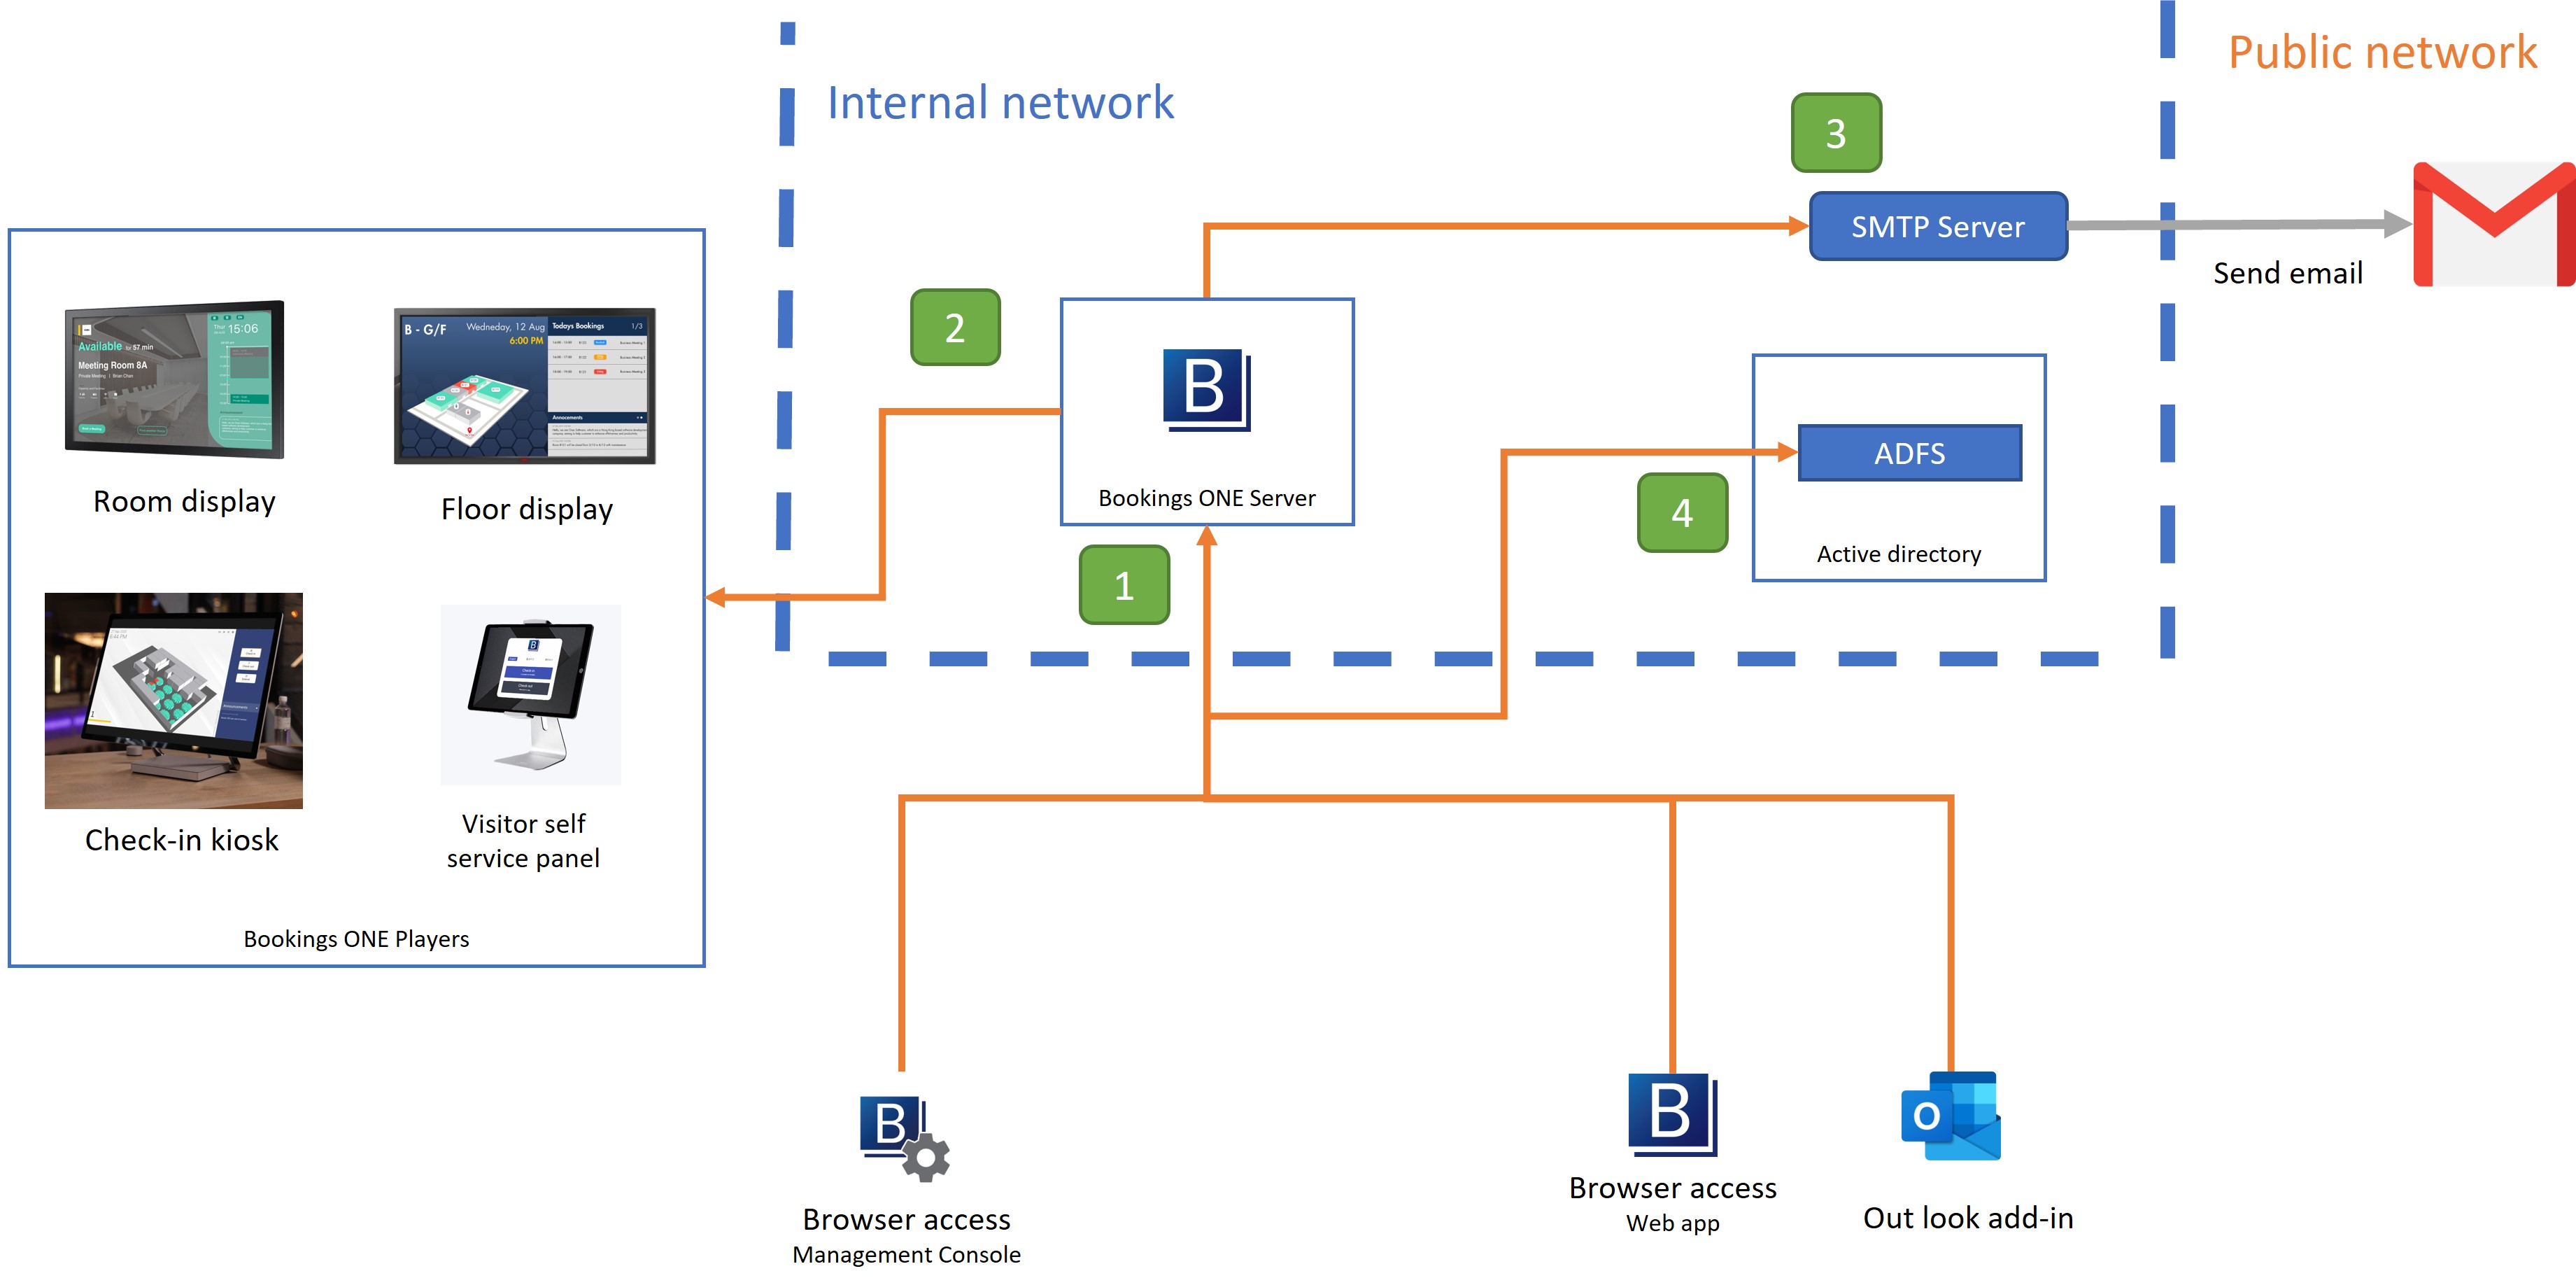
由 用戶APP, Outlook插件, 管理頁面 去到 Bookings ONE伺服器
- 打開 Bookings ONE 的 WebApps。
- 通訊埠:
TCP 443
由 Bookings ONE伺服器 去到 Bookings ONE播放器
- 給房間播放器、樓層播放器等,連接伺服器接收信號,Bookings ONE伺服器可以通過
https和wss協議實時更新數據。 - 通訊埠:
TCP 443
- 給房間播放器、樓層播放器等,連接伺服器接收信號,Bookings ONE伺服器可以通過
由 Bookings ONE伺服器 去到 SMTP伺服器
- 用於通過 SMTP 伺服器發送電子郵件,將電子郵件發送到接收方。
- 通訊埠:
TCP 25, 465, or 587(depend on the SMTP伺服器 setting)
由 用戶APP, Outlook插件, 管理頁面 to the ADFS
- Active Directory Federation Services(ADFS) 的單點登錄
- 通訊埠:
TCP 443
步驟
前提條件
- 微軟 Active Directory / Azure AD
- 配置 ADFS / Azure Active Directory。 請參考 ADFS 設定指南 和 AzureAD 設定指南
- 打開
Bookings ONE 管理頁面 - 選擇
Settings > External Integration - 點擊
New external integration +, 選擇Active Directory (Single sign on) - 填寫Metadata address和WtRealM
- 對於 Exchange Server
- 在 metadata address, 填寫 follow address
https://{您的active directory地址}/FederationMetadata/2007-06/FederationMetadata.xml - 在 Wt RealM, 填寫 the for WS-Federation Passive protocol app's URL configured in active directory
- 在 metadata address, 填寫 follow address
- 對於 Office 365
- 在 metadata address, 填寫 WS-Federation middleware's MetadataAddress
- 在 Wt RealM, 填寫 the Application ID URI
- (可選)填寫登錄點擊鈕名稱,如果留空則顯示
Login via Active directory - 點擊
保存點擊鈕. - 設定從 ADFS 整合到 Azure 的重定向 URI。 請參考 ADFS 設定指南.
- 現在用戶可以在登錄頁面單點登錄
如何隱藏登錄頁面中的默認登錄字段和點擊鈕
默認登錄字段和點擊鈕供用戶通過系統本地帳戶登錄。 如果您使用的系統沒有任何本地用戶帳戶,或者您不希望用戶通過本地帳戶登錄,您可以點擊照管理頁面中的步驟隱藏這些字段:
- 導航到
設定> 一般設定 - 選擇
隱藏用戶App基本登入 - 點擊
更新點擊鈕