Office 365
How to add app registration to Office 365
Navigate to the AAD tenant's app registrations blade. Click
New application registration: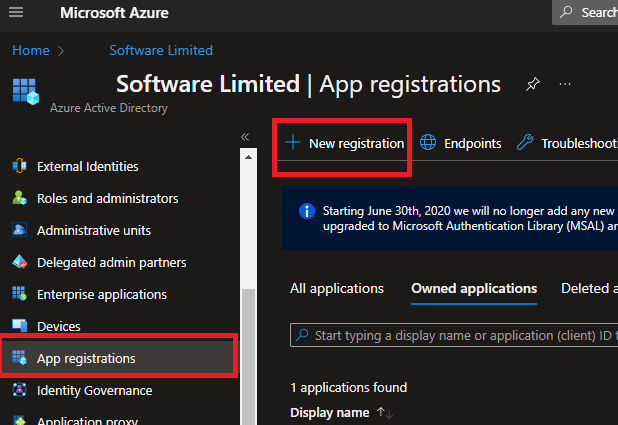
Enter a name for the app registration. This is not important to the Bookings ONE.
After created, go to
Certificates & Secretsselect
Client secrets, and clickNew Client secret.Typing a name (e.g. Bookings ONE Integration) for the client secret, and select the expire time base on your performance
Expire time & renew client secretFor restriction of Office 365 for security. The expire time are limited to 2 years in maximum. Before the client secret expire, you need to create a new client secret for it and update the client secret in Bookings ONE
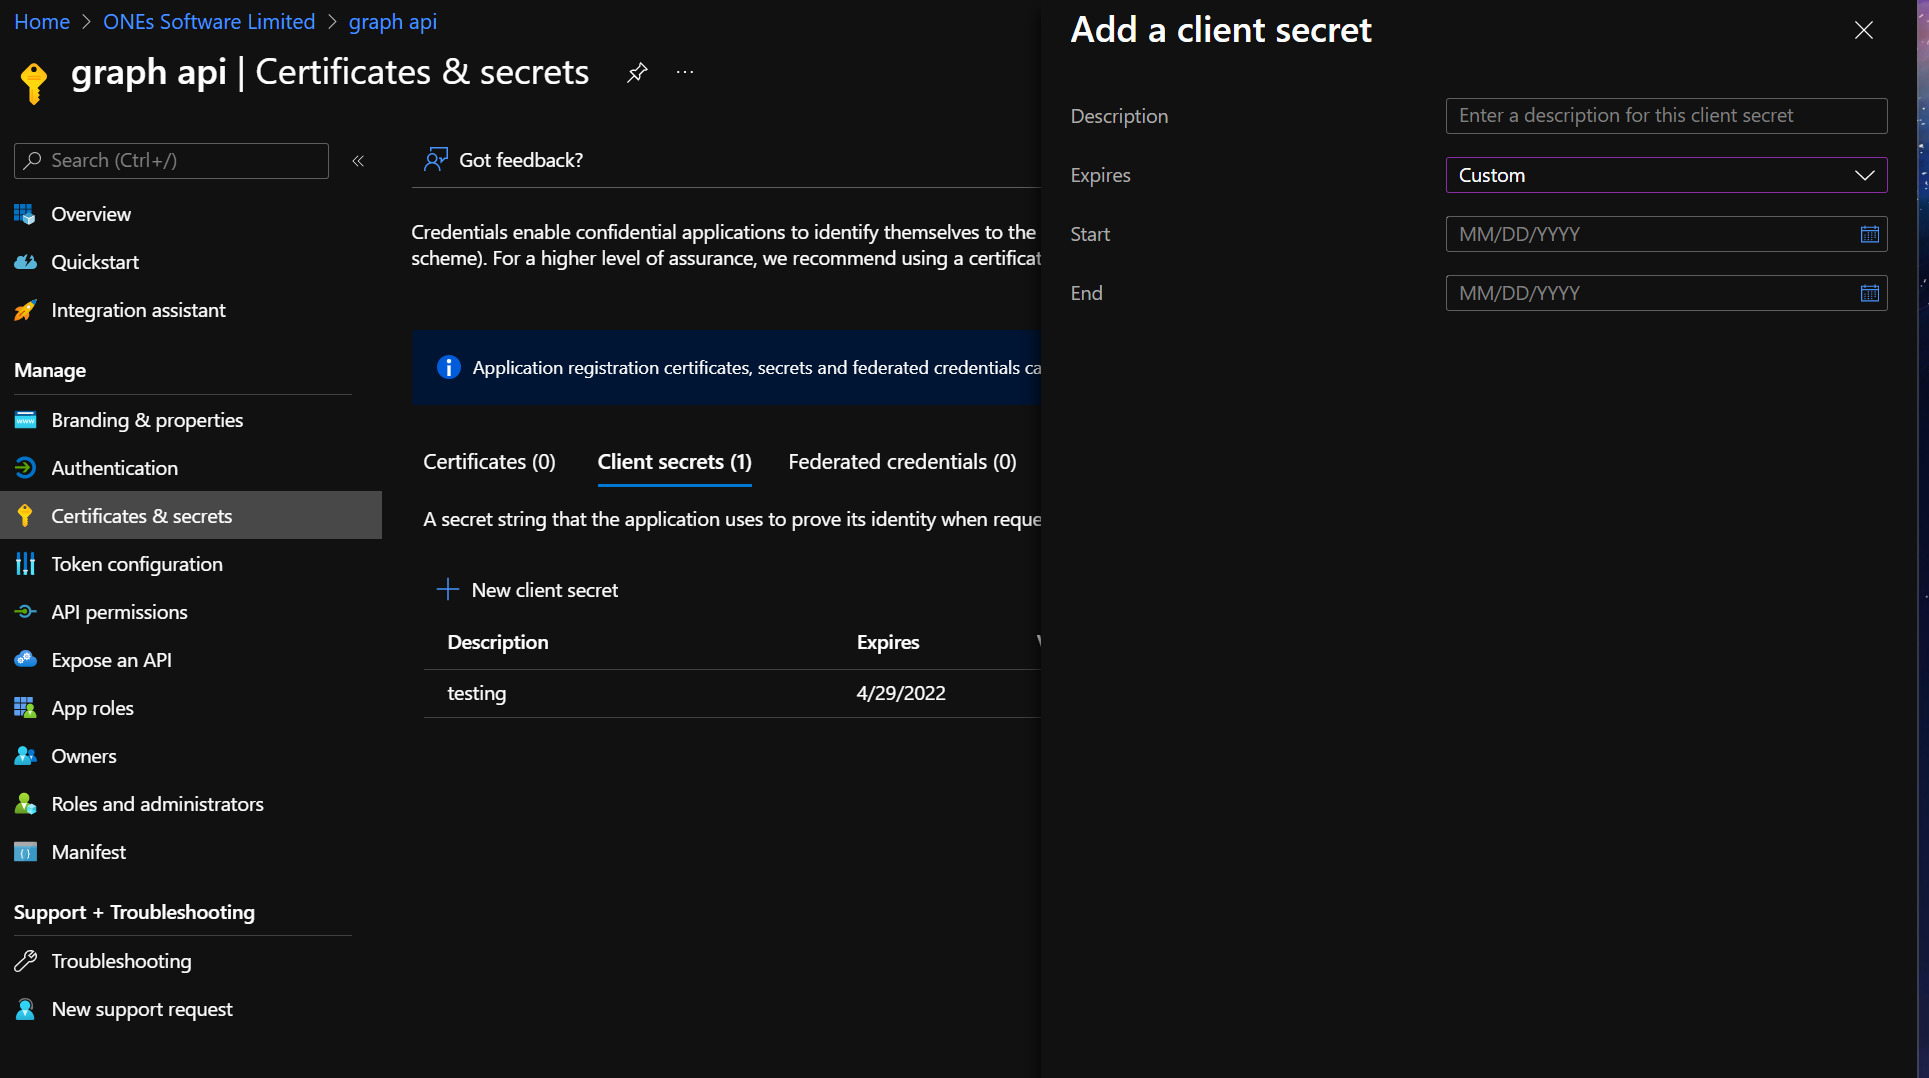
Click the Add button, and you will get the
Client secret警告Client secret will only show once, you have to copy it at this moment. If you lost it, you may create a new client secret

Go to
Authentication, inSupported account types, selectAccounts in any organizational directory(Any Azure AD Directory - Multitenant, and click Save button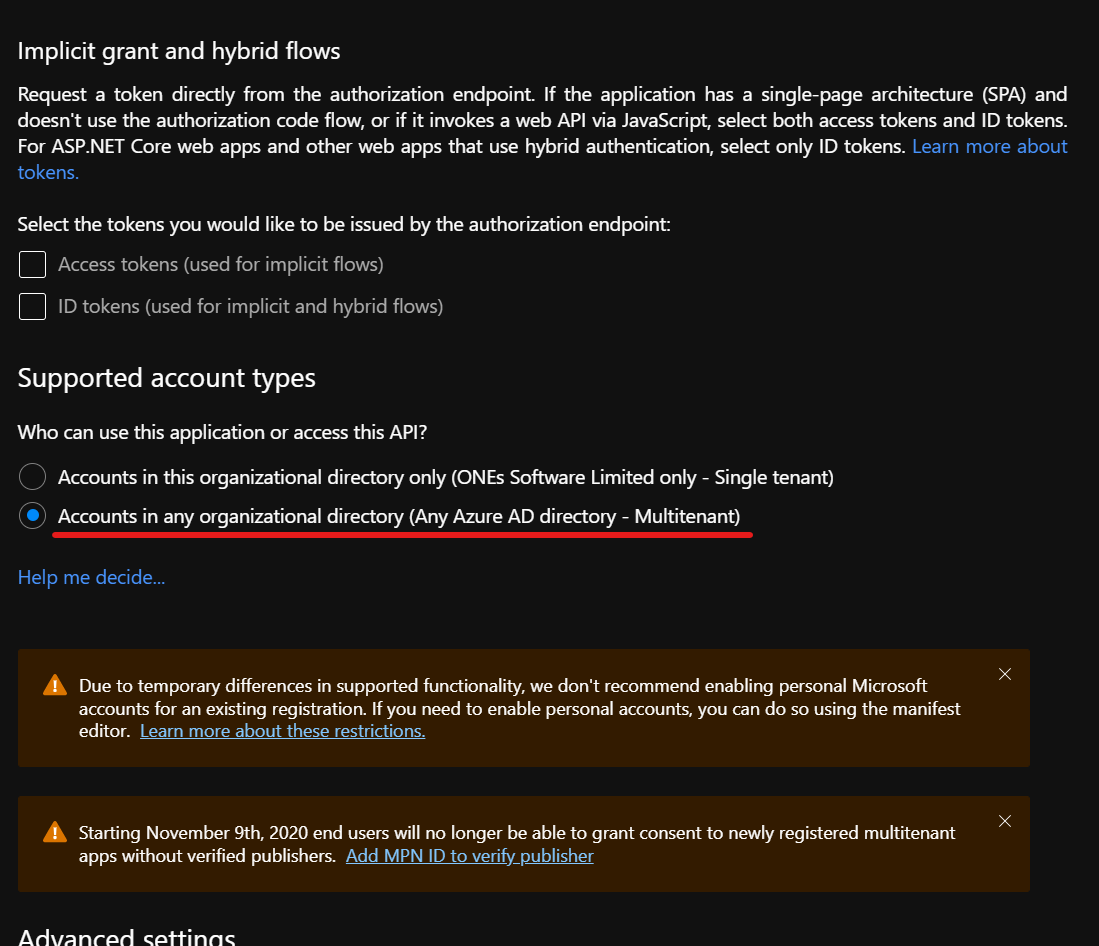
Go to
API Permissions, clickAdd a permission, selectMicrosoft Graph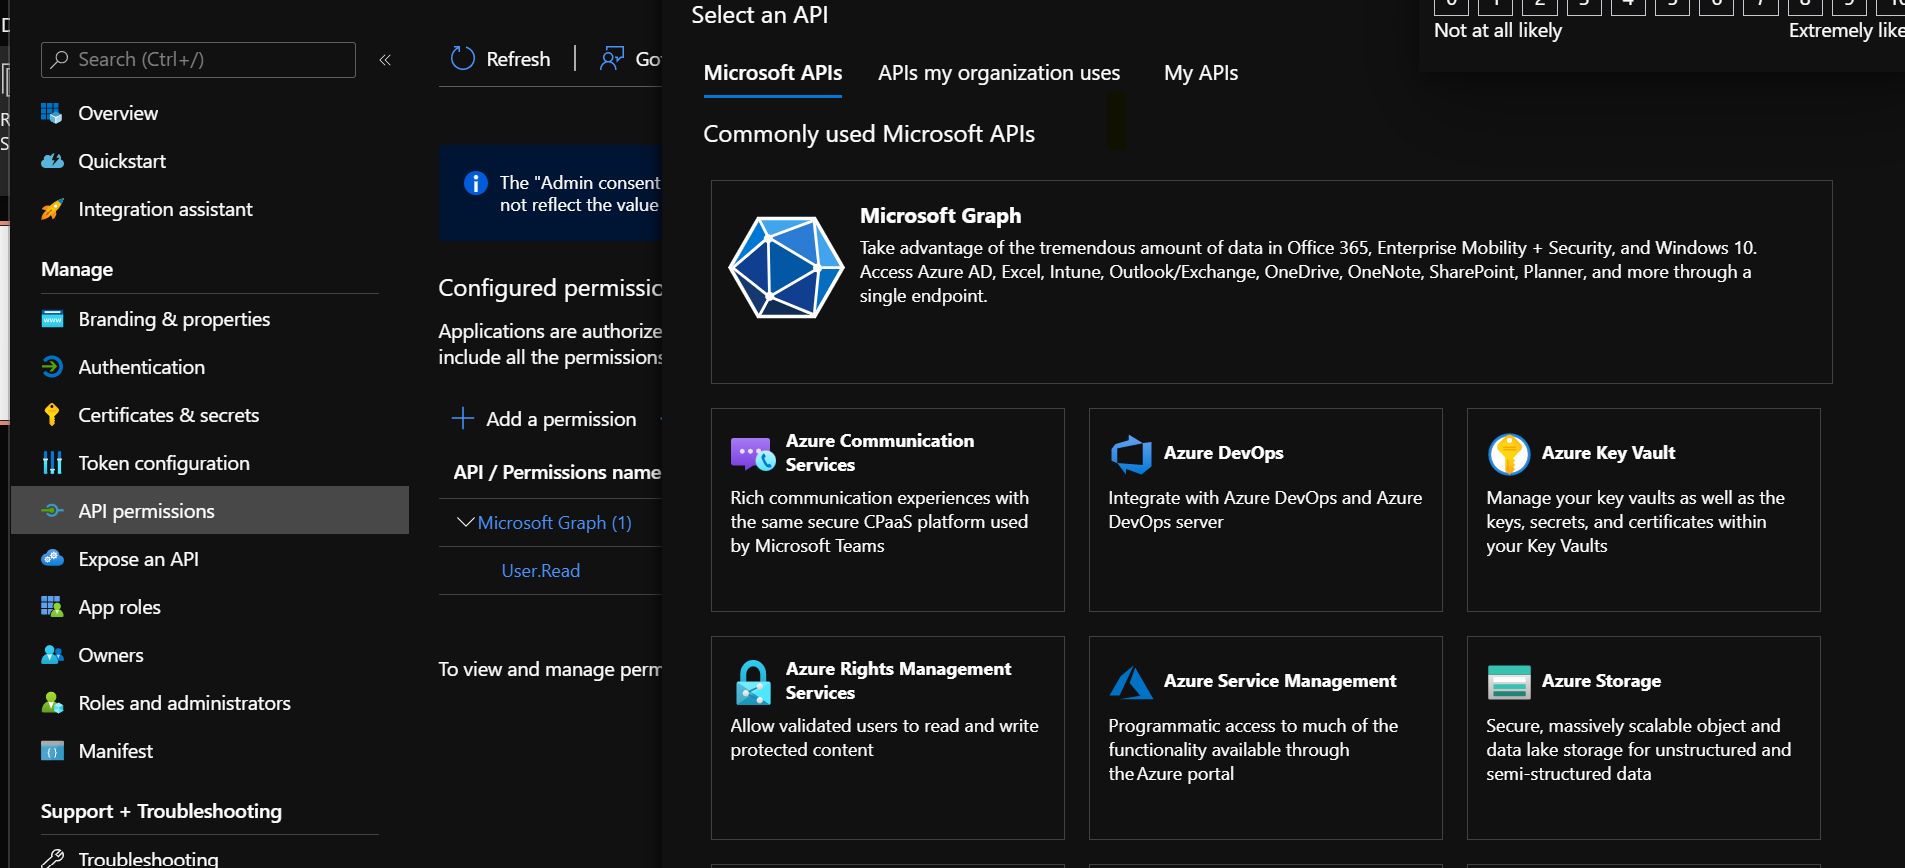
Click
Application permissions, check the following permissions- Calendars -> Calendars.ReadWrite
- Group -> Group.Read.All
- Mail -> Mail.Send
- Place -> Place.Read.All
- User -> User.Read.All
And click
Add permissions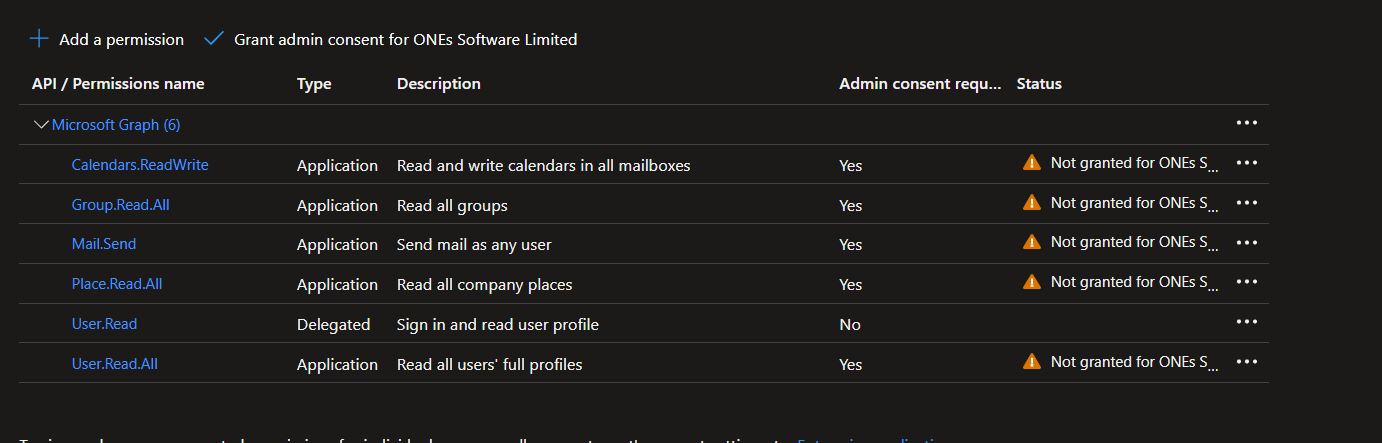
You will see the permissions added to the list but there are a warning Not granted for {Your organization name} in status. Now you have to click the
Grant admin consent for {Your organization name}to confirm the permission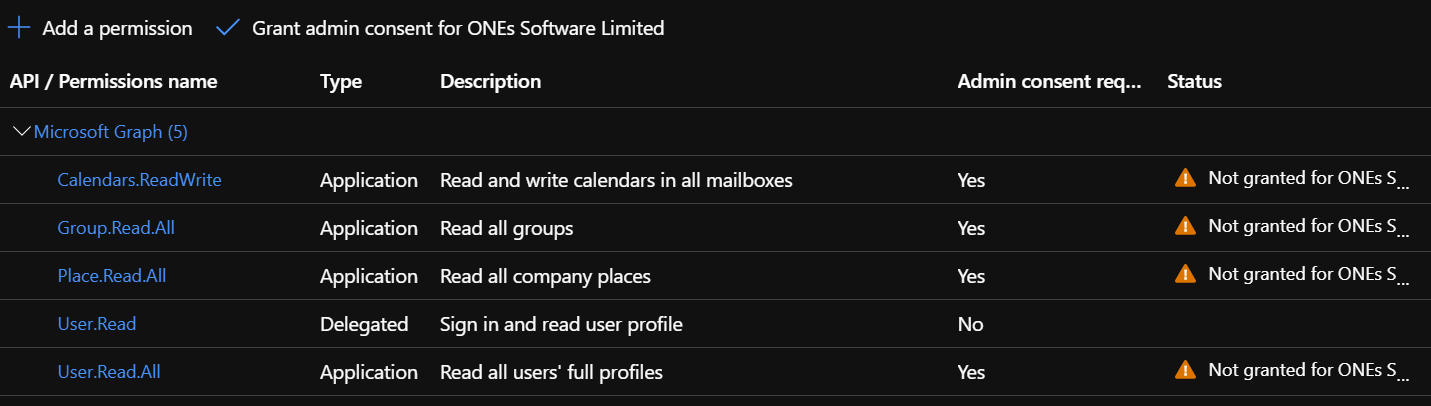
After that, you will see the permission grant successfully

Finally, go back to the Overview copy the value, Client ID (Application ID), Tenant ID (Directory ID), with the
Client secretcreated in previous step, these are information for Bookings ONE to integration.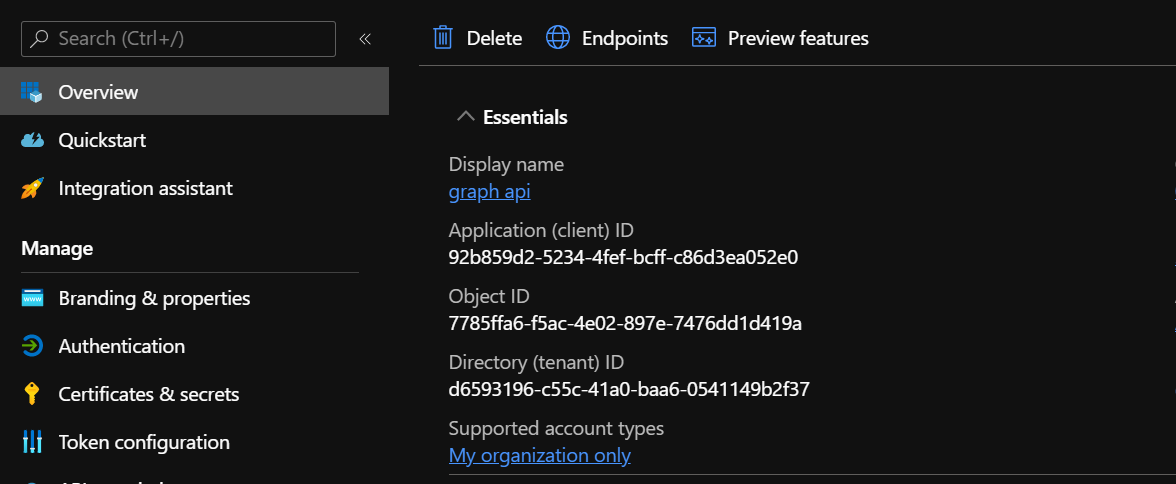
How to add single sign on callback link to Office 365
- Navigate to the AAD tenant's app registrations blade. Select your existing app for Bookings ONE

- Navigate to authentication, click
Add platform, clickWeb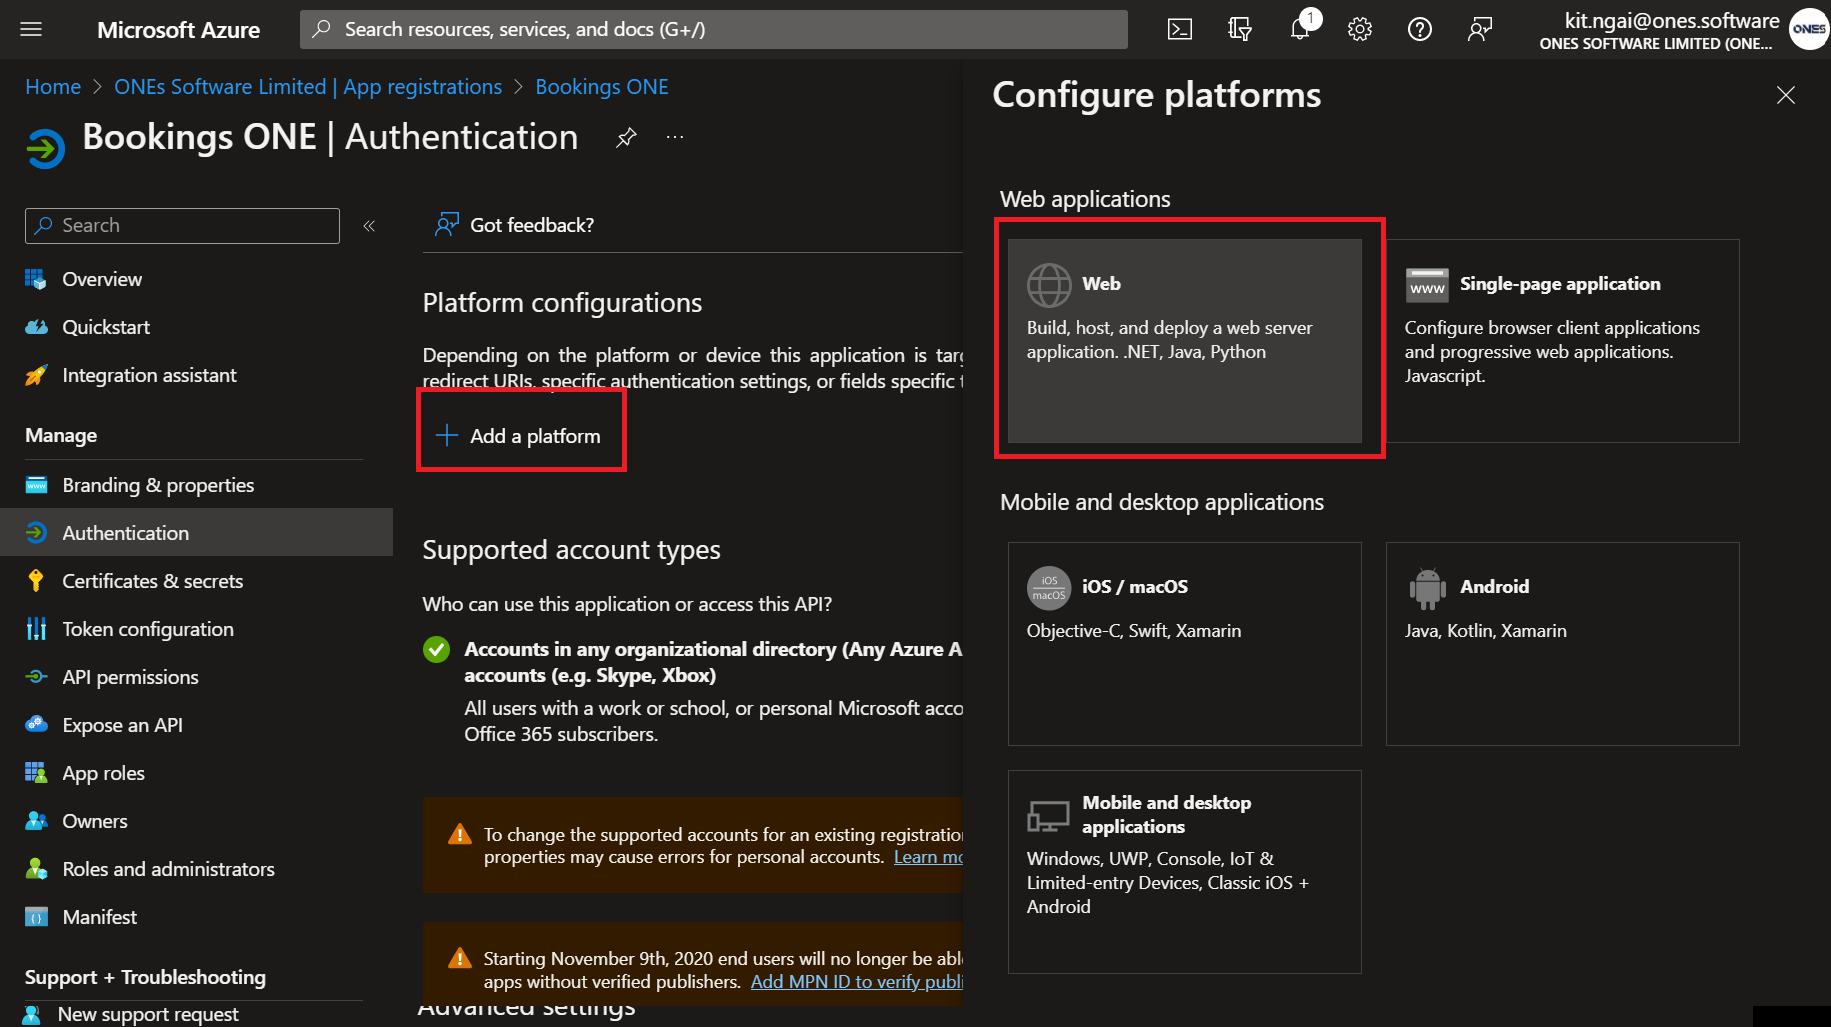
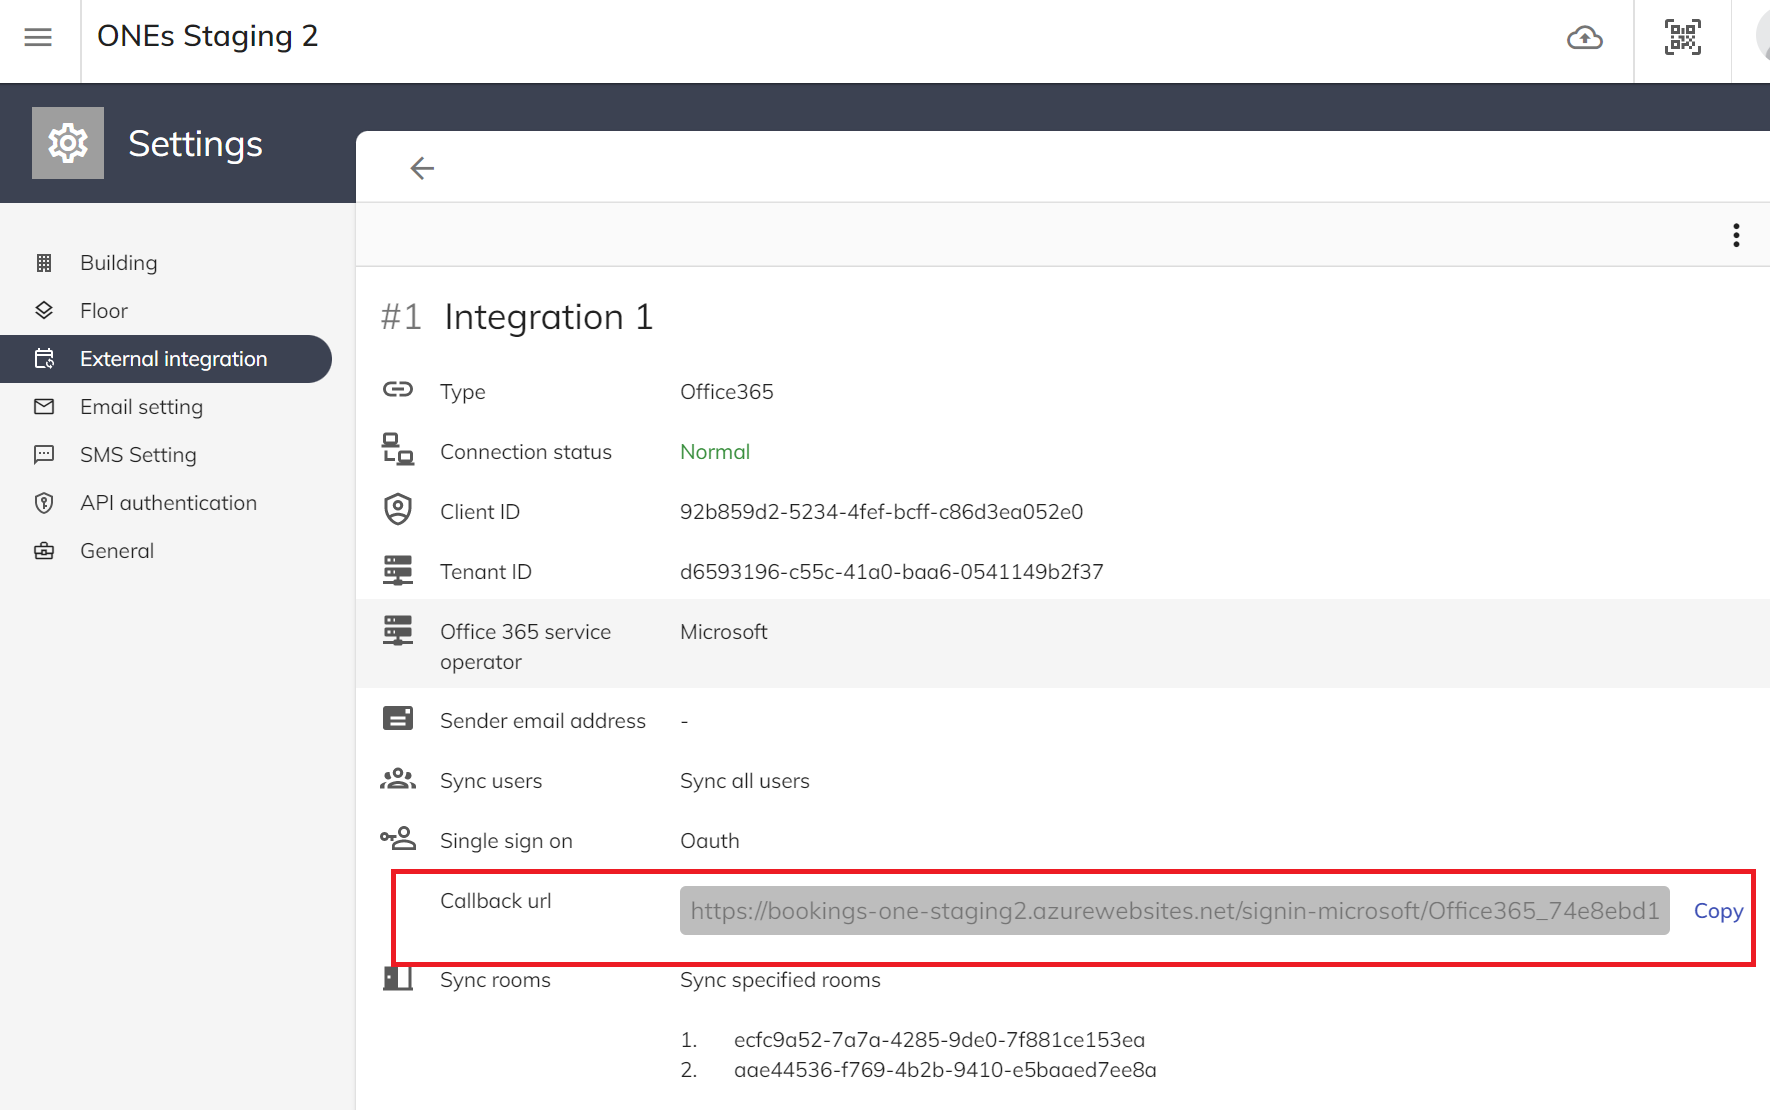
- In redirect url fill in the Bookings ONE callback url, you may find the url in integration detail
- Click
Configure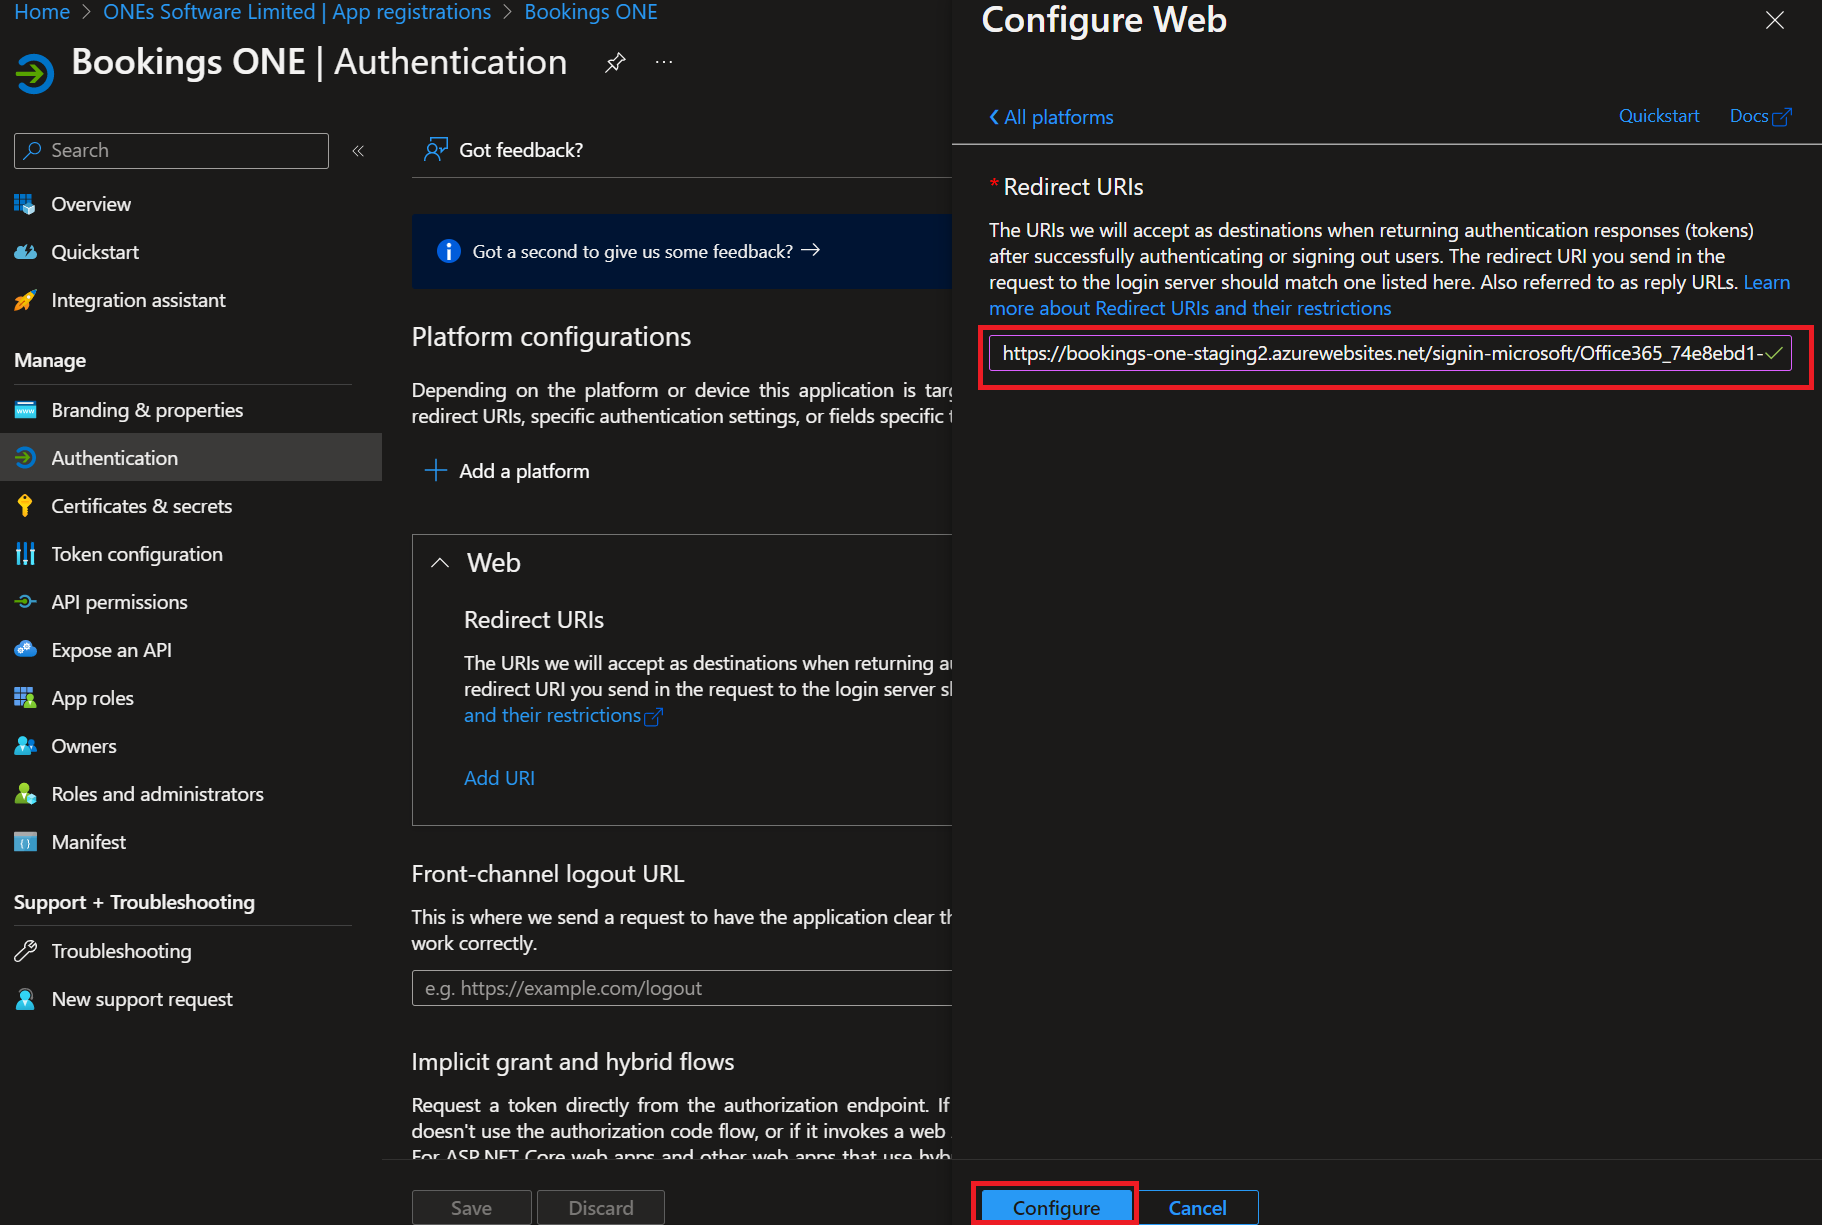
How to apply the Bookings ONE policy to Office 365 room
You can follow the steps below to apply the Bookings ONE policy to Office 365 room:
- Go to https://admin.exchange.microsoft.com/#/resources
- Go to
Recipients->Resources. - Select and click the room that you want to integrate to Bookings ONE.
- Click the "Booking" tag.
- Click
Manage delegate settings.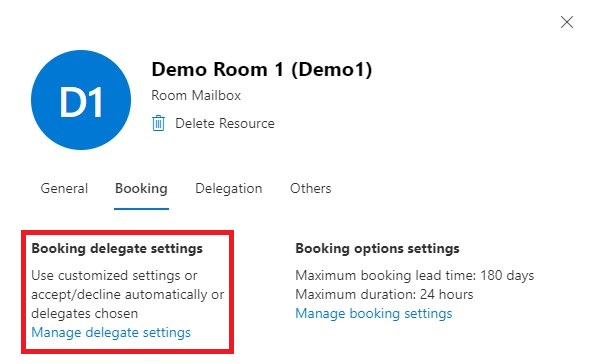
- Choose
Select delegates who can accept or decline booking requestsand add an email address that exists in Bookings ONE to the "Select delegates" column. This email will be used to receive system emails for pending system validation purposes, so it is recommended to use a dummy email address for this setting.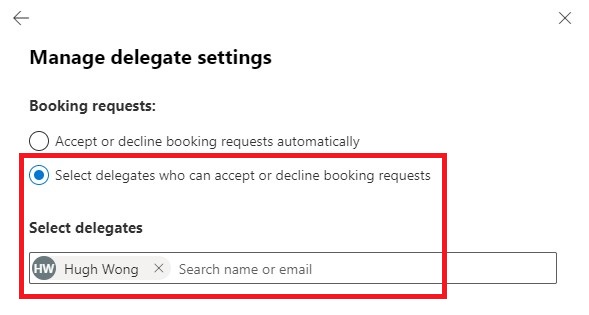
- Click
Manage booking settingson the "Booking" tag - Disable
Allow scheduling only during working hoursandAutomatically decline meetings outside this limit. - Click
Savebutton. - Got to the "Delegation" tab.
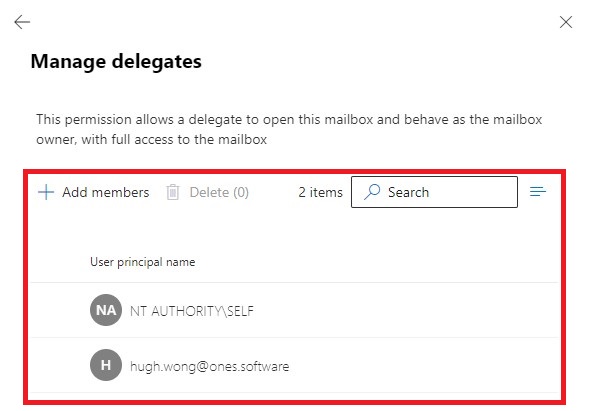
- Click the
Editbutton of "Read and manage (Full Access)".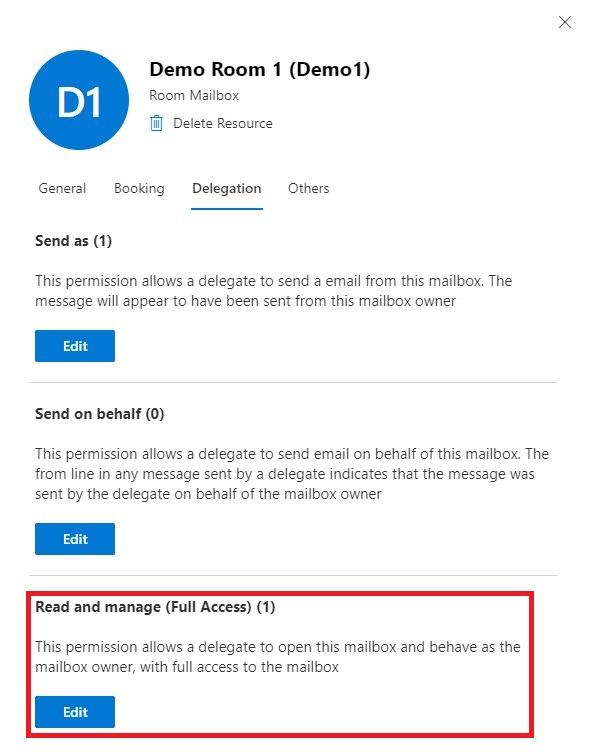
- Click the
Add membersbutton and include the email address you added in step 6. Please note that it may take a few minutes for the changes to reflect in the settings.